

U and O drive on Windows 10 (VPN)
Read here how you can reach the files on your U- and O-drive when you are not on campus at the UU with your laptop. You can do this by connecting to the UU network using the application Cisco Secure Client and making a VPN connection. This only works if you are an employee of the UU, not a student.
-

Are you using a laptop from the University?
If you need to use your Solis-id and password to log in to your laptop, it is a UU laptop. This means that the application AnyConnect is already installed and you can start at step 10 of this manual.
Are you using your own personal laptop?
In this case you will need to be administrator on your device to be able to install the necessary application. Start at step 1 of this manual.
-
Step 1
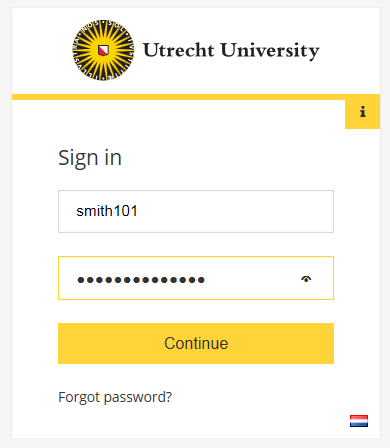
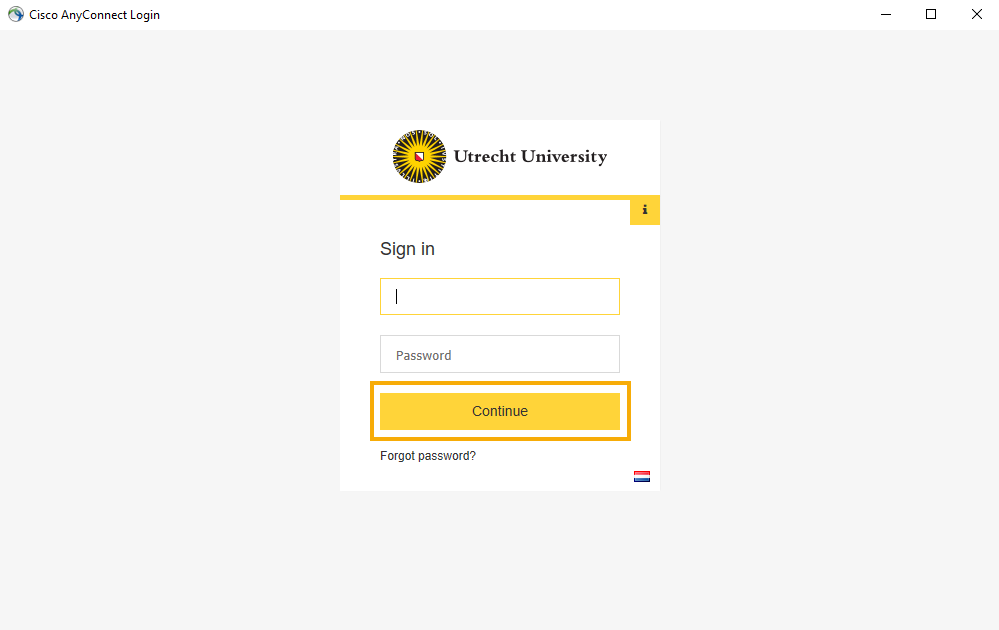
Make sure you are connected to the internet. Open a browser (Edge, Firefox or Chrome) and go to https://vpn.uu.nl.
- Log in with your Solis-id and password.
-

Step 2
You will be prompted to enter a 2FA verification code.
-
If you have not yet set up a 2FA method, you can do this by clicking on this link: mysolisid.uu.nl and following the setup instructions. You can also check out this video explaining how to set up 2FA.
-

Step 3
- Click on “Download for Windows” in this screen
-
Do you see an error message indicating you are still using an older version of AnyConnect? You will have to de-install this old version first, before you can install the new one. If you don’t have issues downloading the app, please contact the service desk.
-
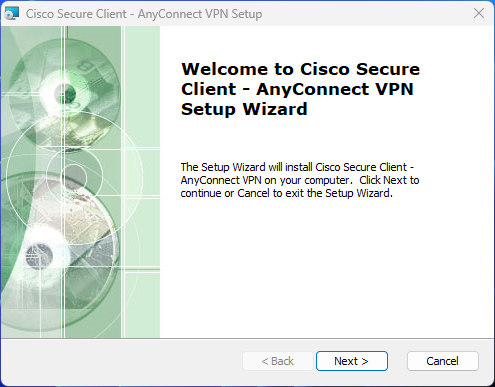
Step 4
You will now see the Cisco Secure Client Installation Wizard.
- Click “Next”.
-
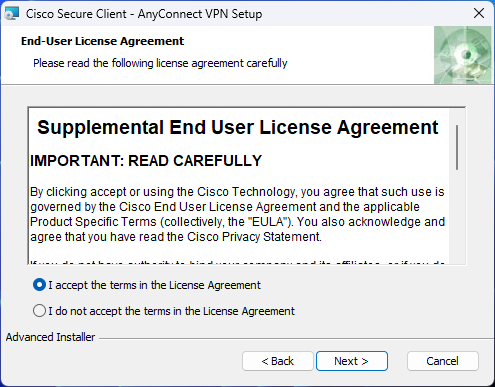
Step 5
- Select “I accept the terms in the Licence Agreement”
- Click “Next”
-
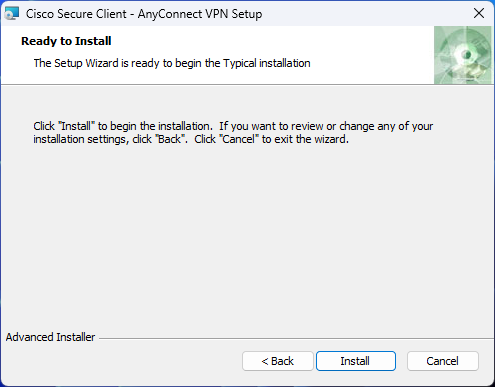
Step 6
- Click “Install”
-
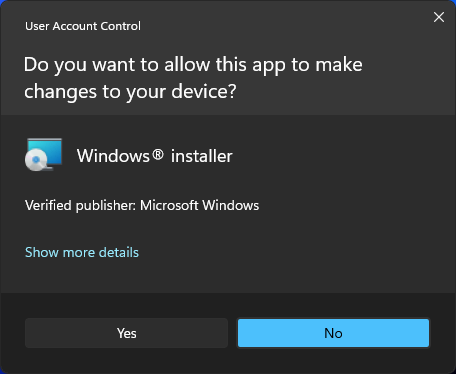
Step 7
If you get a Windows notification similar to the one you see on the left, click “OK”.
-
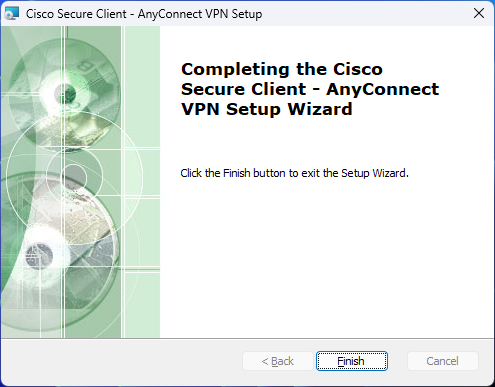
Step 8
Click “Finish” to complete the installation.
-
Step 9
You can now close the window or tab of your browser, it is no longer necessary.
-
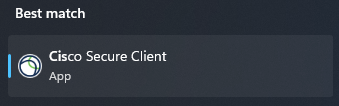
Step 10
Click on the start menu button and type “cisco”. Then click on “Cisco Secure Client” to open the application. (You can also use the icon at the bottom right of the task bar to open the application)
-

Step 11
A pop-up will appear in the bottom right of your screen. Enter vpn.uu.nl and then click “Connect”.
-
Step 12
Log in using your Solis-id and password. Click “OK”.
You can’t log in with your UU e-mail address.
-
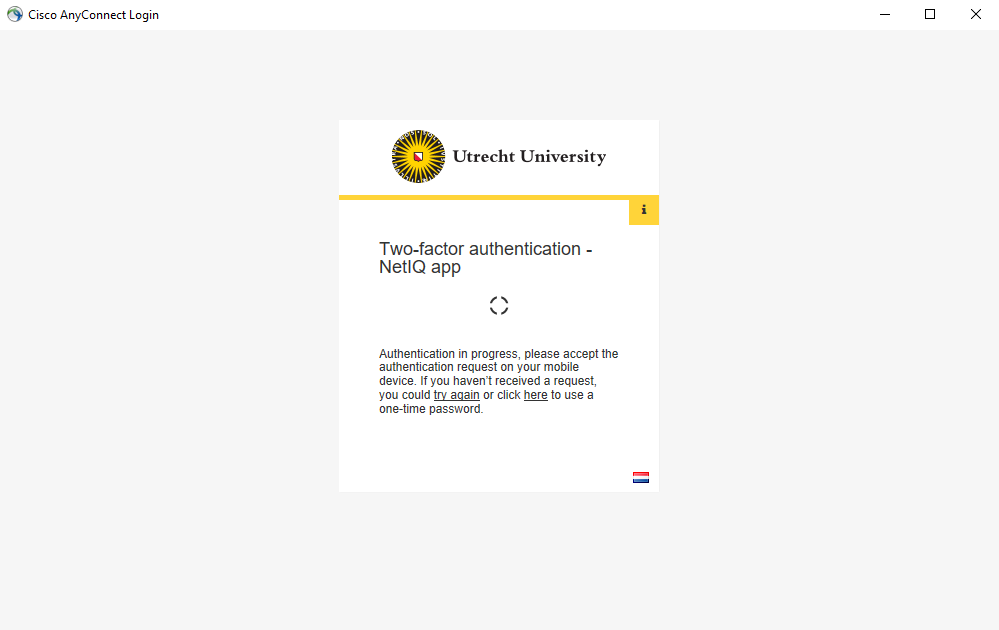
Step 13
You will be prompted to enter a 2FA verification code. This pop-up may differ a bit depending on the 2FA method you have chosen.
In the example we use the NetIQ app.
-

Step 14
You will see a notification to confirm a connection has been successfully made.
-
You are now connected via VPN to the UU network. The following steps explain how your U- and O-drive need to be linked if they are not automatically visible in the Explorer. In a standard UU Windows computer these two drives should be automatically visible.
-
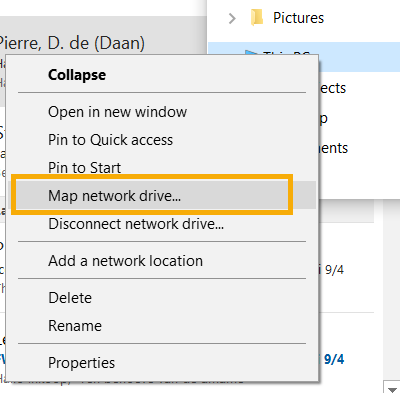
Step 15
Open the Explorer (by clicking the ‘file’ icon on your task bar or by pressing the Windows key and the E key at the same time).
Right click on “This PC” on the left and then on “Map network drive..”.
-
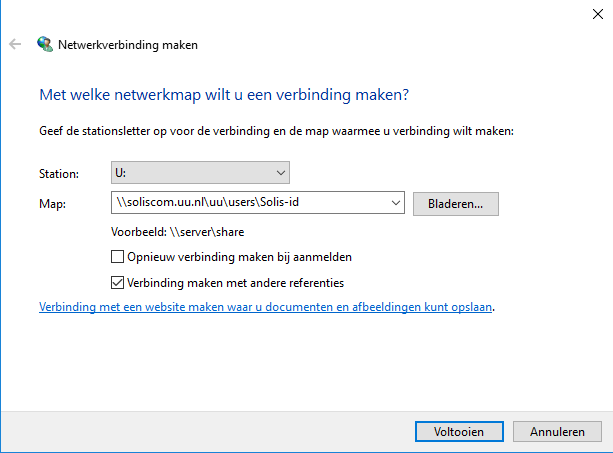
Step 16
Select the letter you want to use for the U-drive, easiest is to use the U: here as well.
Type in the field below:
\\soliscom.uu.nl\users\Solis-idInstead of ‘Solis-id’ use your own Solis-id (for example smith123)
Please note: read the advice below about which options you should select.
-
There are two boxes you can tick in the pop-up above.
Reconnect at sign-in
Select this option if you want you computer to link this network drive automatically next time you restart your laptop. This can be useful if you use this way of reaching your files on a regular basis. However, if you don’t have a connection the UU network once you start up you will receive an error message indicating that a connection to these drives cannot be set up.
Connect using different credentials
When you are using a personal laptop it is recommended you select this option. Note: if you already have a UU networkdrive connected, and want to connect another one, uncheck this box. Your computer will then re-use the credentials of the other drive. If you check the box, you will receive an error message.
If you are using a UU laptop leave the box unchecked.
-
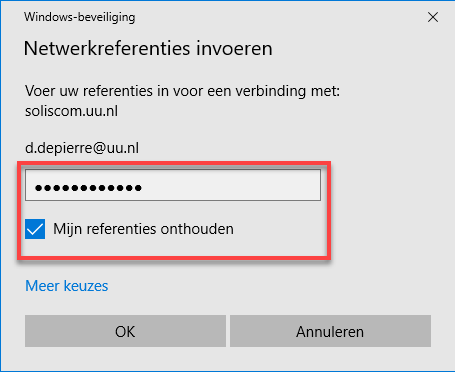
Step 17
If you are working on your own laptop or you’ve selected “Connect using different credentials”, you will see the following pop-up.
For username use your UU e-mail address. In case username has already been filled with your solis-id or something else, click More choices followed by Use a different account. Now enter your UU e-mail address. If this does not work you can also log in using soliscom.uu.nl\your solis-id (soliscom.uu.nl\smith001).
Use your Solis password as password.
Select “Remember my credentials” if you don’t want to enter this information every time you reconnect.
Click “OK”.
-
Step 18
If you want to connect the O-drive as well follow the same couple of steps as you did for the U-drive:
Open the Explorer, right click on “This PC”, then on “Map network drive..”.
-
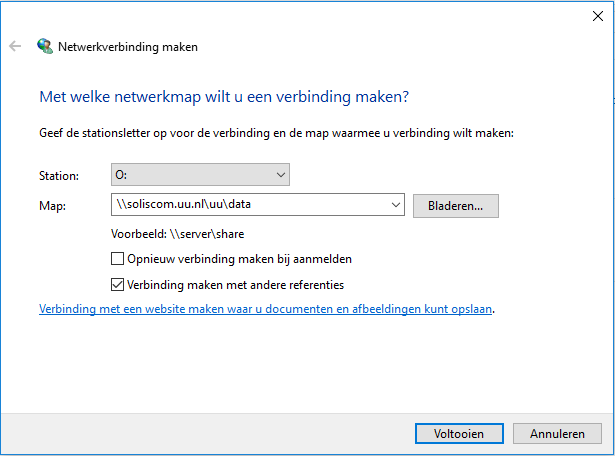
Step 19
Select the preferred letter for the O-drive, easiest is to choose the O:.
In the field below:
\\soliscom.uu.nl\uu\dataPlease note: you have the same options to select as for the U-drive
-
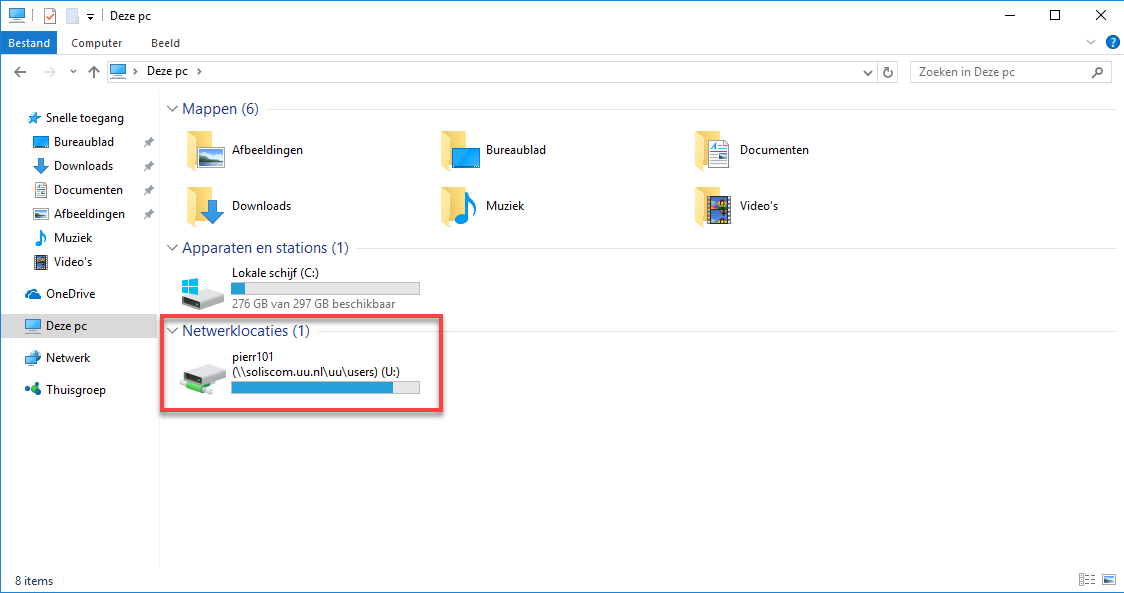
Step 20
You are now finished.
When you open the Explorer you will see the network drives you’ve just added.
-
Please note: every time you restart your laptop at home or on the road, you have to start AnyConnect to be able to use the U- and O-drive.
-
Do you want to remove a network drive? Right click on the drive you want to remove and select “Disconnect”.
If you want to disconnect your VPN connection once you’ve finished work, click on the Cisco Secure Client symbol in your taskbar and then on ‘Disconnect’ in the window that pops up.
Last modified: 15/02/2024