
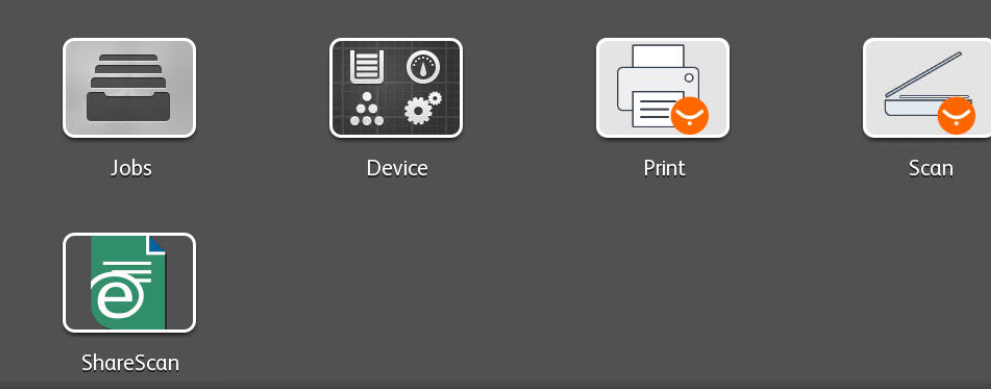
Printers: Scan via Sharescan
Sharescan is an extensive scanning application that is installed on about twenty Xerox printers and with which it is possible to:
- scan directly to your home or group folder;
- split your scanned material by means of a page with a QR code;
- scan to an email address.
In the FAQ at the bottom of this manual you can find additional information about how the application works.
The user instructions are described below per template:
Basic instruction (step 1 to 3)
Scan2Group (step 4 to 8)
Scan2Group_Quick (step 9)
Scan2Group_QRCode (step 10)
-

- Scanning via email has a server limitation: attachments/scans larger than 20mb can’t be send to a mailbox.
- This limitation doesn’t exist when scanning to your home folder or group’s folder
-
- Adding consecutive (QR) separator pages can cause problems. Therefore, do not use more than 1 separator page per split.
- This also applies to a QR on the front and back of a page.
-
Step 1
Basic instruction
Log in to the printer and select Sharescan.
-
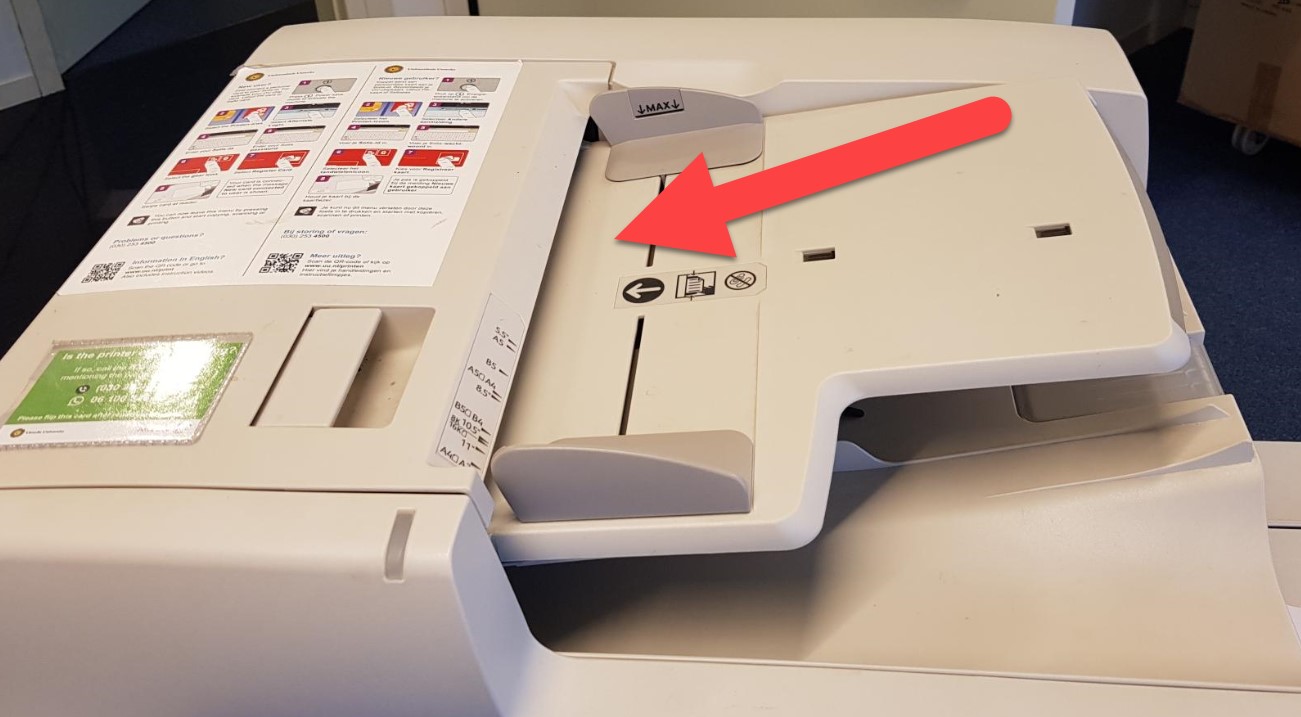
Step 2
Place the documents in the document feeder.
-
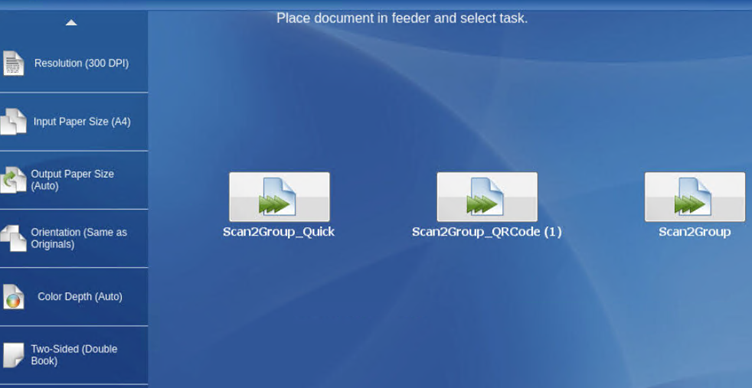
Step 3
Choose the desired template.
The templates are available on every device with Sharescan.
-
Logging out of Sharescan does not mean you are logged out of the printer.
You should also log out of the printer after logging out of Sharescan.
-
Sharescan’s timeout when scanning to fileserver is 1 minute.
-
Step 4
Scan2Group
Follow steps 1 to 3 of the basic instructions.
At the template “Scan2Group”, click on Done when you finish scanning
-

Step 5
Enter your password and click on Next. A keyboard appears as soon as you click on the ‘Password’ field.
-
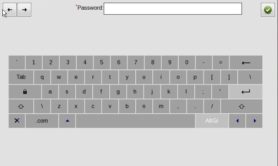
 to leave the keyboard
backspace for a correction

to delete a line
-
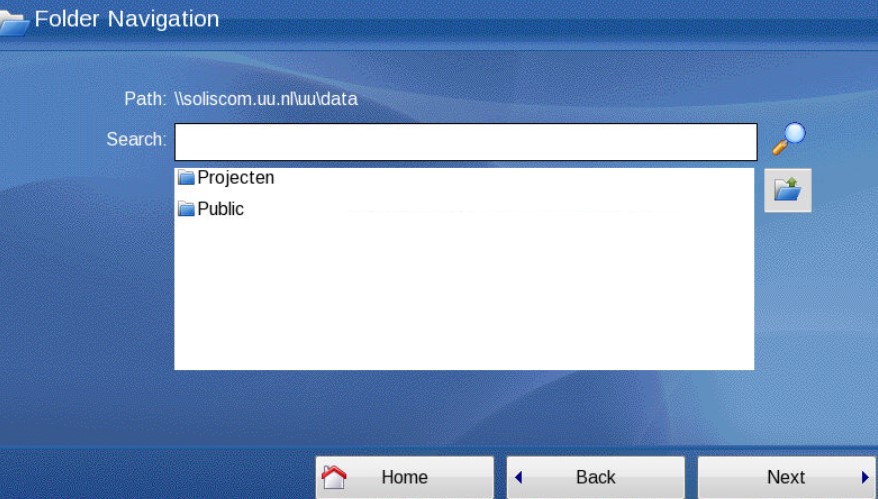
Step 6
Navigate to the desired folder on the O drive and click on Next.
-

To go to the parent folder
-
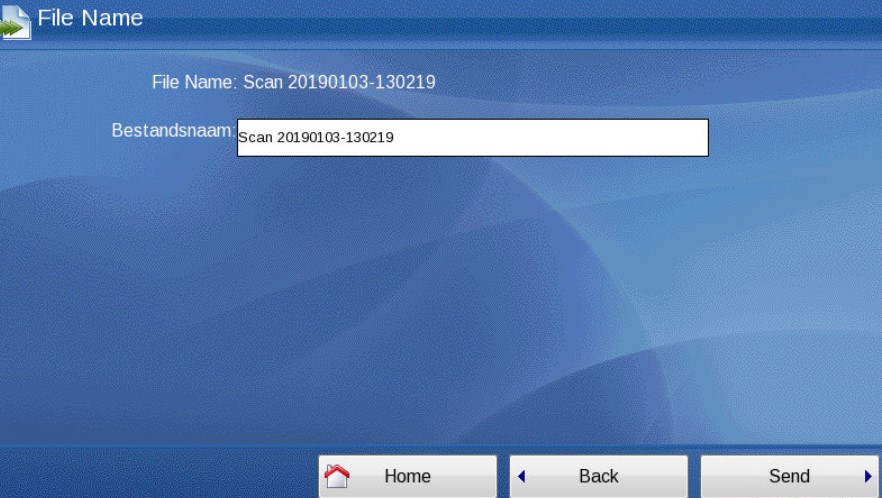
Step 7
Edit the name if necessary and click on Send.
-
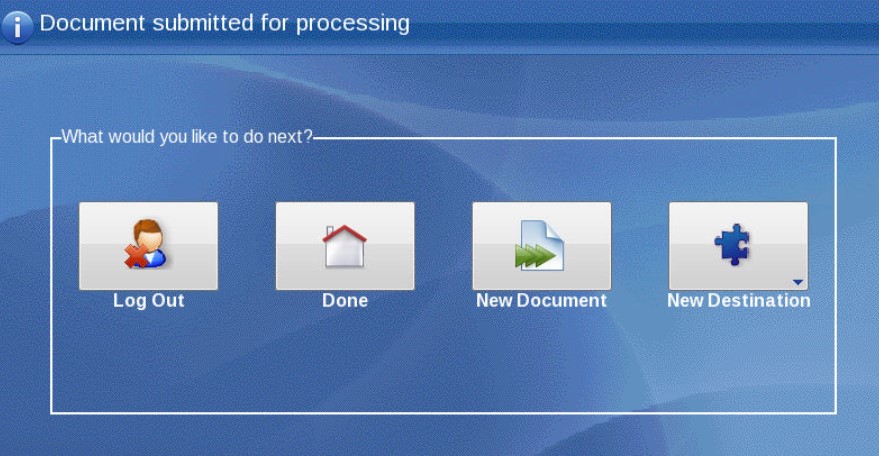
Step 8
Click on one of the options.
-
Step 9
Scan2Group_Quick
This template works in the same way as the Scan2Group.
Difference:
- No modification possible in the file name.
-
Step 10
Scan2Group_QRCode
This template works in the same way as the Scan2Group.
Differences:
- No modification possible in the file name.
- QRCode split is possible.
-

UU064809 Achter Sint Pieter 200 Near 0.05 UU064807 Achter Sint Pieter 200 4.40 UU064956 Budapestlaan 6 2e etage UU064819 Campusplein 1 0.15 UU064886 Heidelberglaan 1-1b G207 UU064743 Heidelberglaan 3 2.35 UU064997 Heidelberglaan 6-8 381 UU064989 Heidelberglaan 6-8 5.13 UU064982 Heidelberglaan 6-8 1.60 UU064816 Janskerkhof 2-3a 1.06 UU064809 Newtonlaan 201 3A.57 UU064807 Newtonlaan 201 4A.57 UU064858 Padualaan 14 naast c121 UU064911 Princetonlaan 8A 5.01 UU064733 Wittevrouwenstraat 9-11 1.29 UU064850 Yalelaan 1-3 C140 UU064849 Yalelaan 1-3 W110 UU064877 Yalelaan 104-106 0.010 UU064835 Yalelaan 7 hal achterin - PDF-a for archiving
- White pages are deleted automatically.
- PDF is searchable
- Encryption is disabled
- Original (Image Mode): Text/Photo
- Original orientation: Portrait
- Double sided
- Resolution: 300 dpi
- Bits per pixel: 24
- Print output: Automatic recognition
- Quality/size: higher/higher
- Compression: JPEG
- Deskew: Yes
No. A new scan session starts when you log in with a card or manually. With each session you have to re-enter the desired preferences unless you want to use the default settings.
If you want to scan a new document to the same folder, with the same settings you just selected, you can select the New Document icon. No password is requested.
For “New Destination” you do have to enter a password for that other destination.
By default, the original is considered double-sided (Double Book). For single sided originals, before scanning anything, choose the button with the wheel, then Single Sided.
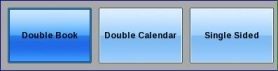
Double Calendar means that the back of the scanned sheet is scanned in reverse (flip over).
- scanned documents can be placed directly in a folder on the U or O drive.
- all documents are scanned as standard (pdf-a, OCR searchable, 300 dpi)
- handy extras: blank pages are automatically removed, you can split a stack of documents with a QR code.
You can download the separator page with QR code as a PDF using this link: https://manuals.uu.nl/wp-content/uploads/sites/756/2017/03/QRcode-template.pdf
Print it at a high resolution/quality on a Xerox printer. When the QR code is not sharp enough, it sometimes does not work properly.
Please note that you add a separator page after each separate document to be scanned.
That depends on the size of the job: how full the pages are, the scan resolution, color, and so on. Normally the scan will be placed directly in your selected folder.
Change the default ‘file’ setting from PDF-a to PDF. Scanning is then faster. The result is that the PDF file is not searchable.
It also helps to choose a folder that is the nearest at the root of the folder. For example, choose C:\Scans rather than C:\My Documents\Archive\Scans.
You can put about 60 sheets of paper in the document feeder (on top of the printer). If your document contains more than 60 sheets, you can scan it in multiple batches. They can be merged into one document.
PDF-a is archival scanning. The “a” at the end stands for “archive”. On this site you can find extensive information about pdf-a
PDF-a is a subset of PDF that ensures that the content is reproduced correctly in the future. PDF-a prohibits dynamic content so that the user sees the same content today and in the future. Fonts, colors, profiles, images are already stored in the pdf-a. PDF-a is also an ISO standard, which guarantees that future software generations will know how to open PDF-a files.
No, in this case you have to choose a different format, for example just PDF.
No, chances are your scan will fail. A single QR is enough.
They may grow slightly larger than the original.
If you want to print your scanned PDF, make sure you choose the “Actual size” option in Adobe.
If you leave “Fit” (default), Adobe will adjust the page size slightly, and this will make too many borders visible. Even if your document has landscape and portrait text/image: in Adobe, choose Auto Portrait/Landscape.
Each printer has a contract owner (faculty or service). This determines whether licenses can be purchased.
Unfortunately this is not possible due to security requirements.
Print the QR code on a (possibly colored) A4 sheet.
Include this sheet(s) between the documents you want to scan.
Sharescan sees a page with QR code as a separator page, and creates separate (PDF) documents. This is useful if you have several sets of documents for which you want separate files.
Adjust the default settings using the Preview menu buttons on the left.
When finished, put the documents in the document feeder and start the scanning by pressing the first bottom on the left (the green one).

Explanation of the general buttons in the Preview menu:
Document settings: bottom left.
 Here you can specify the type of the file (PDF, PDF-A, etc.).
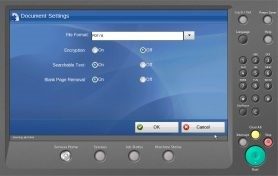 Click “OK” to return to the main menu.
Scanner settings: 2nd button from the bottom.

Here you can change advanced settings for scanning (quality, etc).
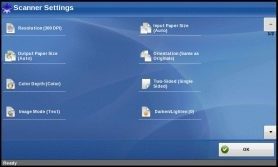
Click “OK” to return to the main menu.

Last modified: 6/11/2024