
Outlook: delegate e-mail and calendar
In this manual you can read how to delegate tasks in Outlook, for example your e-mail and calendar.
This is explained using the example of a manager who want to delegate access to his assistant. There are two points of view in this example:
A) the one giving the access (the manager in this example)
B) the one receiving the access (the assistant in this example)
Both situations are explained separately below.
-

Part A start here-
The person giving access: ‘the manager’.
-
Step 1
- Start the desktop version of Outlook.
-

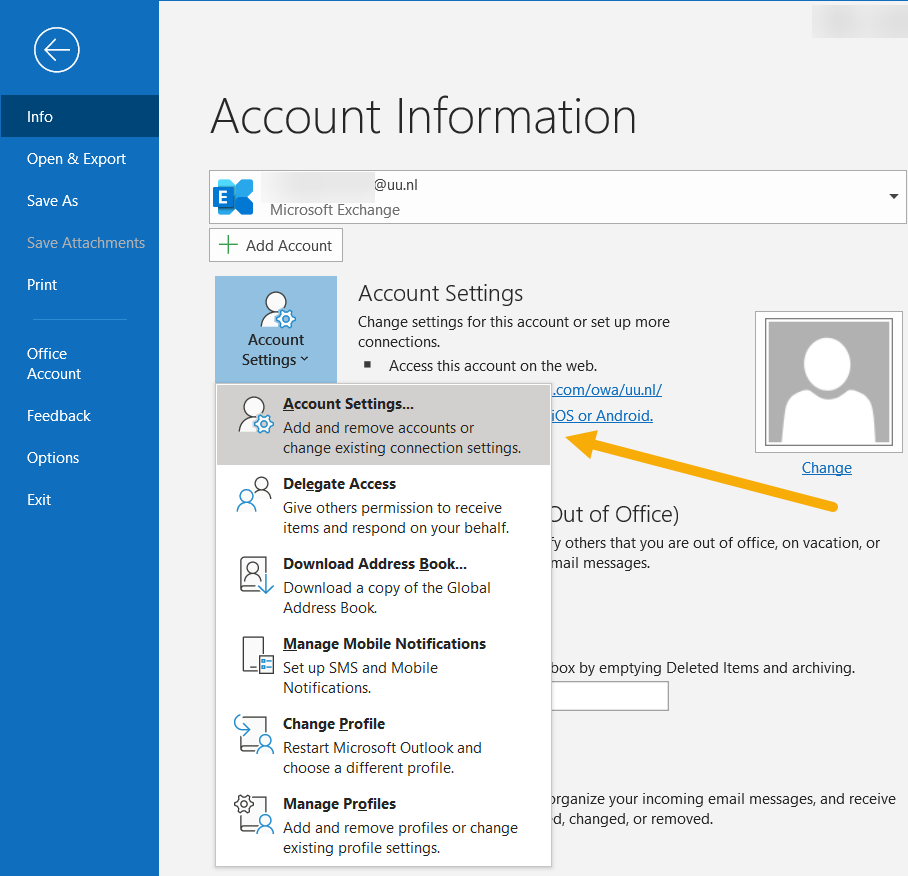
Step 2
Click “File”, choose “Account Settings” and pick “Delegate Access”.
-
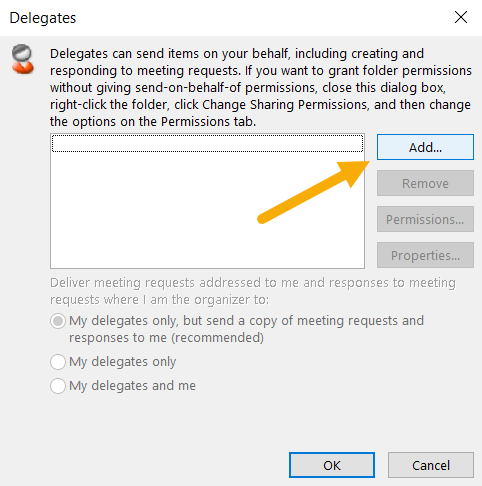
Step 3
Click “Add…”.
-

Step 4
The Outlook addressbook will be opened.
- Search the person you want to delegate access to.
- Double click the name of this person.
- Click “OK”.
-
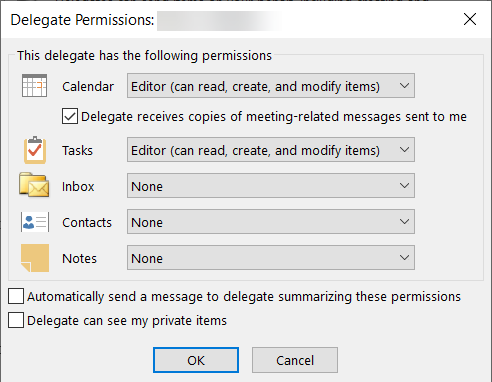
Step 5
Choose the permissions you want to assign to this person. In this example we share the Calendar and Inbox.
When “Automatically send a message to delegate summarizing these permissions” is checked, the other person will receive a mail with information of the assigned permissions.
Click “OK”.
-
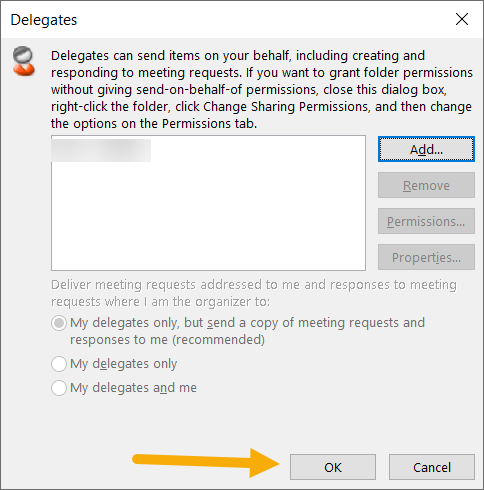
Step 6
The delegate should be listed. Click “OK”.
-

Step 7
To share your mailbox, an extra permission needs to be set.
Go back to your mailbox:
- Right click your mailaddress at the top of the navigation bar.
- Click “Folder Permissions”.
-
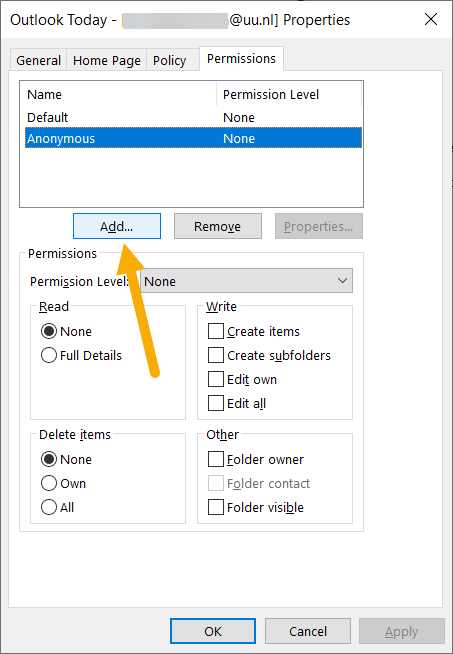
Step 8
Click “Add…”.
-
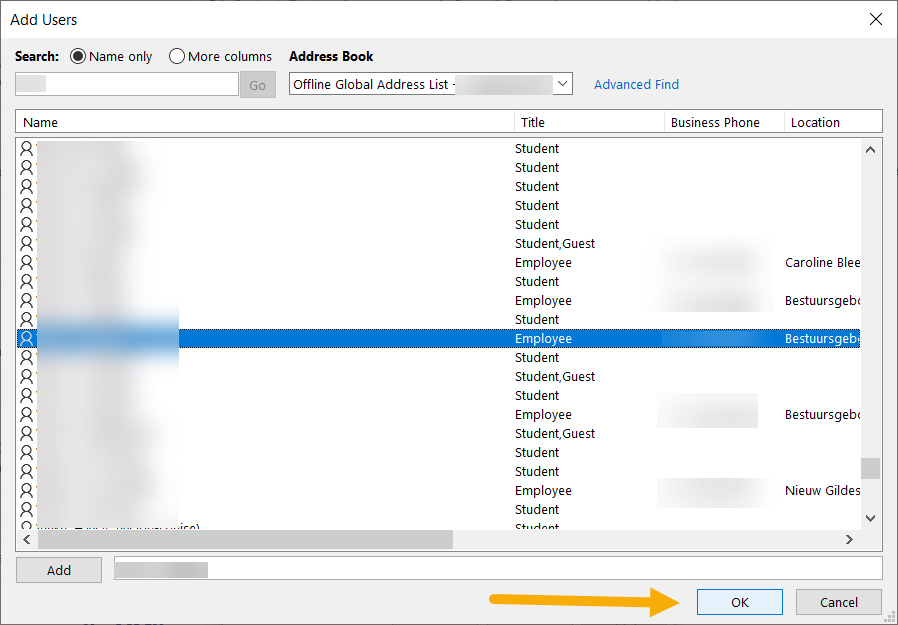
Step 9
- Again look up the person you added to your delegates.
- Double click the name of this person.
- Click “OK”.
-
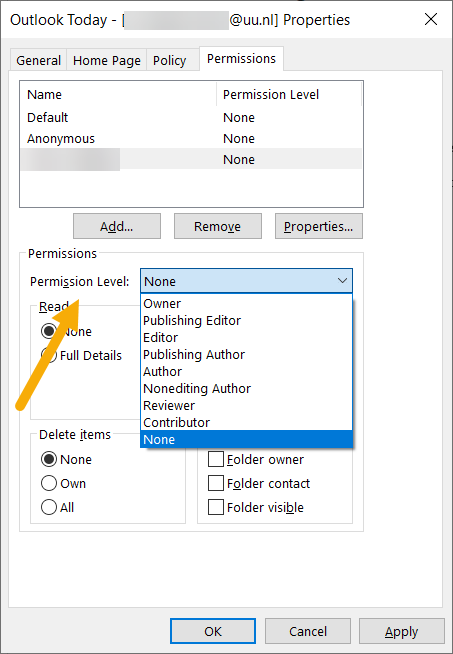
Step 10
Select the permission you want to give in the dropdown menu.
-
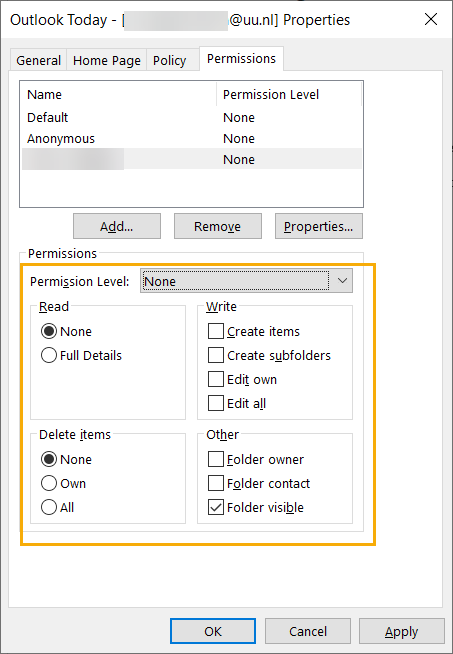
Step 11
You can modify the specific permissions for this person.
Click “OK” when you are done.
-
Important: Each folder under the “Inbox” folder must be shared separately. If someone gets access to your “Inbox” folder, they don’t get access to the sub folders automatically.
-
Part B start here –
The person receiving access ‘the assistant’.
-
Step 12
- Start the desktop version of Outlook.
-
Step 13
Click “File” > “Account Settings” > “Account Settings…”.
-
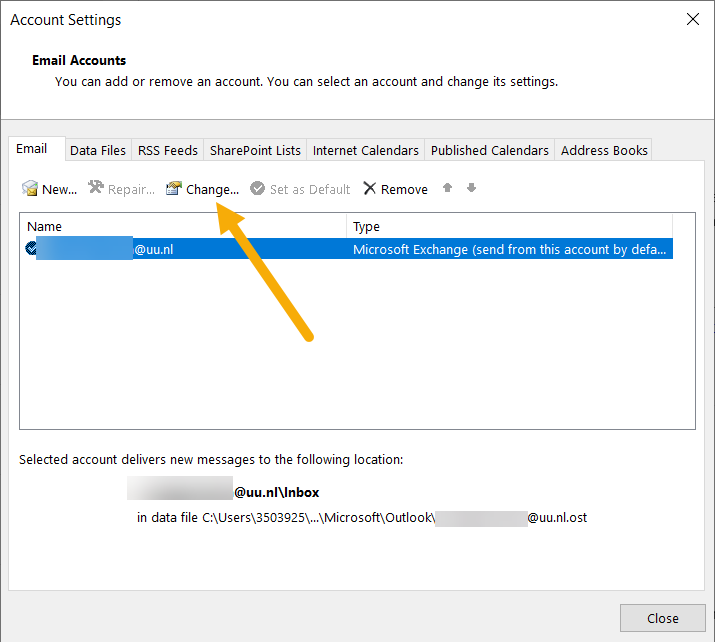
Step 14
Click your account (Solis-id or email-address) and click “Change…”.
-
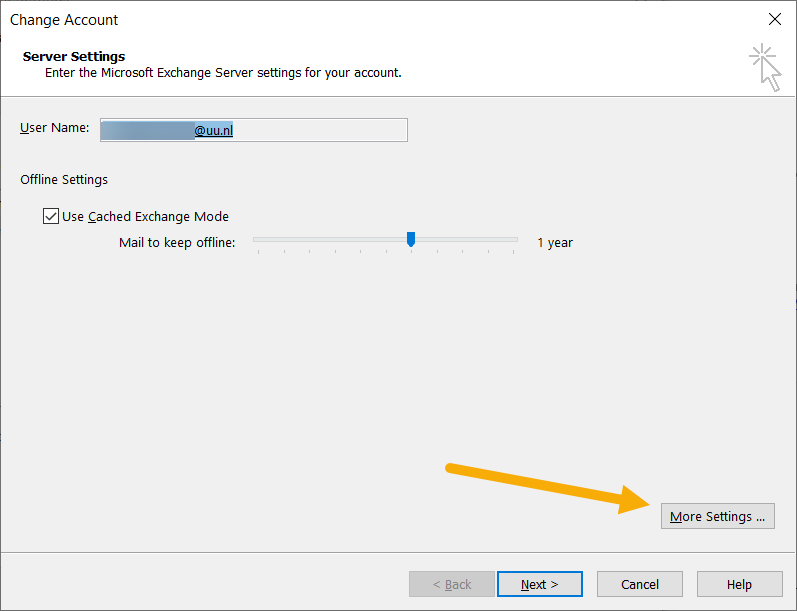
Step 15
Click “More Settings…”
-
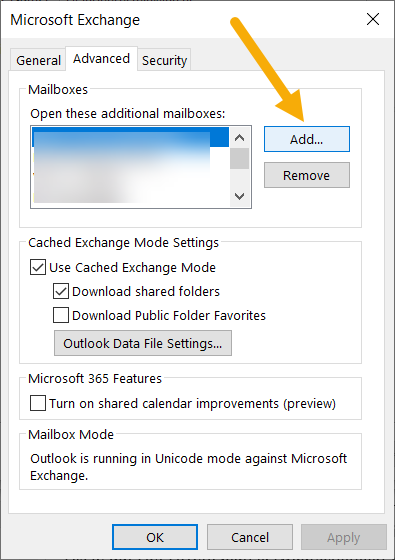
Step 16
Open the tab “Advanced” and click “Add…”.
-
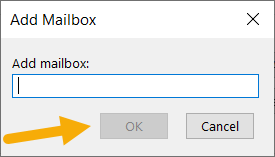
Step 17
Enter the name or emailaddress of the person you want to add (‘the manager’) and click “OK”.
-
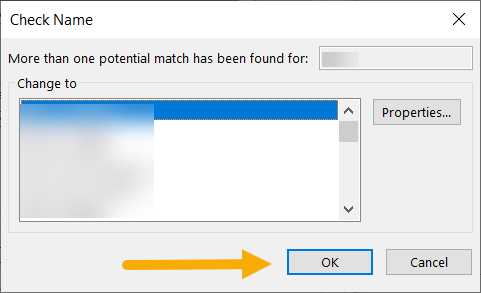
Step 18
If multiple results are found, pick the one you want to add and click “OK”.
-

Step 19
The person should now show up in the list of “additional mailboxes”. Click “OK”.
-
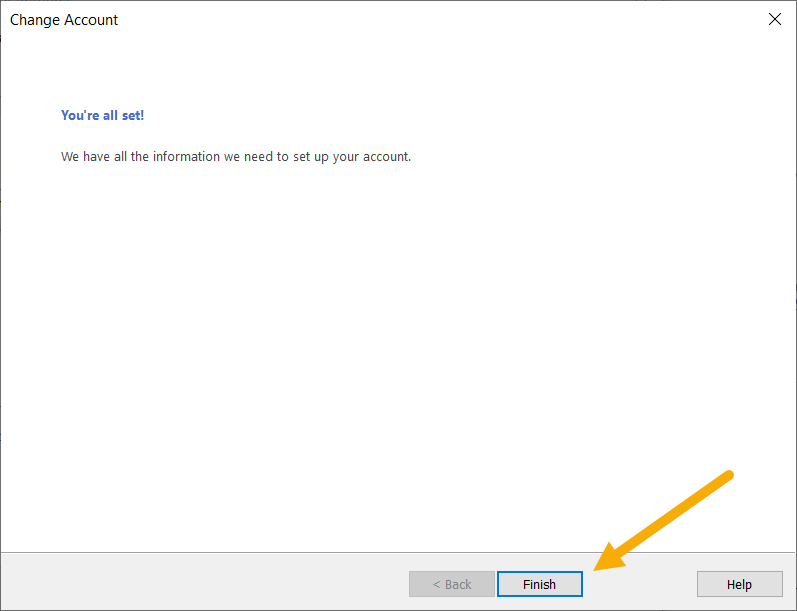
Step 20
Click “Next” and then “Finish”.
-
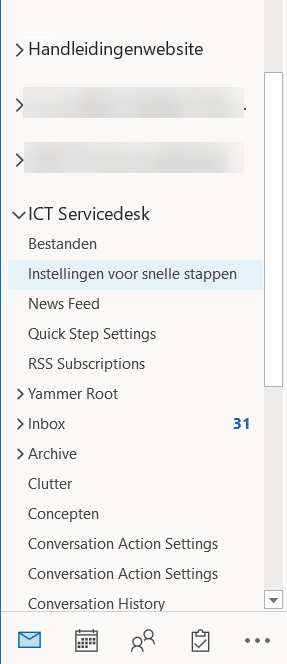
Step 21
The mailbox should now be listed in the folder pane of Outlook. You can also send emails on behalf of this person.
Last modified: 23/08/2023