Outlook: create a signature
This instruction guide describes how to create a signature in Outlook.
-
There are university guidelines for signatures to the e-mail. More information can be found on the website of Utrecht University. This guide meets these guidelines.
-
Step 1
- Log on to an UU computer (a ‘Solis workplace’, no private computer or laptop)
- Start Outlook.
-
Step 2
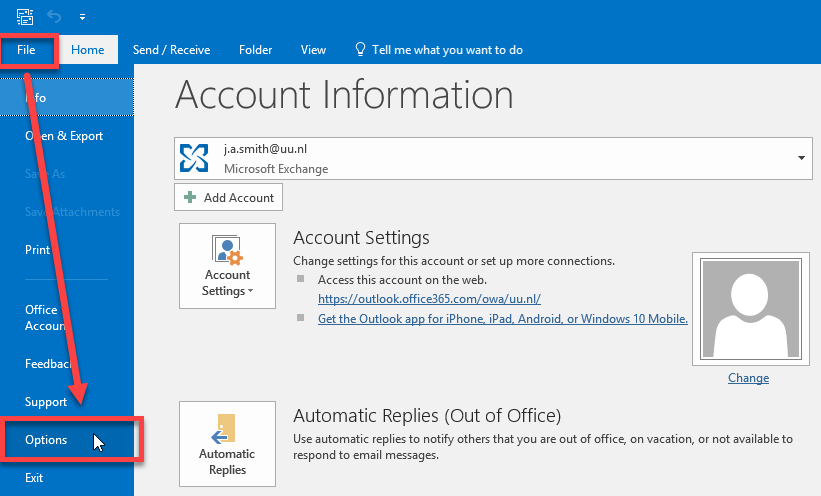
Click on “File” and then “Options”.
-
Step 3
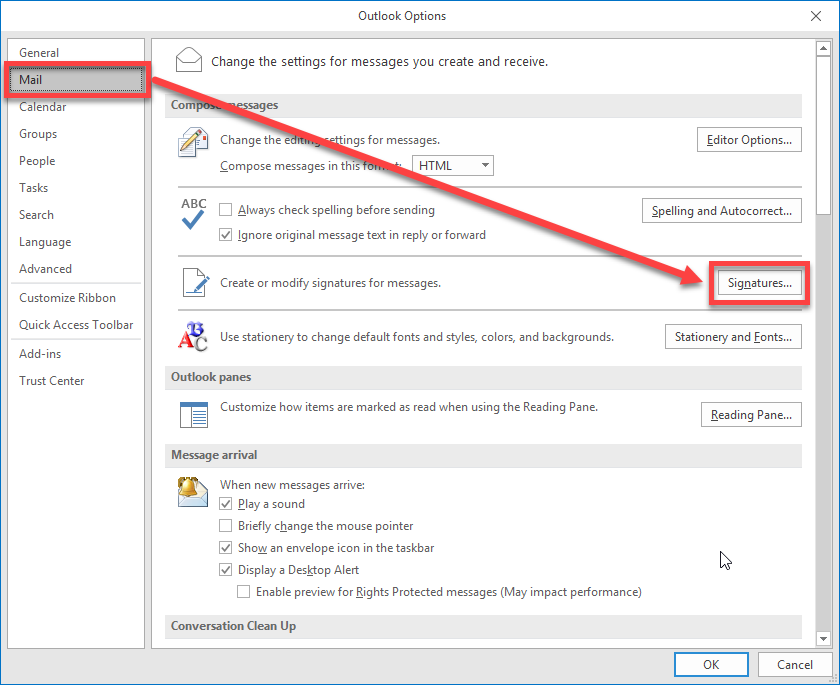
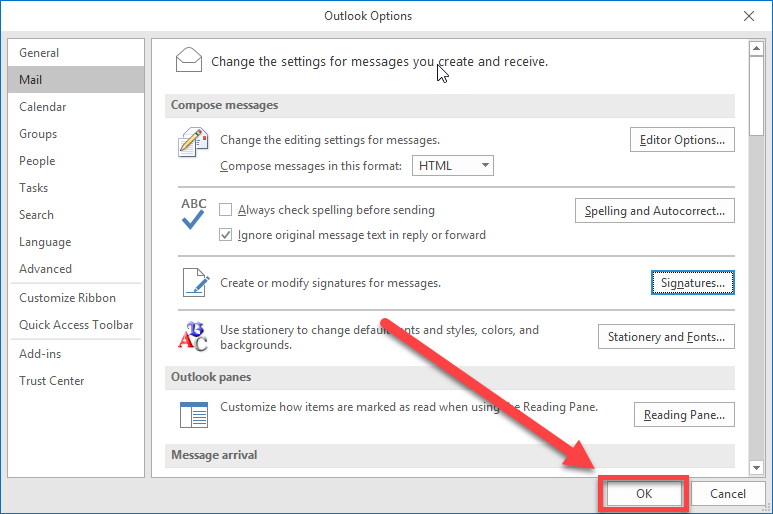
Click “Mail” on the left and then “Signatures…”.
-
Step 4
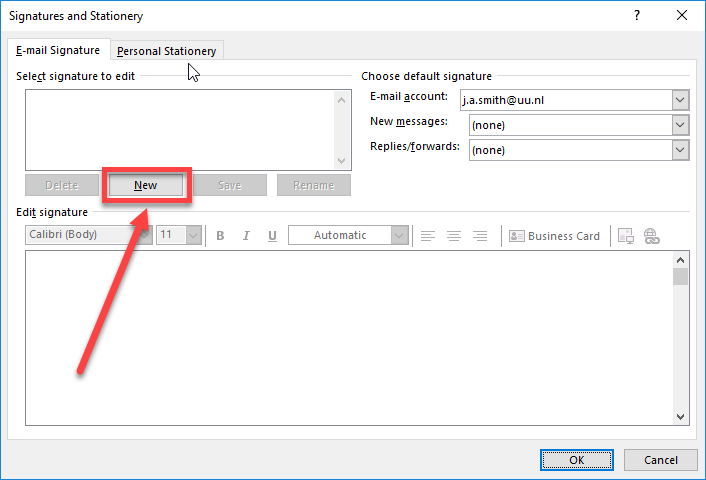
Click “New” in this overview.
-
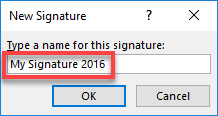
Step 5
Enter a name for your signature, for example “My signature”.
When you configure multiple signatures, a recognizable name can be very usefull.
-
Step 6
First, create your personal signature in Word. Download the example file here and make it your own.
Have you finished? Copy the signature from Word (select all the text in Word and use your right mouse button and click Copy).
-
Step 7
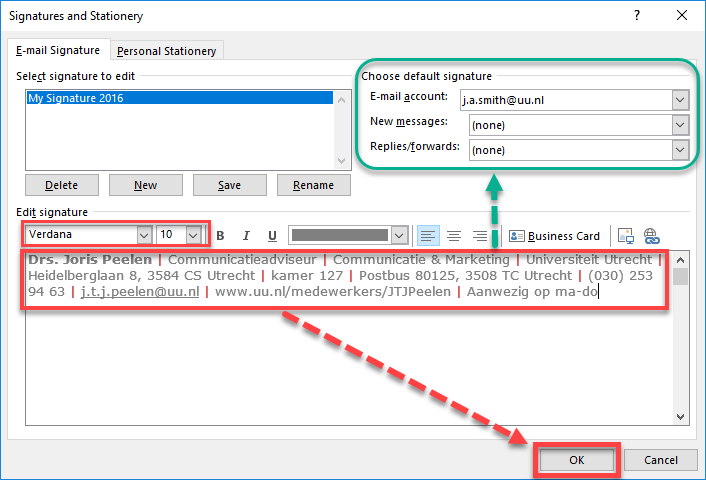
- Paste the signature in the field below (right click the mouse somewhere in this field and select “Paste”.
- The standard university font is “Verdana“. In the example, font-size 8 is used.
- Select when to apply the signature in the green box: when sending new mails and/or reply emails.
- Read the tip below and press “OK” when ready.
-
Would you like to put a standard greeting above your signature, such as “Kind regards”? In that case, type this text above your signature. You can change the font size of this text as well (for example Verdana 10, see green box below).
It is always possible to change this another time.
Click “OK” when you are done
-
Step 8
Click “OK” to close this window.
When you compose a new email, your signature is automatically placed below your email.
-
Last modified: 6/01/2022


