
Outlook: Non-Personal Mailbox (Windows)
In this manual you can read how to configure a non-personal mailbox on a UU computer using Outlook 2016. A non-personal mailbox can be a group or department mailbox for example. This manual is meant for Outlook 2016 at UU computers, but the import is similar for Outlook 365.
Using a NPM means:
- You can read mails from a group mailbox and send replies using the name of that mailbox (i.e. “ICT Servicedesk”)
- Send items will be saved in the group mailbox send folder, not your personal one
- You can set up colored categories that are the same for everyone using the group mailbox
- The contact list of the group mailbox is also available as address list
- For every new mail you will see a notification at the bottom of your screen
-

If you are experiencing issues with your non-personal mailbox you can remove it and add it again. Read more about how to remove a non-personal mailbox at the end of this manual.
-
The “New” Outlook
Nowadays, many computers have Outlook (new) installed by default. This is a completely different application that is currently not supported by the UU. The steps in this manual will also not work with Outlook (new). It is recommended to use the “normal” Outlook.

-
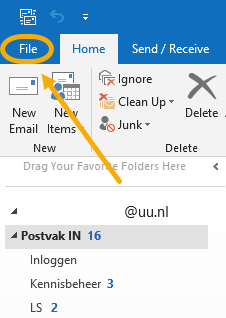
Step 1
- Click on “File” in the top left corner.
-

Step 2
- Then click on “Account Settings” and again on “Account Settings”.
-

Step 3
- Click on “New”.
-
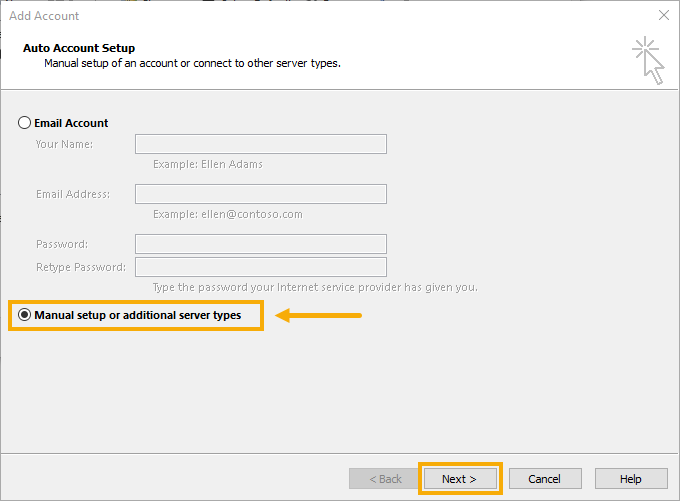
Step 4
- Select “Manual setup or additional server types”.
- Click “Next”.
-
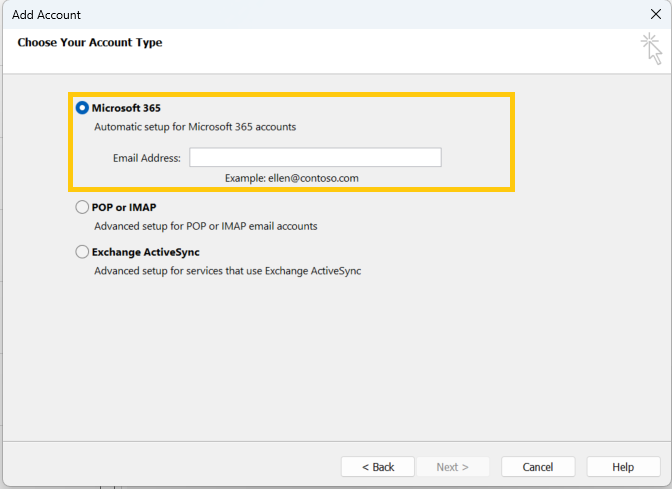
Step 5
- Select “Microsoft 365”.
- Enter the full mail address of the non-personal mailbox
- Click “Next”.
-
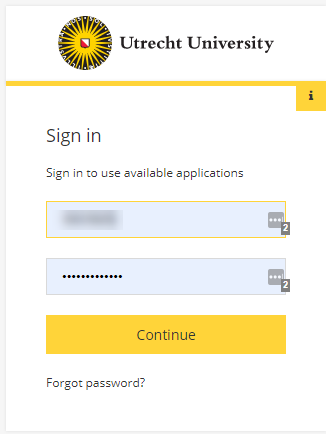
Step 6
- Log in using your own e-mail address and solis-password.
Please note: Do not use the e-mail address of the non-personal mailbox here, even if it is automatically filled in.
-

Step 7
- Enter your 2FA verification code here.
-
Step 8
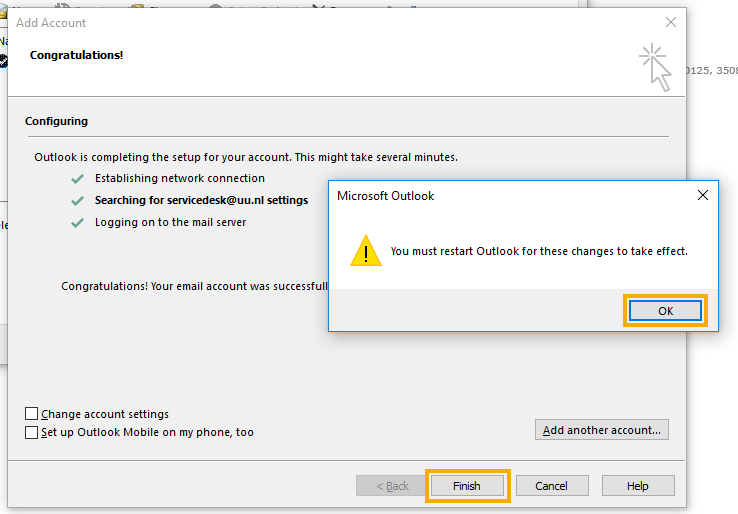
- Make sure the option “Set up Outlook Mobile on my phone, too” is not selected.
- Click “Finish”.
- Click “Ok” in the pop-up you see.
- Restart Outlook
The non-personal mailbox has now been connected to your Outlook, you will find it in the menu bar on the left underneath your own inbox.
-

Possibly this NPM has been added using a different method: additionally rather then as a separate account. To remove this type of NPM you:
- Go to “File”>”Info”>”Account settings”> “Account settings”
- Double click your own e-mail account
- Go to “More Settings”
- Go to “Advanced”
- Here you will see the NPM and it’s possible to remove it
- Click on “OK” and “Finish”
When you have the rights to a specific non-personal mailbox you can use the link below to log in to it using your own student UU e-mail address (j.smith@students.uu.nl) and password.
Replace the bit “emailoftheNPM” with the name of the NPM you want to log in to in the link below:
http://outlook.office365.com/emailoftheNPM
To remove a non-personal mailbox, follow the first 2 steps of this manual. You then select the mailbox you want to remove from the list and click on “Remove”.

If you get a pop-up, click “Ok”.

Last modified: 11/02/2025