
Printers Xerox: IPP printing via Windows
With the IPP printing method you have all the advantages of the UUBlack/UUColour at your disposal. You can accurately set your print settings as you need.
-

You need to be connected to the UU network to install and use this print method.
-
To configure some options you might need administrator rights.
-
Step 1
- If your device does not have the Xerox driver installed, please download it from the Xerox website: https://www.support.xerox.com/en-us/product/global-printer- driver/downloads?platform=win10x64&language=en
- Select the Windows driver
- Download the driver “V3 Xerox Global Print Driver PostScript”
-

Step 2
In case the “Internet Printing Client” is already installed on your device, skip this step.
When installing the feature “Internet Printing Client” for the first time you need to check if this feature is activated on your Windows 10 device.
- Type “Turn Windows Features on or off” in the Windows Search box on the desktop.
- Make sure the Internet Printing Client is ON and then restart your device.
-
Step 3
Add the IPP printer now:
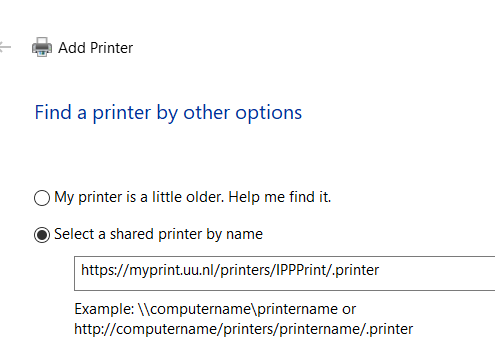
- In the menu “Add Printers & scanners”, select the option “The printer that I want isn’t listed”
- Type in the path to the IPP printer: https://myprint.uu.nl/printers/IPPPrint/.printer
- Now press “Next”
- Depending on your solis account restrictions, you can choose one of the following credential formats. For example:- UU e-mail: X.X.Janssens@uu.nl
– long solis: Janssens101@soliscom.uu.nl
– short solis: soliscom\Janssens101
-
Step 4
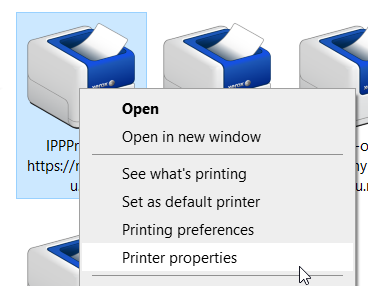
Configure your printer in the Control Panel menu, Devices and Printers.
- Right-click on the printer icon “IPPPrint on https://myprint.uu.nl”
- Select “Printer Properties”
-
Step 5
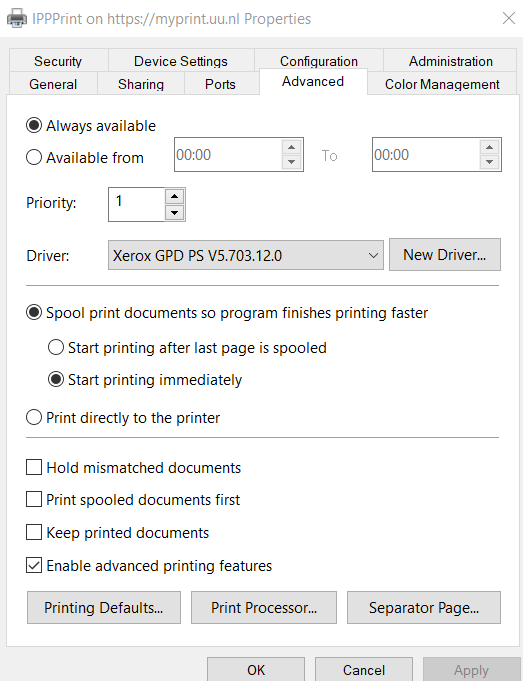
- Go to the tab Advanced, then click “Printing Defaults” in the lower left corner and then “Printing Options”
- The default setting is double sided.
-

Step 6
- To print only Black and White: Change the option “Xerox Black and White” to “ON” .
- To print in colour if the original has such pages: Turn the option “Xerox Black and White” to “OFF (Use document colour)”.
- Select “Apply”.
-
Step 7
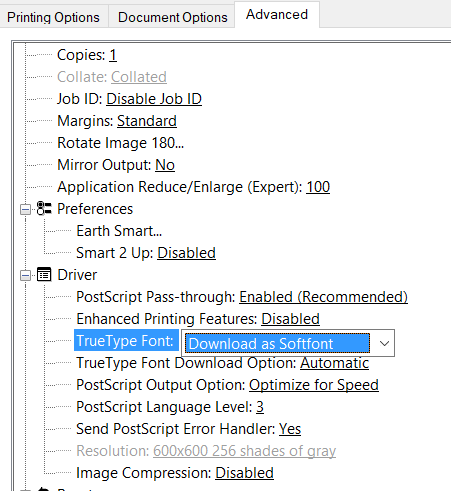
Go to Advanced, then Printing Defaults, then Advanced again. And choose the following settings:
- Job ID: “Disable JobID”
- Driver > TrueType Font: “Download as Softfont”
- Select “Apply”
-
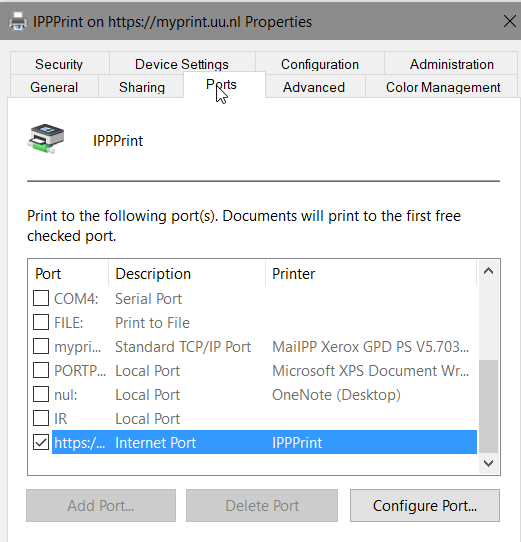
Step 8
Go to the tab “Ports”, then at the lower right corner, select “Configure Port”.
-

Step 9
Check the User Name. You can use one of the formats below, depending on you account restrictions:
– e-mail address
– long solis
– short solis- Please note: when you change your Solis password, remember to change it here as well.
- Select “Apply”
-

Step 10
Go to the tab “Configuration” and enter the following settings:
- Check the bi-directional communication is set to OFF.
- Check if your favorite printer is a model C8055. This has default 6 trays.
- Finisher: Office finisher LX
- Job storage module: Not installed
- Select “Apply”
-
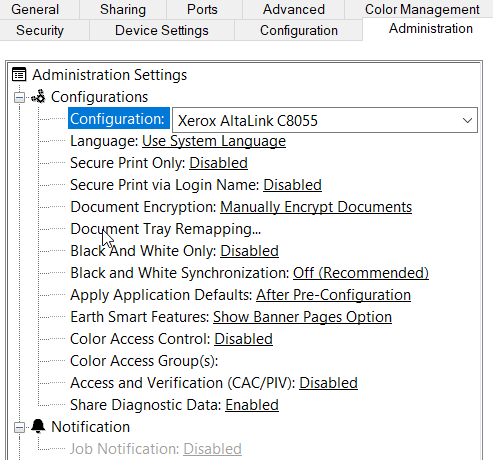
Step 11
Go to the tab “Administration” and enter the following information:
- For Configuration choose: (for example) C8055.
- Select “Apply”
You’ve now finished setting up IPP printing.
-

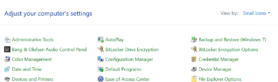
Step 1: In the Windows Search box, left bottom corner, type in: Control Panel
Step 2: Select Control Panel > View by small icons > Devices and Printers > IPPprint > Printing Properties > Ports > Configure Ports.
Step 3: Credential information can be specified in one of the formats below. If you’re experiencing unexpected authentication issues, try then another logon format. Exception: The e-mail format is not suitable for guests who don’t have a valid UU e-mail address.
- e-mail address: X.X.Janssens@uu.nl
- long solis: Janssens101@soliscom.uu.nl
- short solis: soliscom\janssens101

Go to Control Panel > View by small icons > Rightclick on “Devices and Printers” > Create shortcut.
Last modified: 25/07/2026