
Printers Xerox: Manual Input (Tray 5) for Certificates
This manual describes how to print on certificates from Microsoft Word via Xerox Multifunctional using the manual input Tray 5.
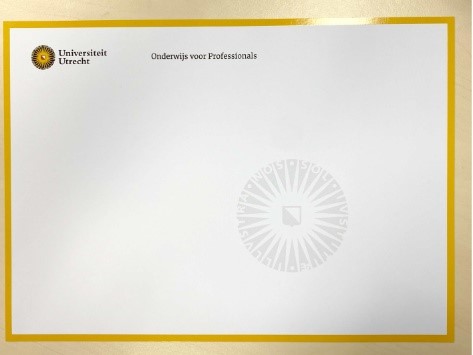
This instruction is based on a certificate with the following properties:
- size A4
- type Cardstock
- weight 160 gsm (g/m2)
- orientation landscape
-

Anyone can modify the settings of Tray 5. This means that next time you want to print a certificate you’ll need to check on the printer display if your settings are still in place.
-
Printing certificates from other trays than Tray 5 may cause paper jams.
-
Step 1
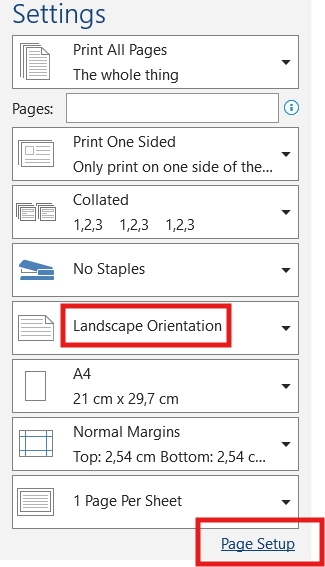
- Open the document to be printed in Word and go to “File”, and click “Print”.
- Check that the desired printer is selected (UUBlack/UUColour or IPPprint).
- Under “Settings”, change the orientation: “portrait” to “landscape”.
- Select “Page Setup”.
-
Step 2
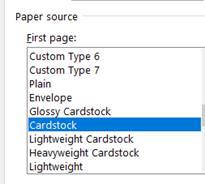
“Page Setup” > “Paper” > “Paper Source” > “First page” > “Cardstock” > “Ok”.
-
Step 3
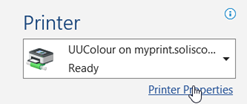
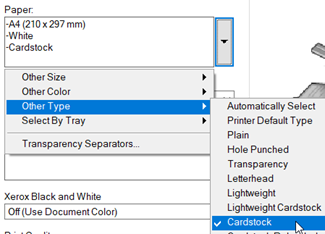
- Open the menu of “Printer properties”
- “Paper”, “Other Color” > “White”
- “Other Type” > “Cardstock”
- Then you can save and print it.
You can partly use this document as a template.
-
Step 4
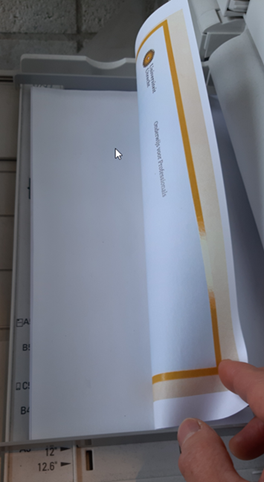
- Before you log in to the printer, load your special paper in Tray 5.
- You’ll find this tray on the bottom left side of the machine (you may need to unfold it).
- Load the paper with the printable side down and the leading edge outward.
- Make sure the paper guides are closed properly.
-
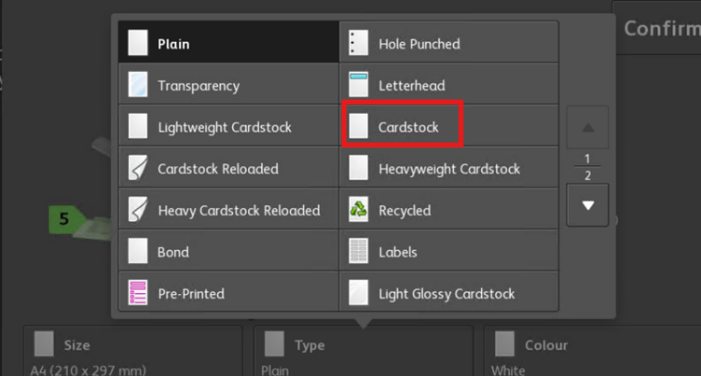
Step 5
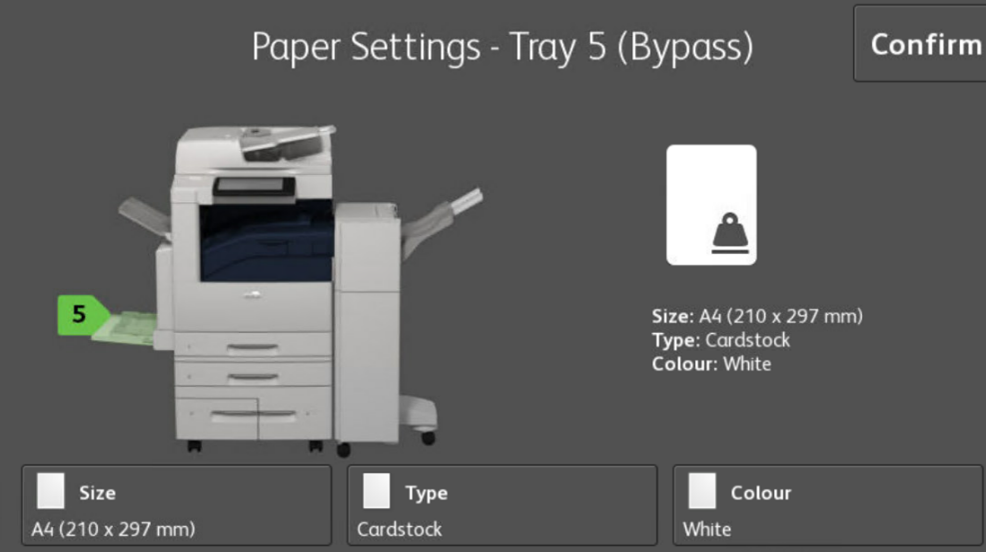
- The menu to configure your paper will appear automatically.
- Does the “Paper Settings” menu not appear on the printer?
- Then, slide the paper in Tray 5 back and forth slightly. The paper sensor then comes into operation, and then shows the menu.
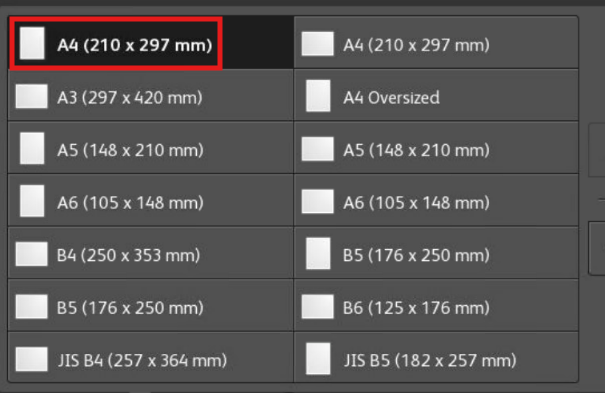
- You can then adjust the “Size”, “Type”, “Color” where necessary to “A4”, “Cardstock”, “White”.
- Press “Confirm”.
-
Step 6
- After pressing “Confirm”, the “Paper Settings” menu will disappear.
- Now you can log in to the printer and select “Print”.
- Release your print job. The special paper from tray 5 is automatically used for your job.
- If you get an error message about “Resources Required”, check the settings again, in Word and on the printer display. Sometimes the paper orientation does not match with what you have set. In this case try a different orientation on the display.
- By setting the correct paper type you prevent paper jams. The printer automatically adjusts the paper path and heat based on the thickness and type of paper you have set.
Last modified: 25/07/2026