Endpoint Management: Private phone (Android)
To access the UU Microsoft 365 apps (Outlook, Teams, OneDrive, Word, etc.) and associated data, you have to install the Company portal app.
Your phone has to:
- A recent version of Android
- Have a screen lock PIN-code (with a minimum of 6 numbers)
- Protected with 2FA
At the UU, the following apps are considered business apps:
- Company portal
- Microsoft 365 (Office)
- Microsoft Outlook
- Microsoft OneDrive
- Microsoft PowerPoint
- Microsoft Word
- Microsoft Excel
- Microsoft OneNote
- Microsoft Teams
- Microsoft Skype for Business
- Microsoft Lens – PDF Scanner
- Microsoft Stream
- Microsoft Lists
- Microsoft Visio Viewer
- Microsoft Whiteboard
- Microsoft Launcher
- Microsoft Planner
- Microsoft 365 Admin
- Microsoft Azure Information Protection Viewer
- Microsoft SharePoint
- Microsoft Kaizala
- Microsoft PowerApps
- Microsoft To-Do
- Microsoft Power Automate
- Microsoft Power BI
- Microsoft Yammer
- Microsoft Bookings
- Microsoft Authenticator
- Microsoft Dynamics CRM
RESTRICTIONS
The following conditions and restrictions apply to devices with an Apple iOS operating system:
- The copying, (cutting/pasting) of business data to personal apps is not possible;
- The copying, (cutting/pasting) of business data between business apps is always possible;
- The saving of business documents is only possible in Microsoft Onedrive or Sharepoint;
- The saving of business documents on your own phone or tablet is not possible;
- After 30 minutes (of not using a business app) the PIN will have to be entered again to be able to open business apps.
If you’ve already installed the Microsoft 365 apps to access business data (like your UU mail), the installation of Intune will secure the data. If your UU account is already connected to the applications, this manual might differ slightly.
Application PIN
During the installation of the first business application, you will be required to create an application PIN (see step 11). This also has to be a “complex” PIN. The application PIN will be asked at startup of a business application. After filling in this PIN, the company portal will permit access to the application for a period of 4 hours. Afterwards, you will again be asked for the application PIN at app startup.
If you enter the application PIN wrong 10x, it will have to be reset by following the given instructions.
In this manual, a Samsung Android device with Dutch language settings and the most recent version of Android OS was used. The pictures in this manual might differ with different devices and versions of Android.
-
A 2FA app has to be installed to follow this manual. For more information about 2FA, see: https://intranet.uu.nl/en/2fa .
TRANSFERRING 2FA AND DATA FROM OLD TO NEW SMARTPHONE
If you receive a replacement (business) phone from your employer, you need to transfer information and applications from your old to your new phone. To access UU data such as your UU mail, your device must be protected with Endpoint Management. -
Step 1
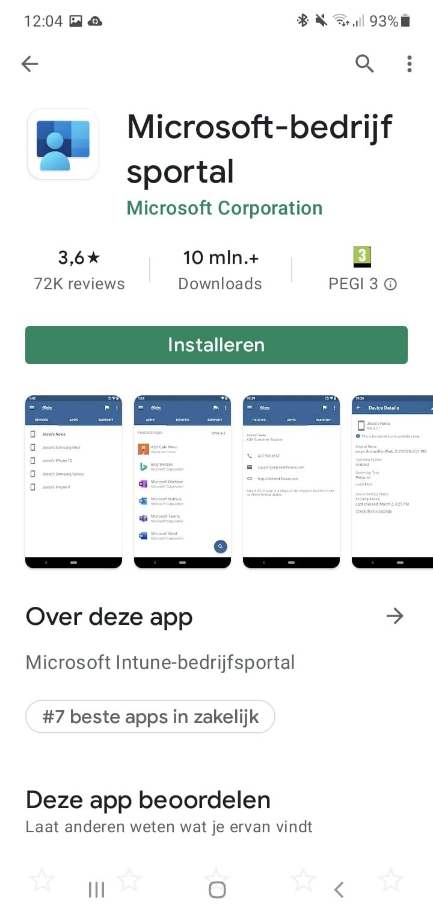
- Open the Google Play Store and search for the app Company portal or bedrijfsportal (if the device is set to Dutch).
- Choose Microsoft Company Portal, and install it.
-
Step 2
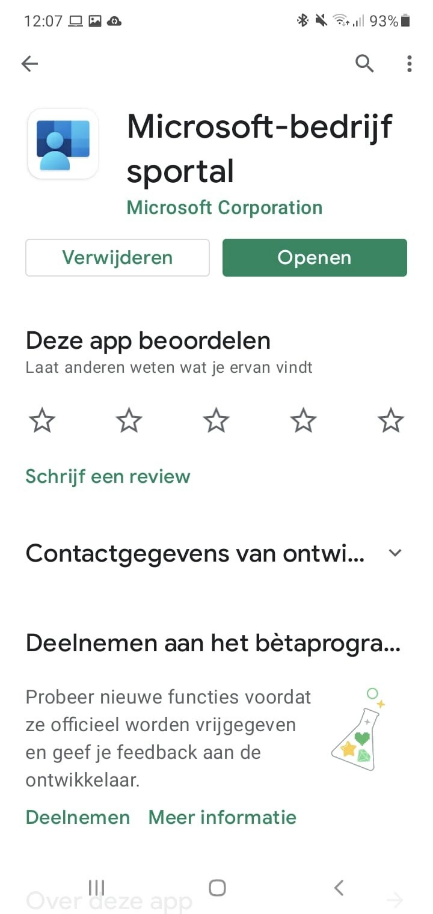
- Select “Open” when the app has been installed to start it.
-
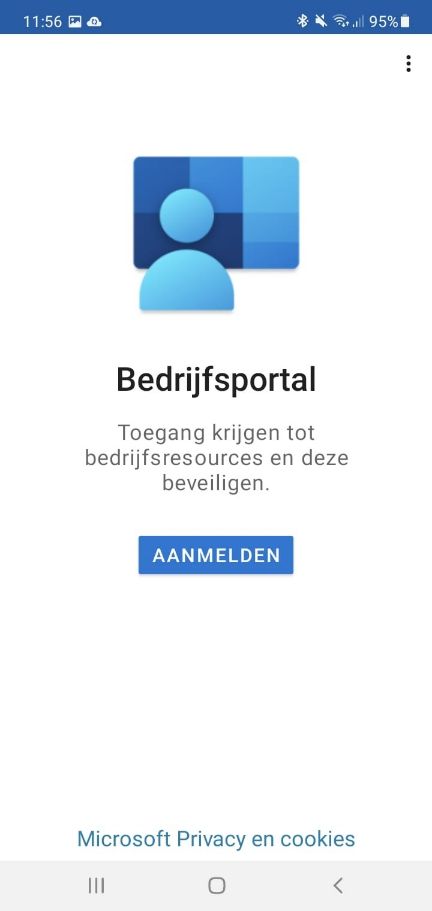
Step 3
When opening the application, it will ask you to log in. ATTENTION: do NOT log in here, but close the application.
-
Step 4
If Outlook is already installed, you can skip this step and continue to step 5.
- Open the Google Play Store again
- Select the app and press “Install”.
-
Step 5
After the installation, Outlook will automatically start.
- Press “Add account”
-
Step 6
- Fill in your @uu.nl e-mail address.
- Afterwards, press “Continue”.
-
Step 7
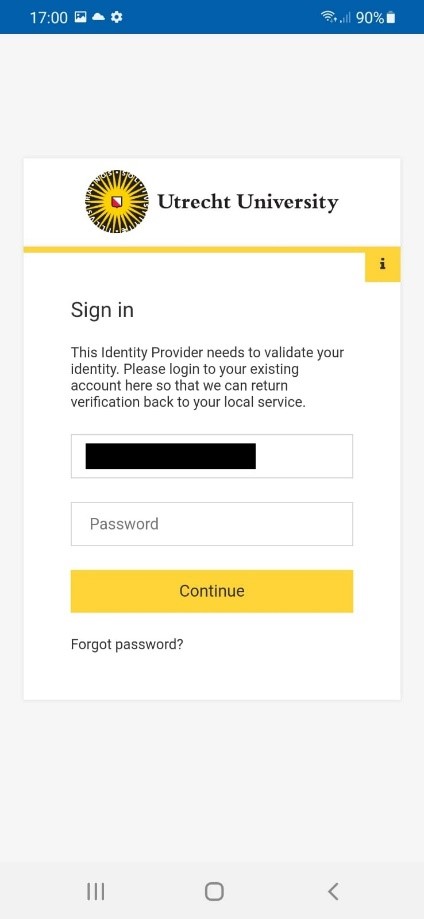
You will now be redirected to the login screen of the Utrecht University.
- Give your password that is associated with your @uu.nl address. The authenticator app should start automatically.
- Authenticate the app.
-
Step 8
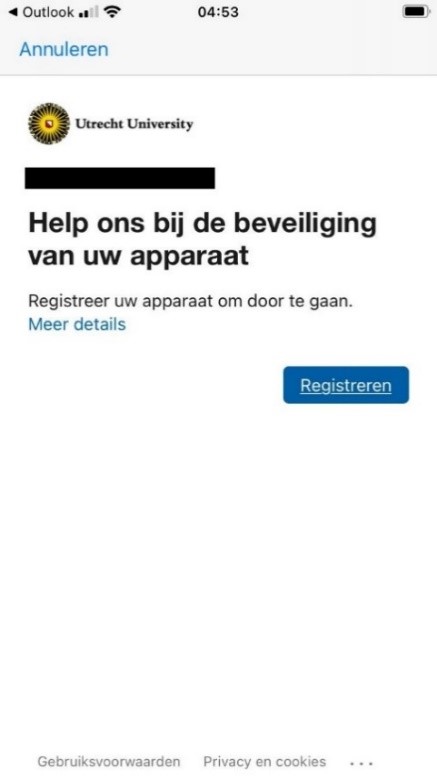
After the authentication, your device has to be registered for secure access.
- Press “Register”.
-
Step 9
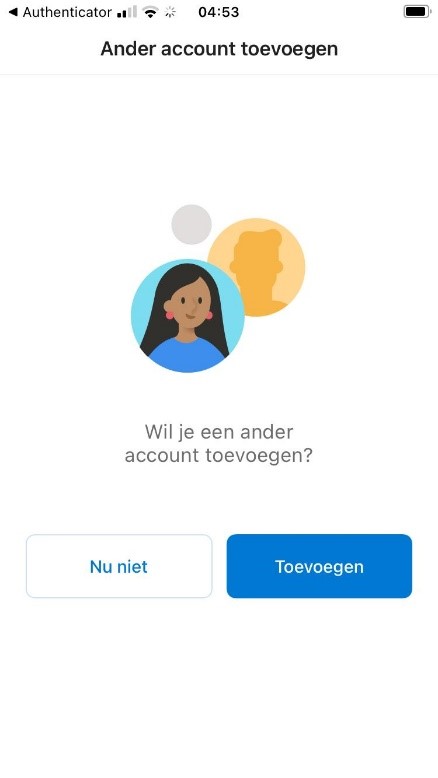
Microsoft Outlook will now start with the question whether you would like to add a second account. We can skip this for now.
- Press Not now
-
Step 10
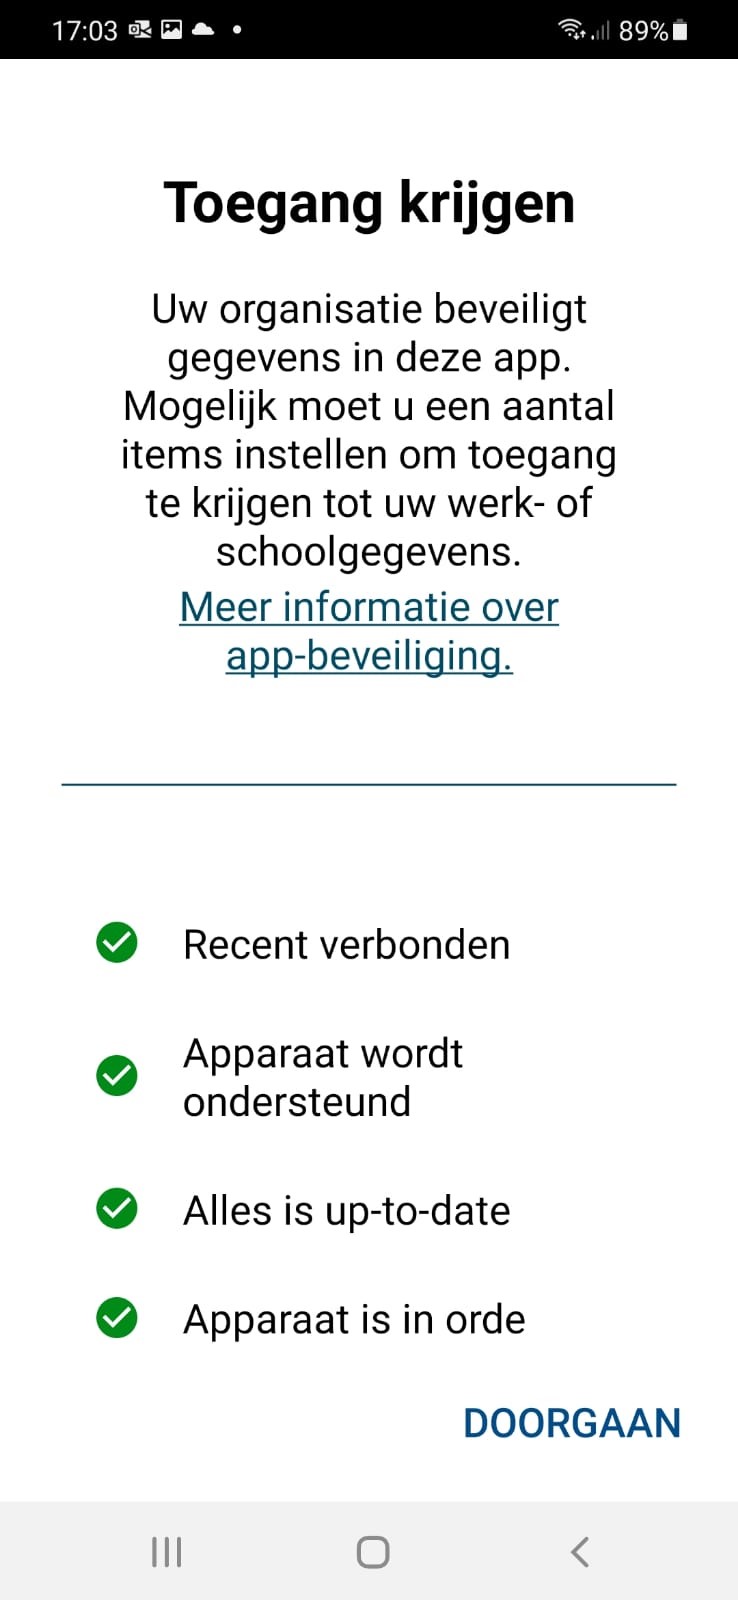
Next, you will be asked to provide Microsoft Outlook with permission to view your personal business data.
- Provide this by pressing “Continue”.
-
Step 11
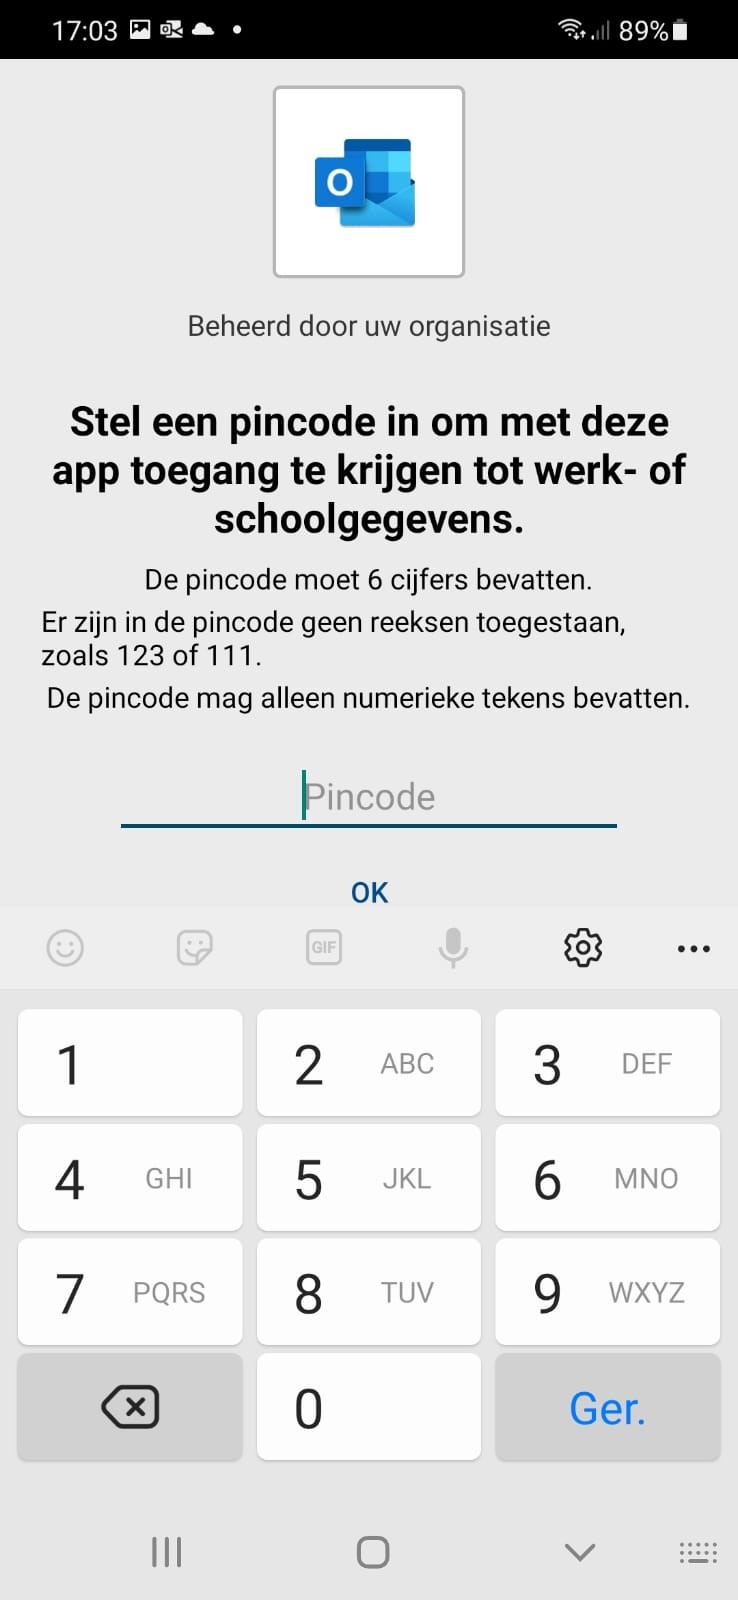
You will now be asked to create a 6-digit PIN.
- Press “Ok”.
- You will then be asked to confirm the 6-digit PIN by entering it again.
-
Step 12
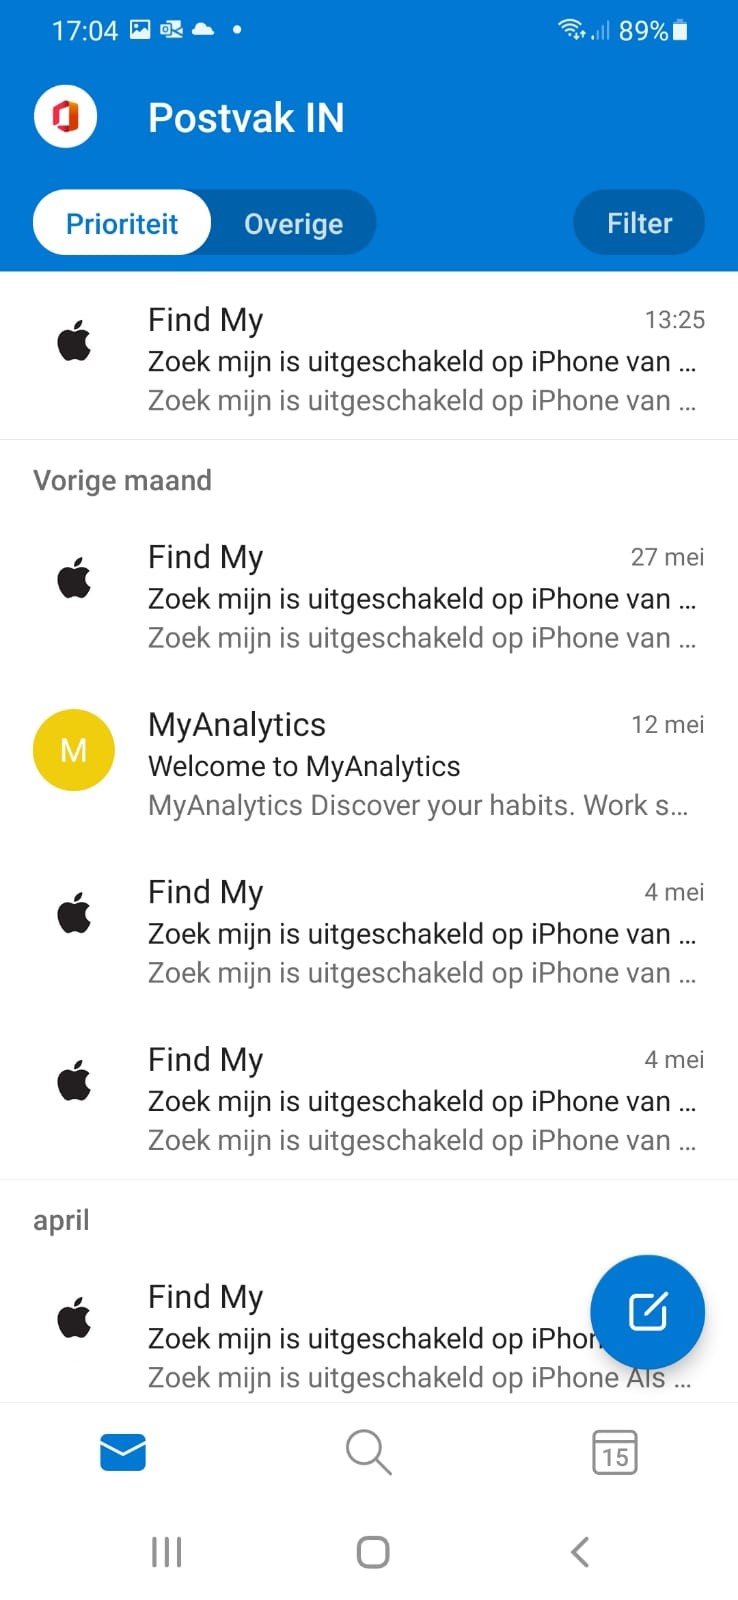
Outlook will open and you’ll see your Inbox. Outlook has now been installed correctly. You can now configure your contact to be synchronised automatically.
-
Step 13
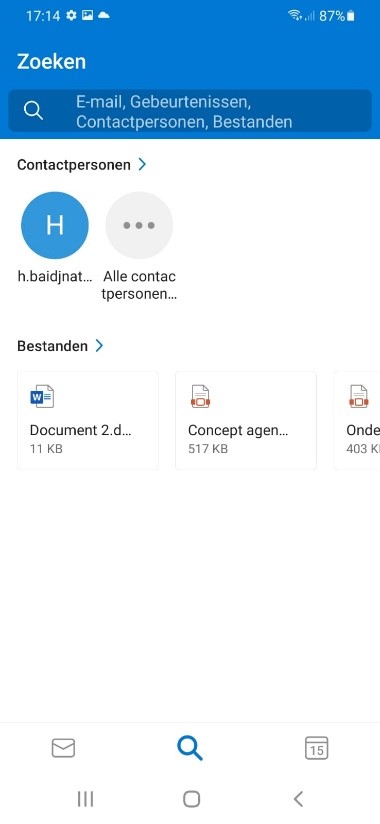
- To synchronise your contacts, press the magnifying glass icon.
- Then select the circle with the 3 dots above “All contacts”.
-
Step 14
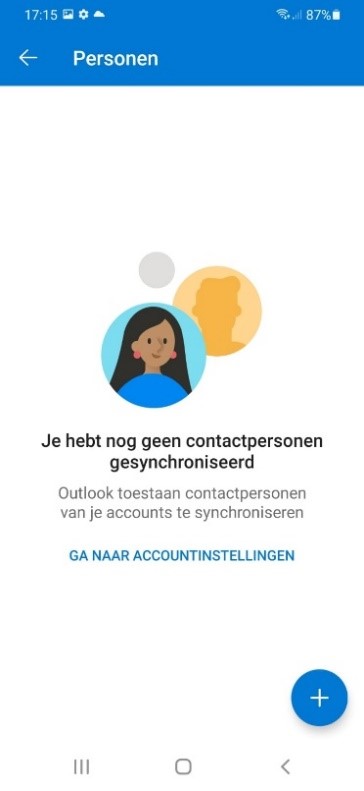
A new screen will appear with the message that no contacts have been synchronised yet.
- Press “Go to account settings”.
-
Step 15
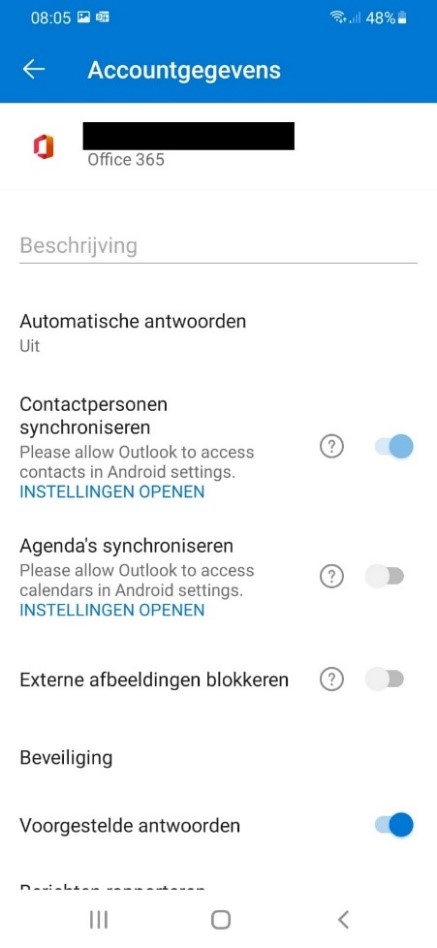
In the screen with your account details you can turn on the synchronisation of account details by selecting the corresponding slider button.
- Press the button next to “Synchronise contacts”.
-
Step 16
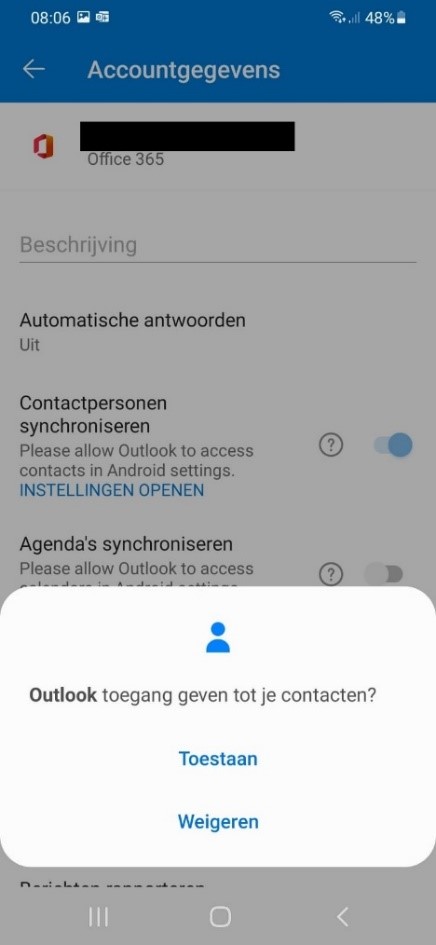
The operating system will now ask permission for Outlook to access your contacts.
- Press “Allow”
The contacts will now be synchronised.
-
Step 17
In the same account details screen you can also synchronise your calendar.
- Press the button next to “Synchronise Calendar”.
-
Step 18
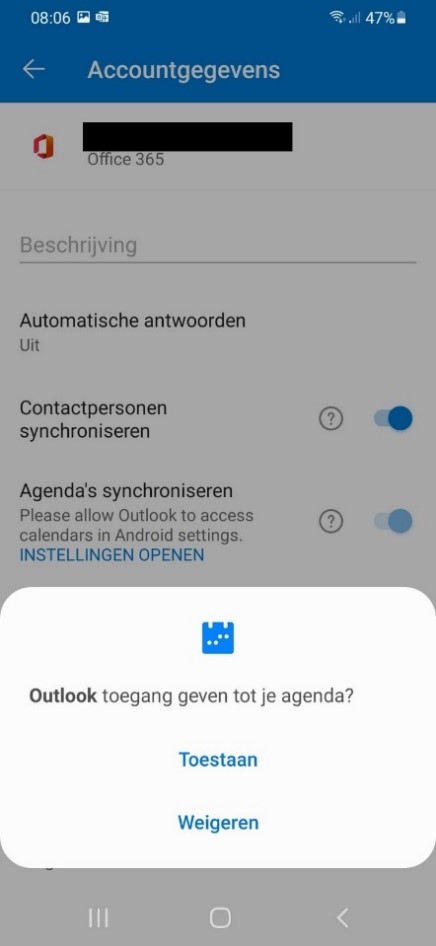
The operating system will now ask for permission for Outlook to access your calendar.
- Press “Allow”.
The calendar will now bee synchronised. You can now leave the account details screen. Outlook has been correctly configured.
Last modified: 22/08/2024


