SharePoint Teamsite: granting and removing permissions
In SharePoint, you manage access in different permission groups. You can give someone access to the site by adding them to a permission group. When you delete someone from the permission group, they lose access to the site. This manual explains how to grant permission (steps 1-5) and remove it (steps 6-9).
-
Step 1
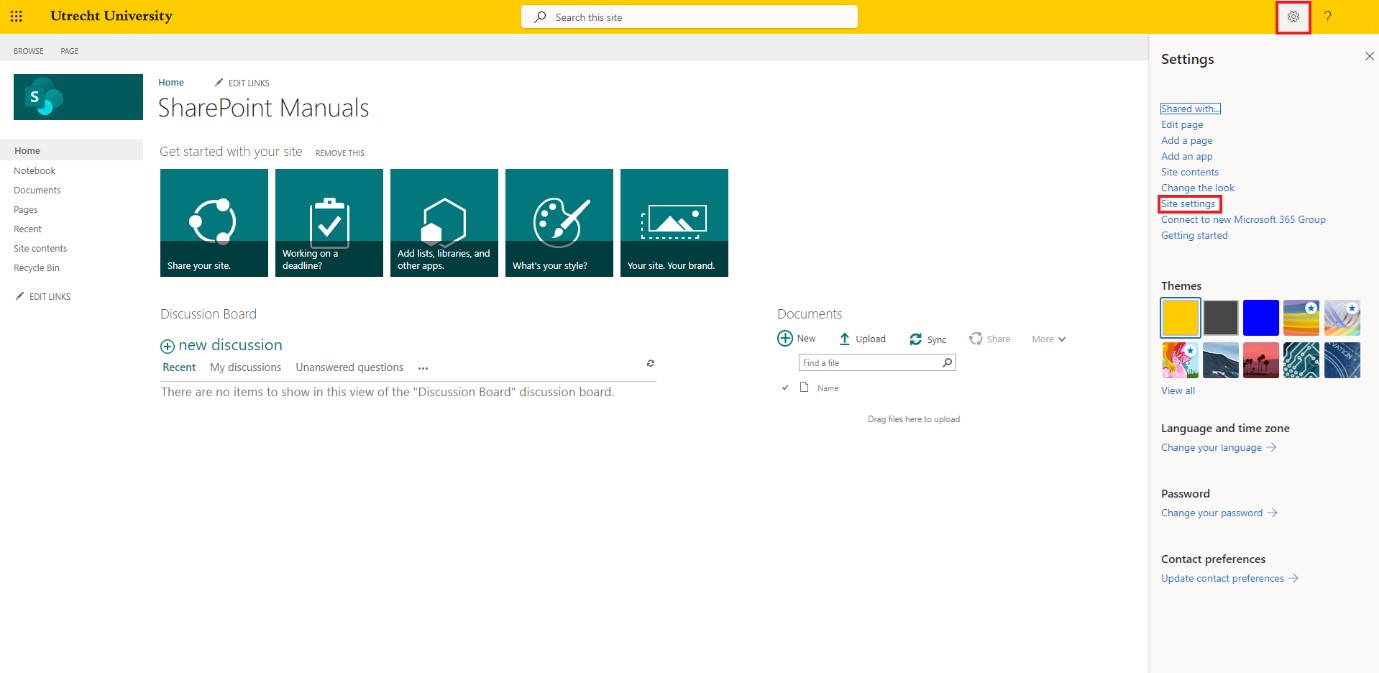
Open the SharePoint Teamsite and select ‘Settings’ (gear icon) in the top right corner. Then select ‘Site settings’.
-
Step 2
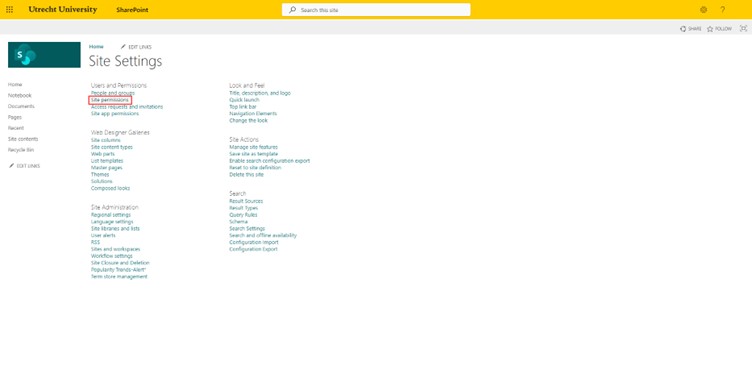
Select ‘Site Permissions’.
-
Step 3
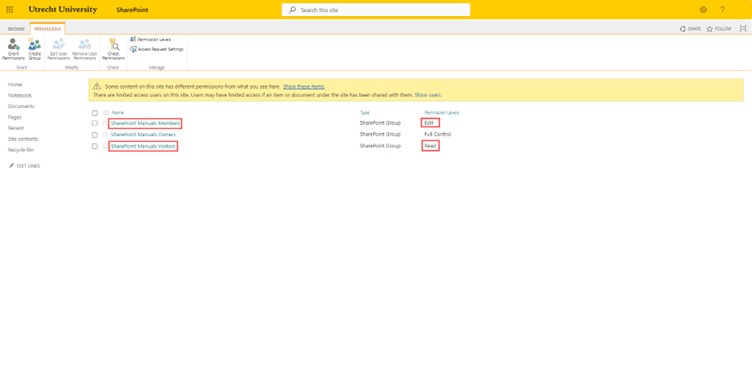
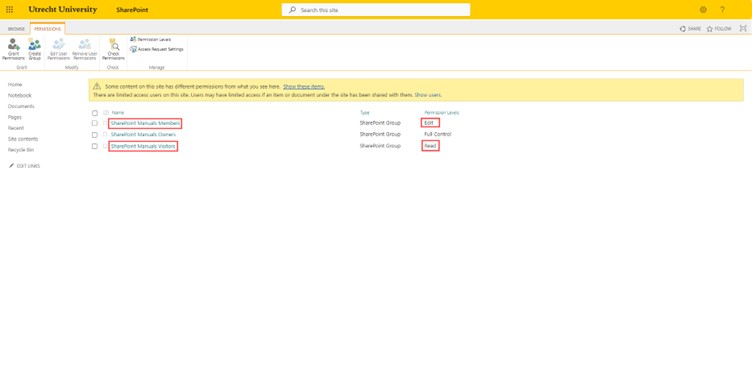
Select the permission group to which you want to add someone. The ‘members’-group gives editing rights to the SharePoint site. The ‘visitors’-group gives reading rights to the site. The ‘owners’-group gives full control over the site. This manual explains how to add or remove an owner.
-
Step 4
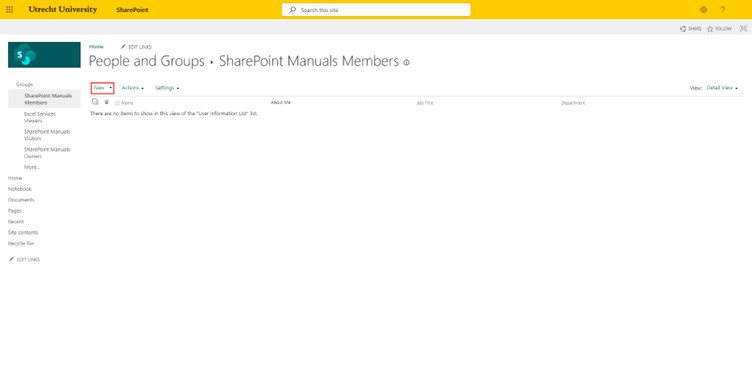
Select ‘New’.
-
Step 5
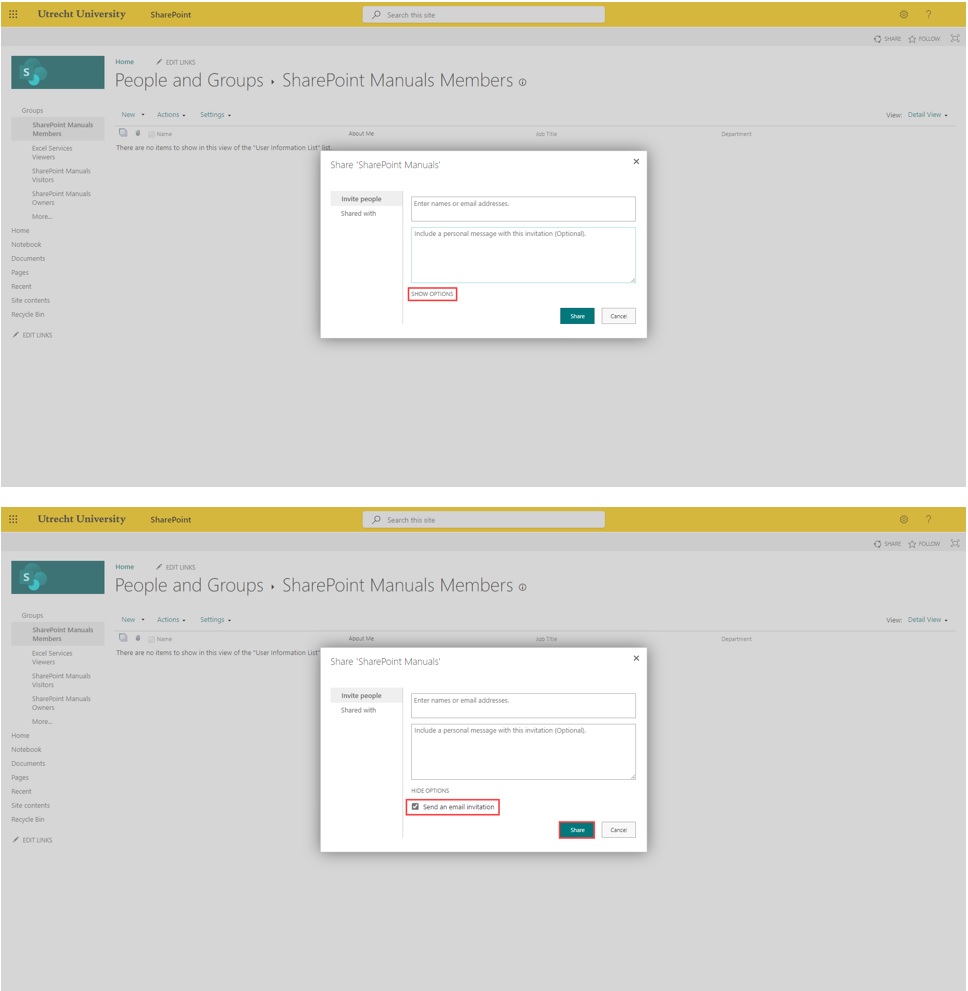
Search for the person you want to add and add this person. You can search for the last name or email address. Under ‘Show options’ you can choose whether you want to send an email invitation. Select ‘Share’. Their name will appear in the list.
-
Step 6
First follow steps 1 and 2. Next, select the group from which you want to delete someone. This way, their rights will be removed and they will no longer have access to the SharePoint site.
-
Step 7
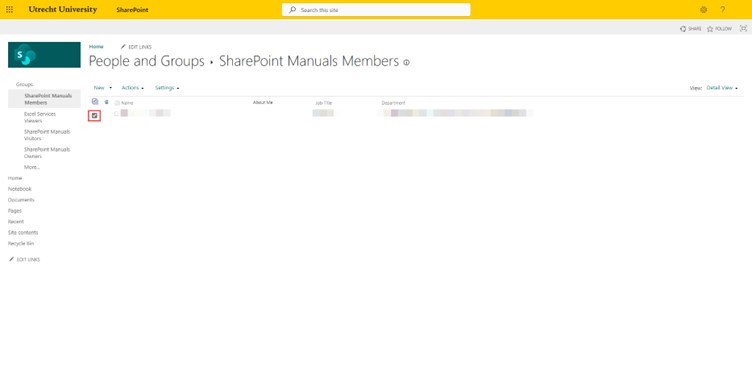
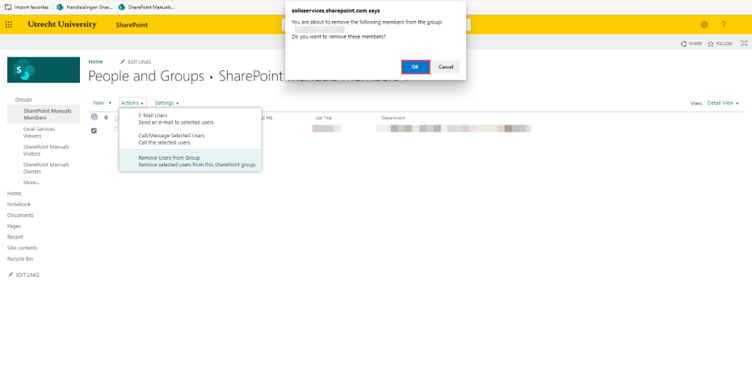
Select the person you want to delete through checking the box in front of their name. You can select multiple persons at once.
-
Step 8
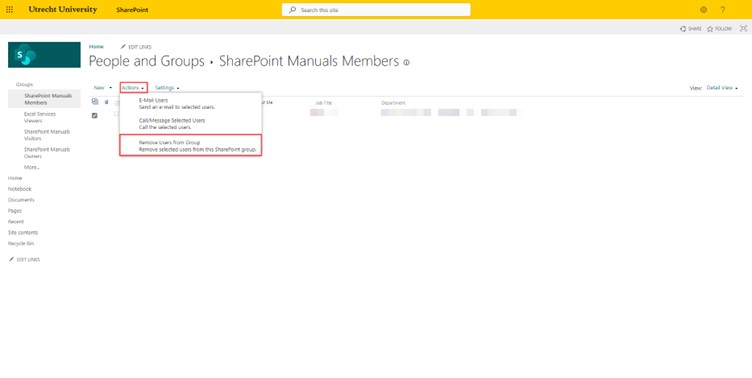
Select ‘Actions’ and then ‘Remove users from group’.
-
Step 9
A warning appears at the top of your screen. Check whether or not you have selected the correct person(s). If everything is in order, select ‘OK’. The selected user will be removed from the list and does no longer have access to the SharePoint site.
Last modified: 24/08/2023


