
Snip and sketch (screenshots)
Using the Windows Snip and sketch application you can easily take screenshots and edit them as well. This manual explains the basic functionality of the app. It is a standard Windows application so you can find it in the Start menu.
-
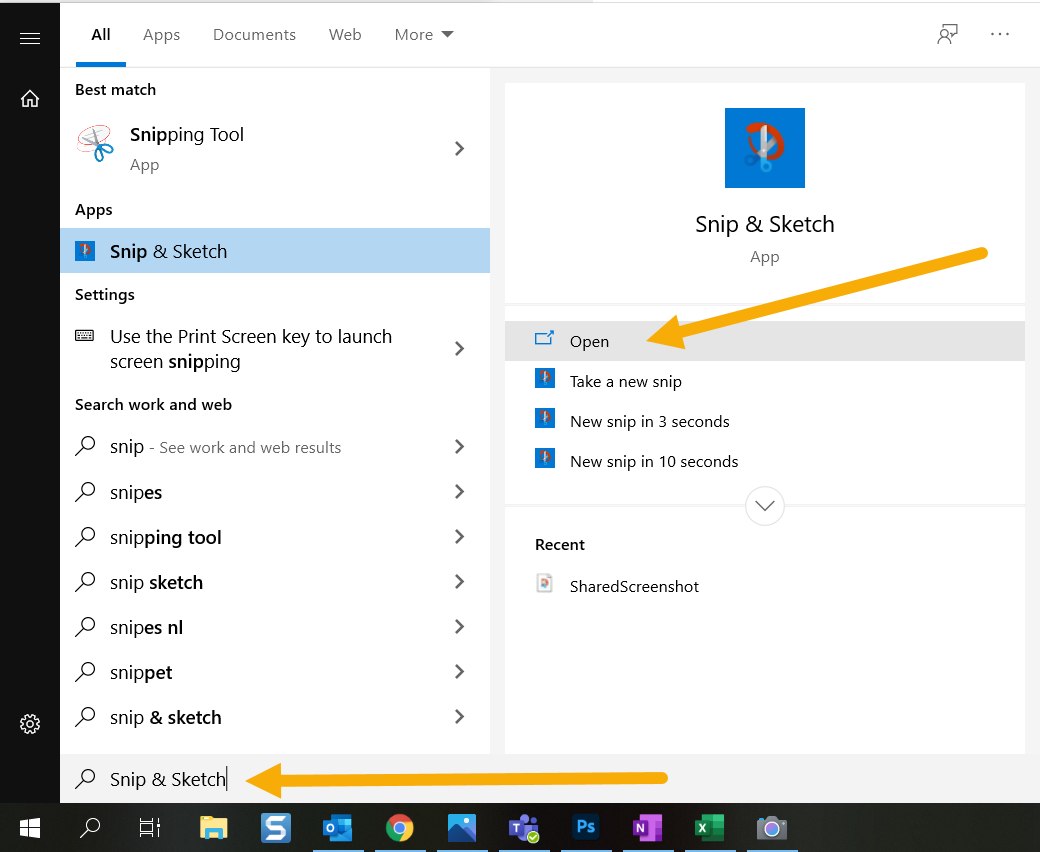
Step 1
- Click the Start menu and type “Snip and sketch”.
- Click ‘Open’ to open the application
-
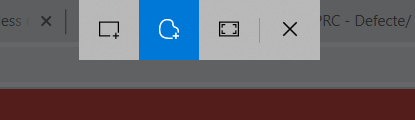
Step 2
When you click “New” to create a new screenshot you will see three options:
- Rectangular selection. This allows you to make a rectangular screenshot of your (a part of) your screen.
- Free-form selection. This allows you to choose a free shape , like a cirkel, to make a screenshot.
- Full-screen Snip. This option will take a screenshot of your entire screen.
Choose the option the wish and click it to make a screenshot by dragging your mouse over the area you want to capture.
-
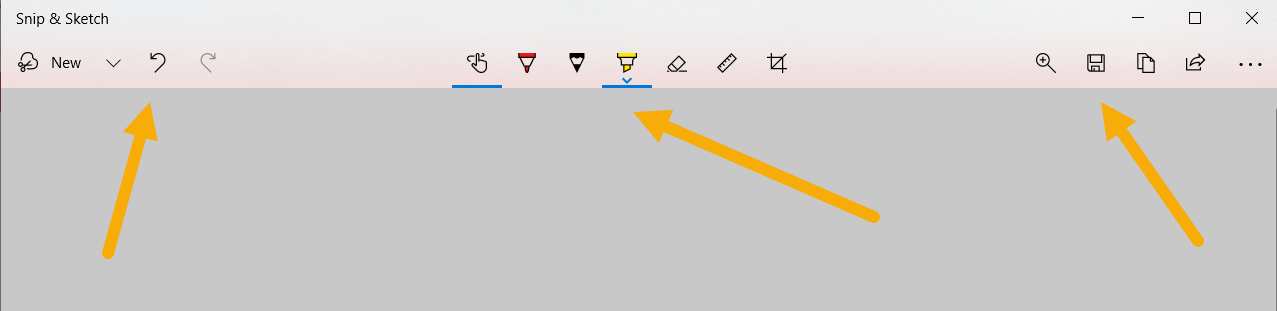
Step 3
Once you’ve taken the screenshot it will appear in the Snip and sketch app. Here you can edit, copy or save the image.
- With the options in the top left you can take a new screenshot or undo an edit (rounded arrow icon)
- With the options in de middle you can add tekst, draw on or crop the image
- The options in the top right can be used to zoom in, save or copy your screenshot
-

Step 4
Do you want to save the file as an image?
- Click the ‘Save’ icon in the top right
- Choose the location in the window that opens up and click ‘Save’ again.
-

Step 5
Do you want to copy the image to a chat or a (Word)file?
- Click the ‘Copy’ icon in the top right
- Then go to the place or app you want to paste the image to
- Rightclick there with your mouse and choose ‘Paste’ (or press CTRL + v)
Last modified: 9/12/2020