Solis-mail on Android (Gmail app)
This instruction guide describes how to configure Solismail (email, contacts and agenda) on an Android tablet or smartphone. The screenshots are made with Android 9.0 and the Gmail app. Screenshots may differ on other devices or apps.
-
Step 1
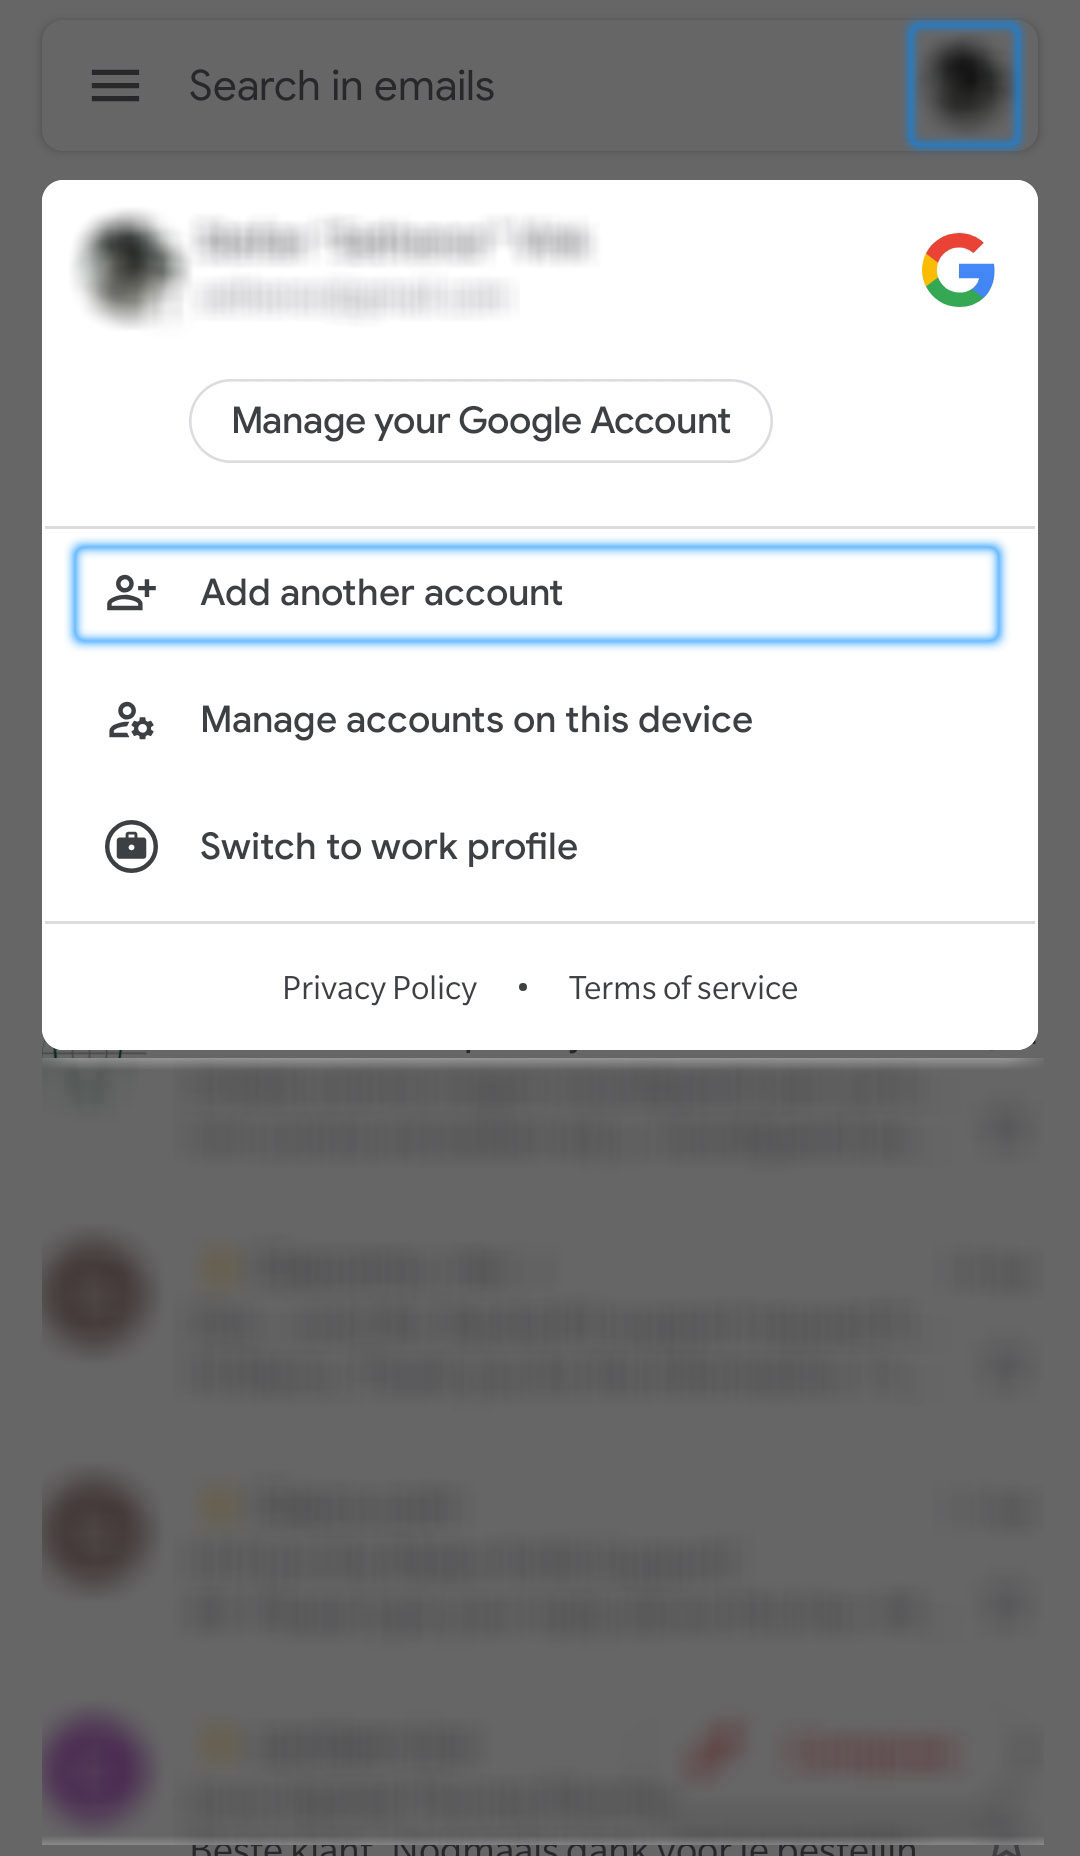
Start the Gmail app and press the profile picture to open the account settings.
Tap on Add another account.
-
Step 2
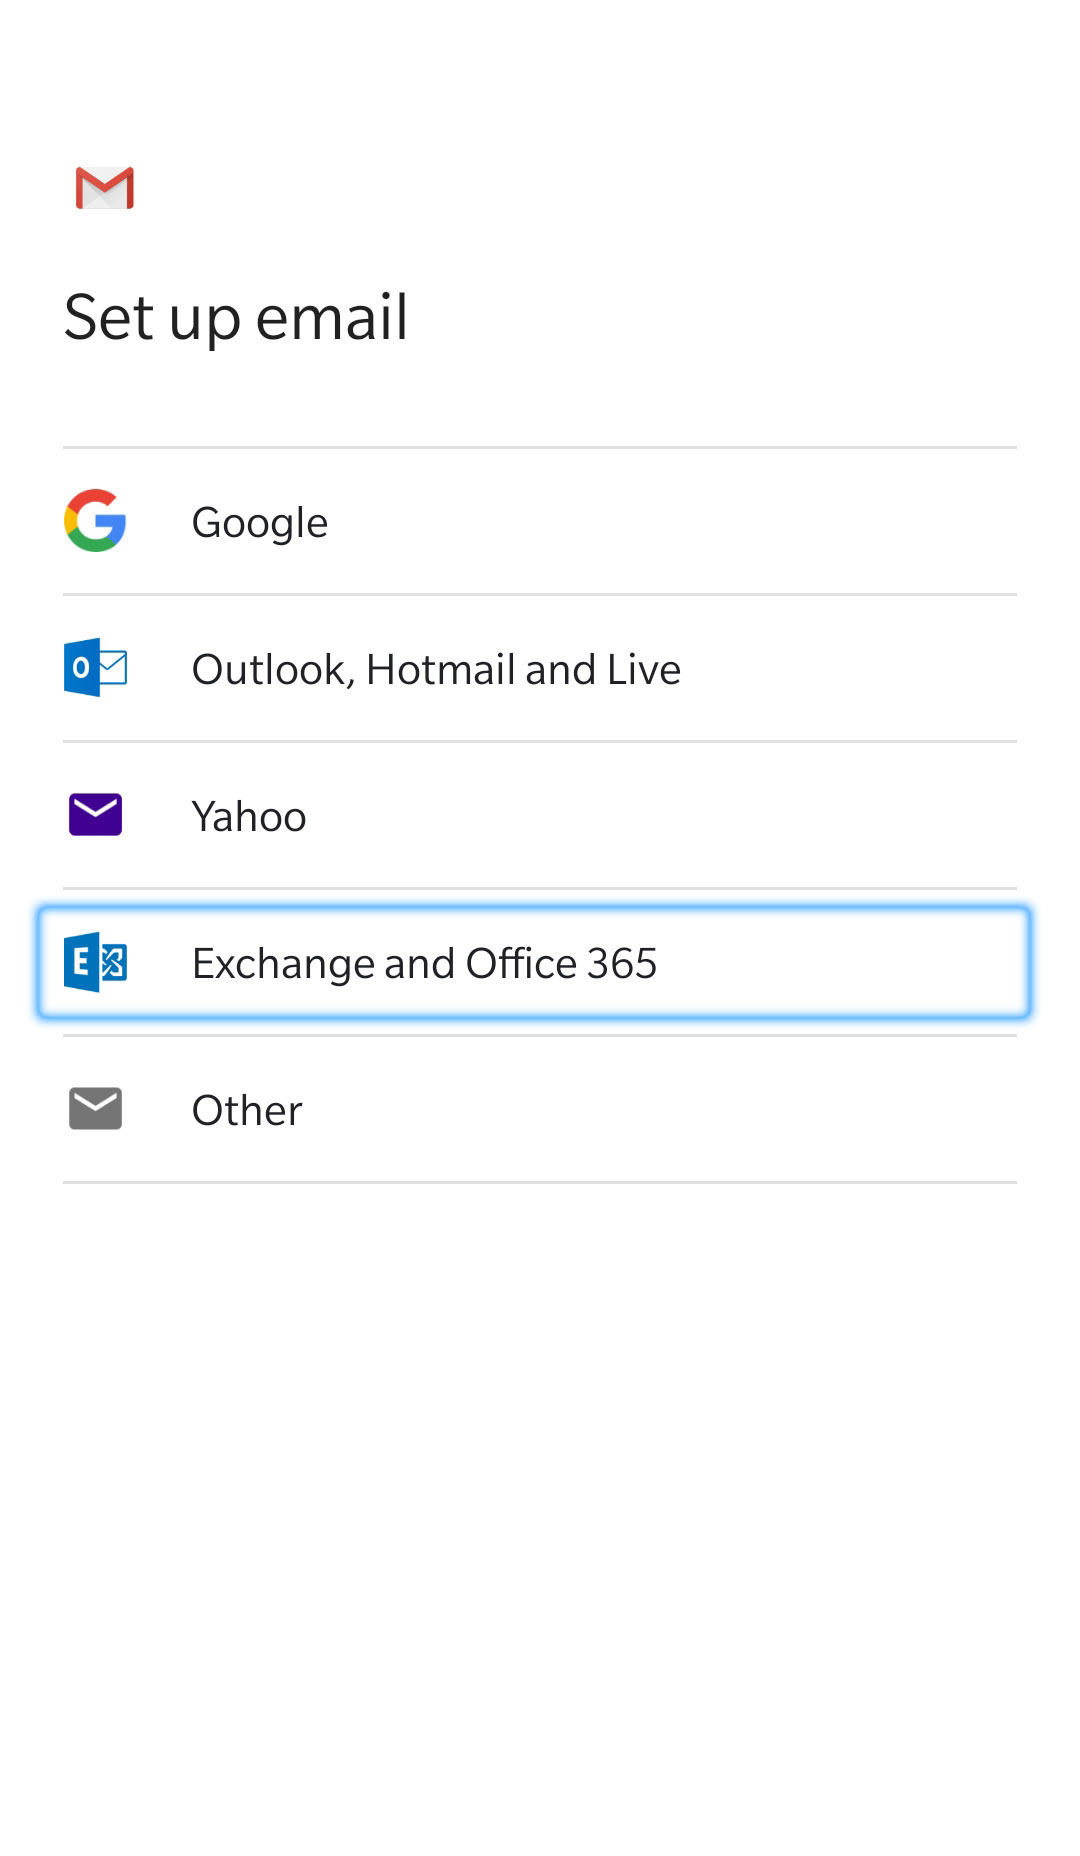
Tap on Exchange and Office 365.
-
Step 3
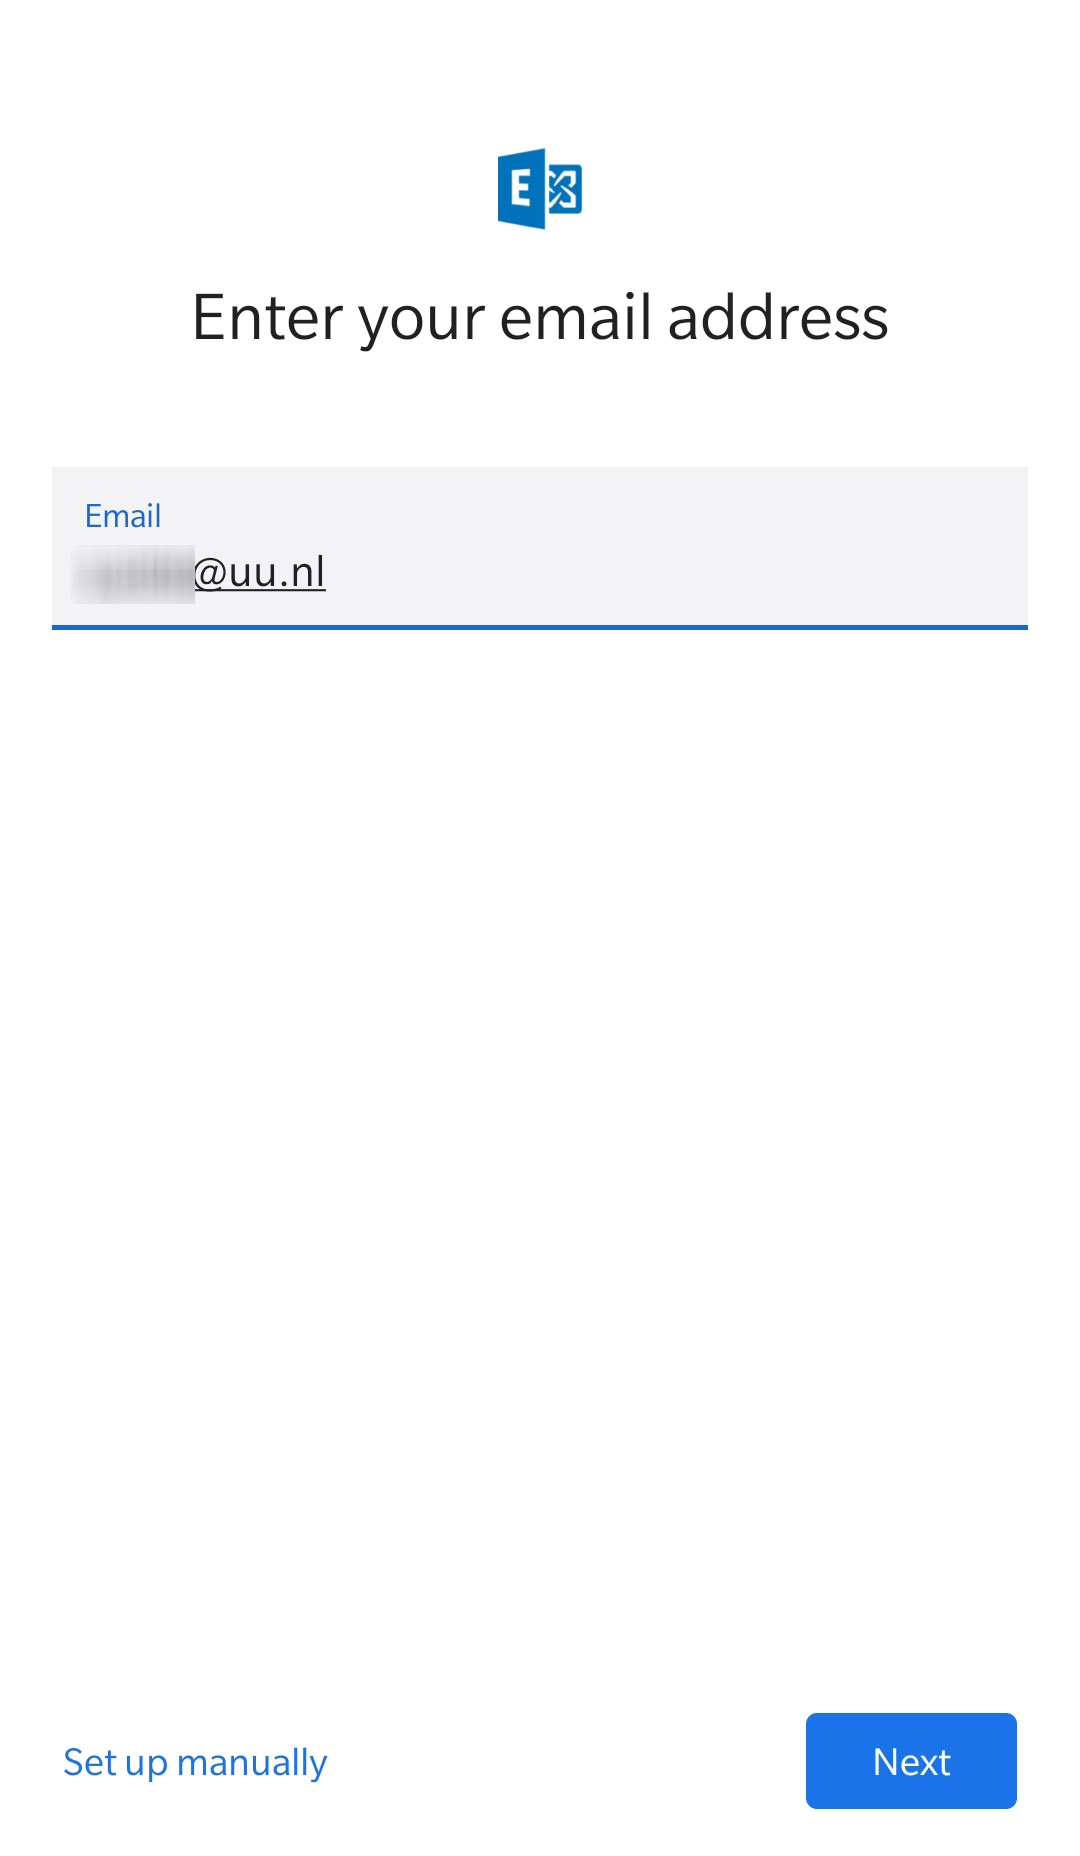
Enter your email address and tap on Next.
-
Step 4
Your email address should already be entered.
Enter your password and tap Sign in. -
Step 5
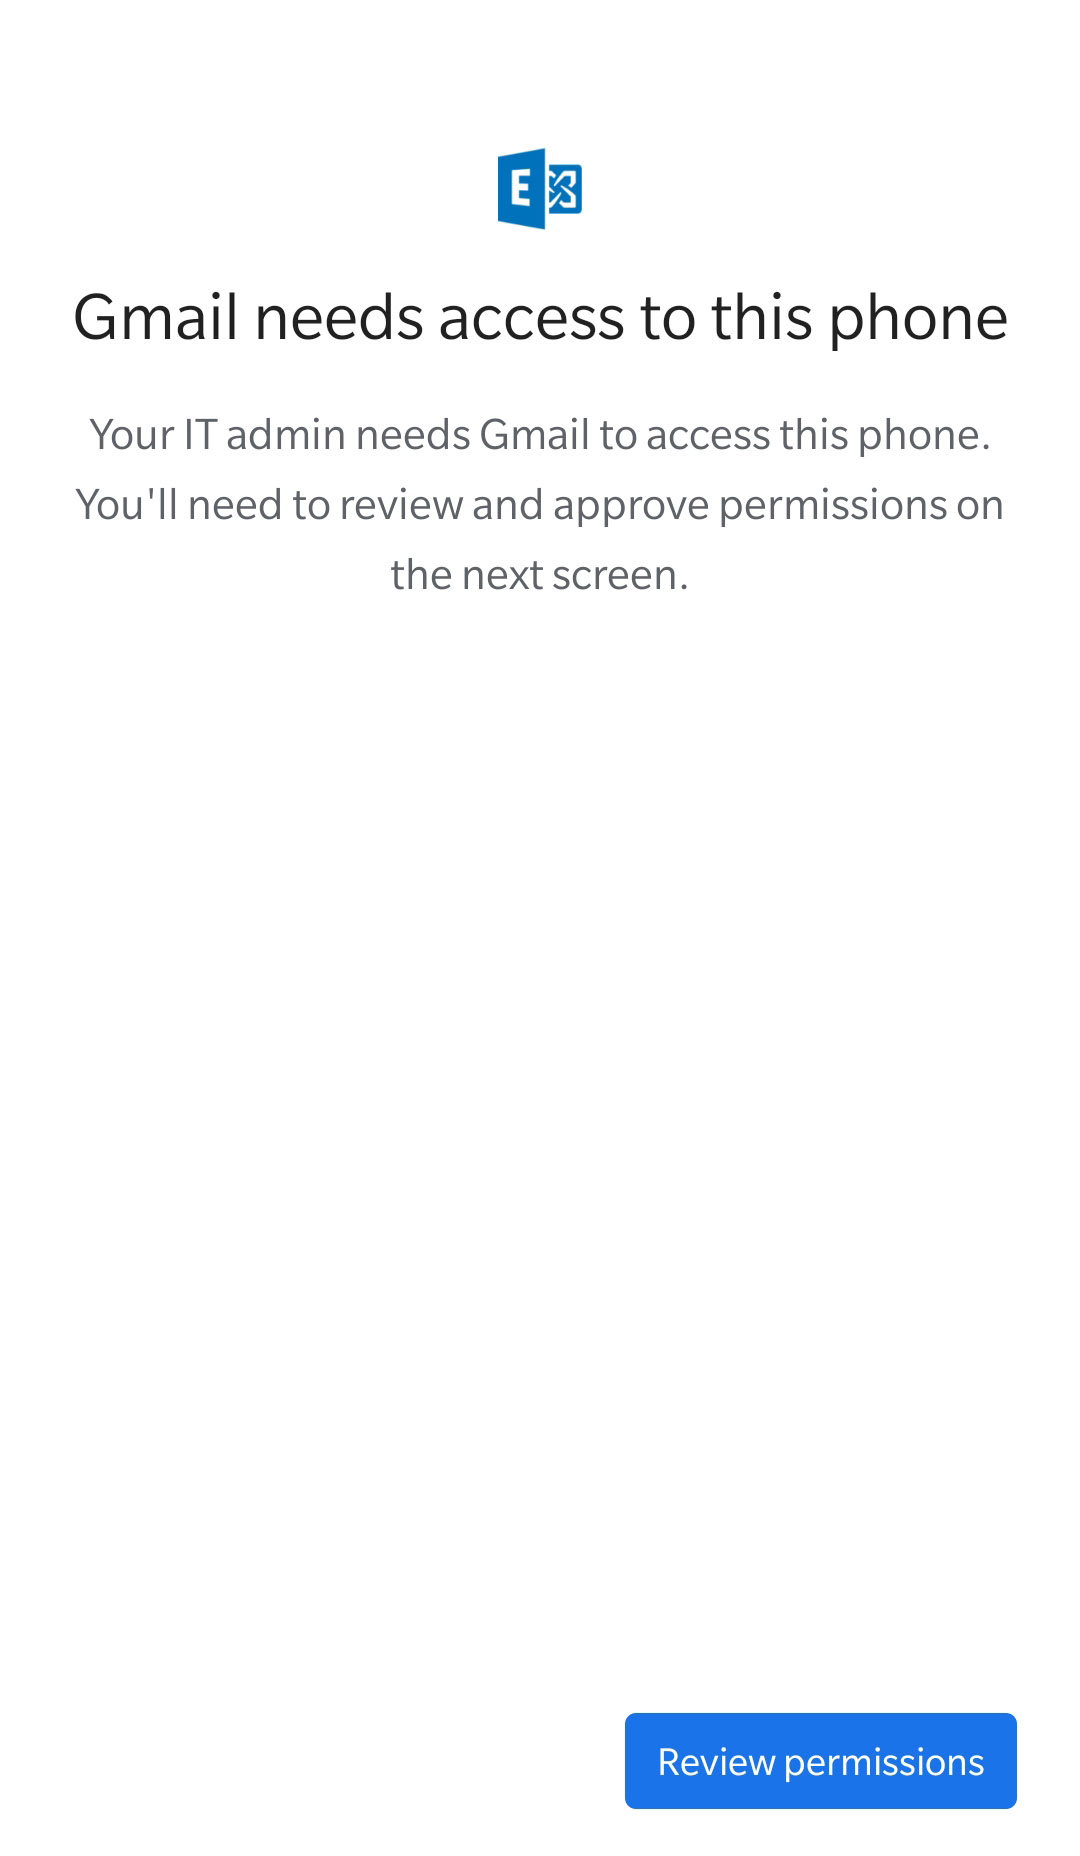
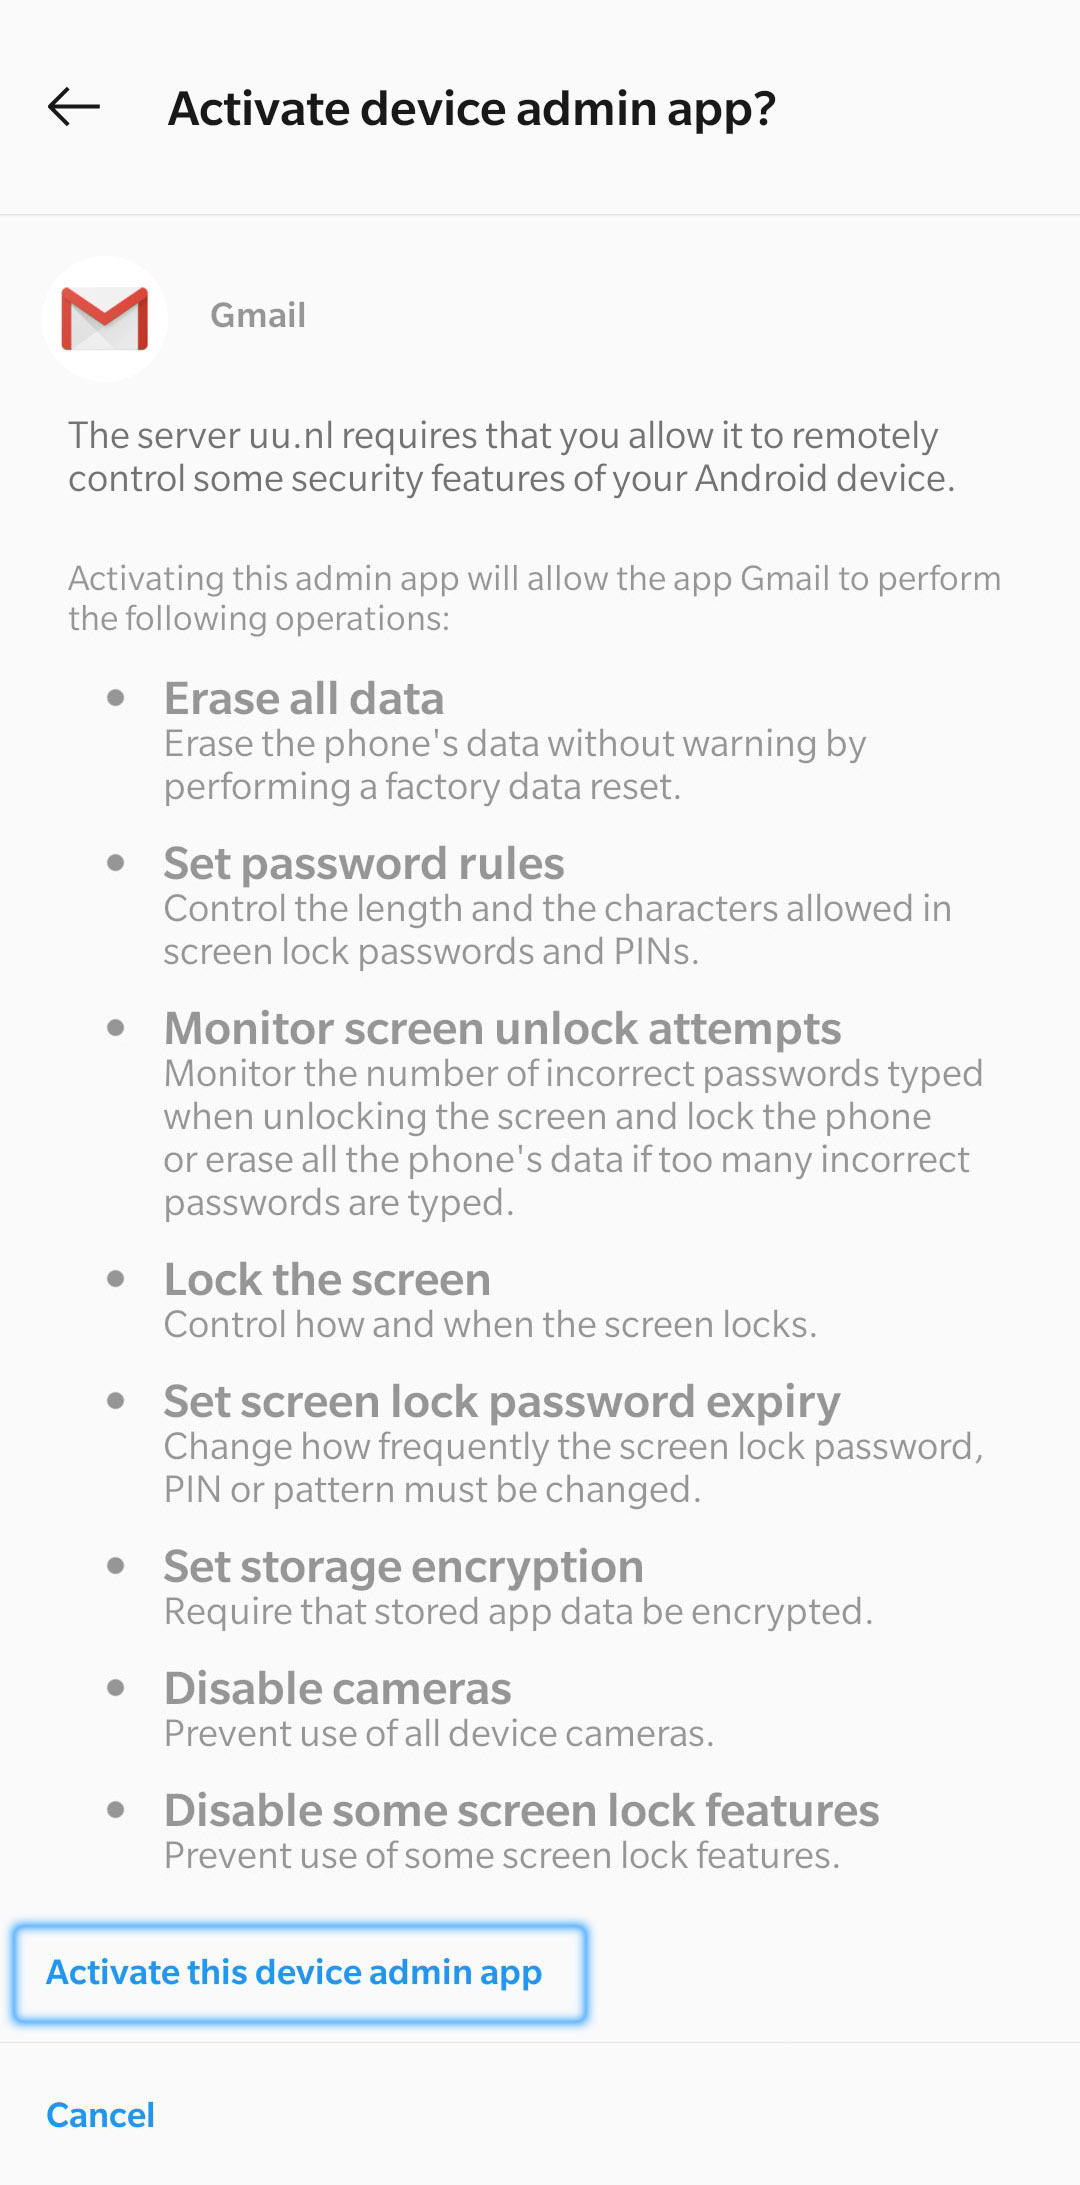
You will be asked to allow the mail server access to remotely control some security features. This is necessary as an additional security measure in case you lose the phone.
Tap Review permissions to continue
-
Step 6
You will now see a list of all requested permissions. Tap Activate this device admin app to continue.
-
Below, you will find some additional configuration tips for your e-mail.
-
Step 7
Tap the Profile Picture again to Manage accounts on this device
-
Step 8
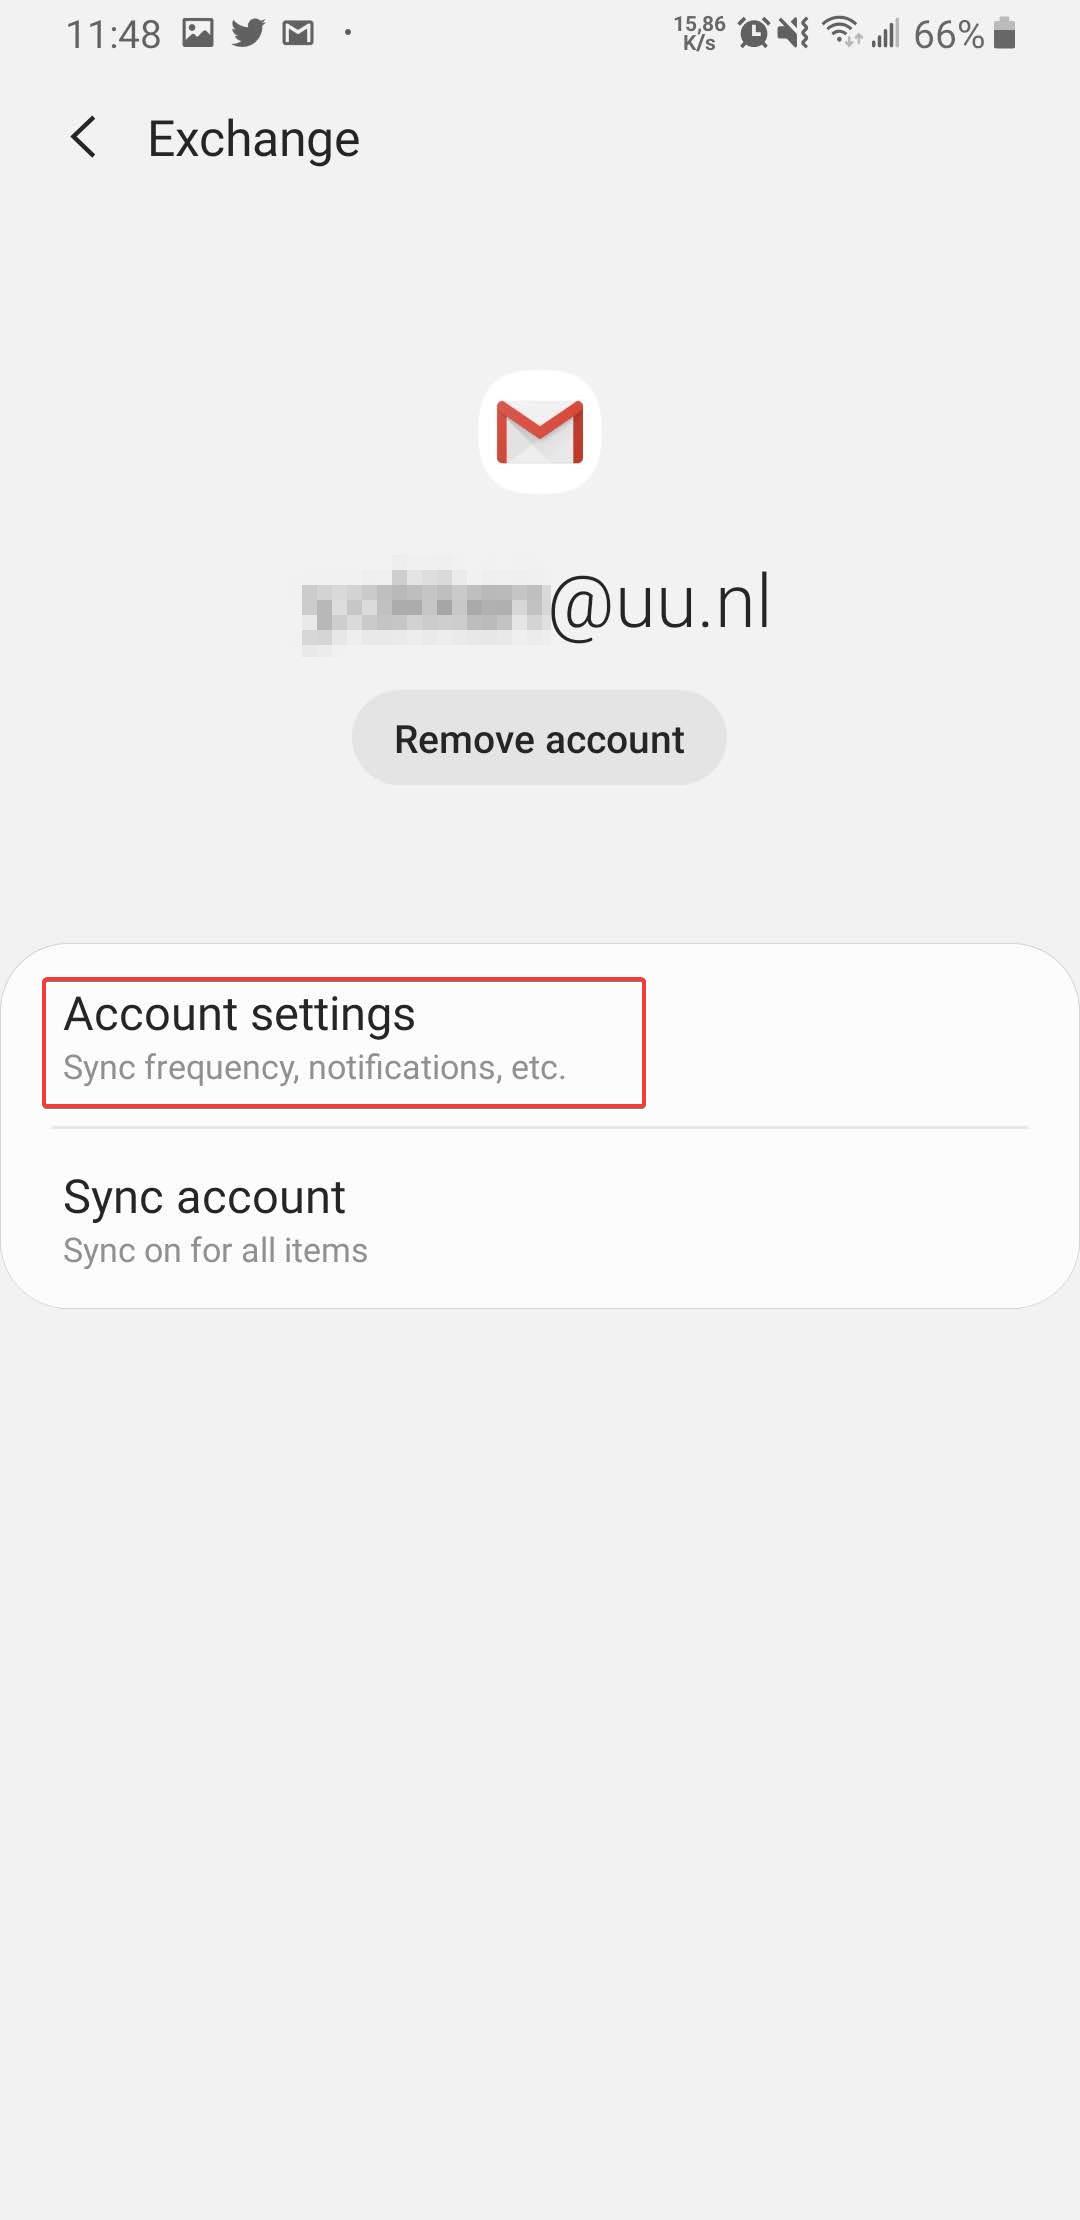
Tap on your UU mail account and open Account settings
-
Step 9
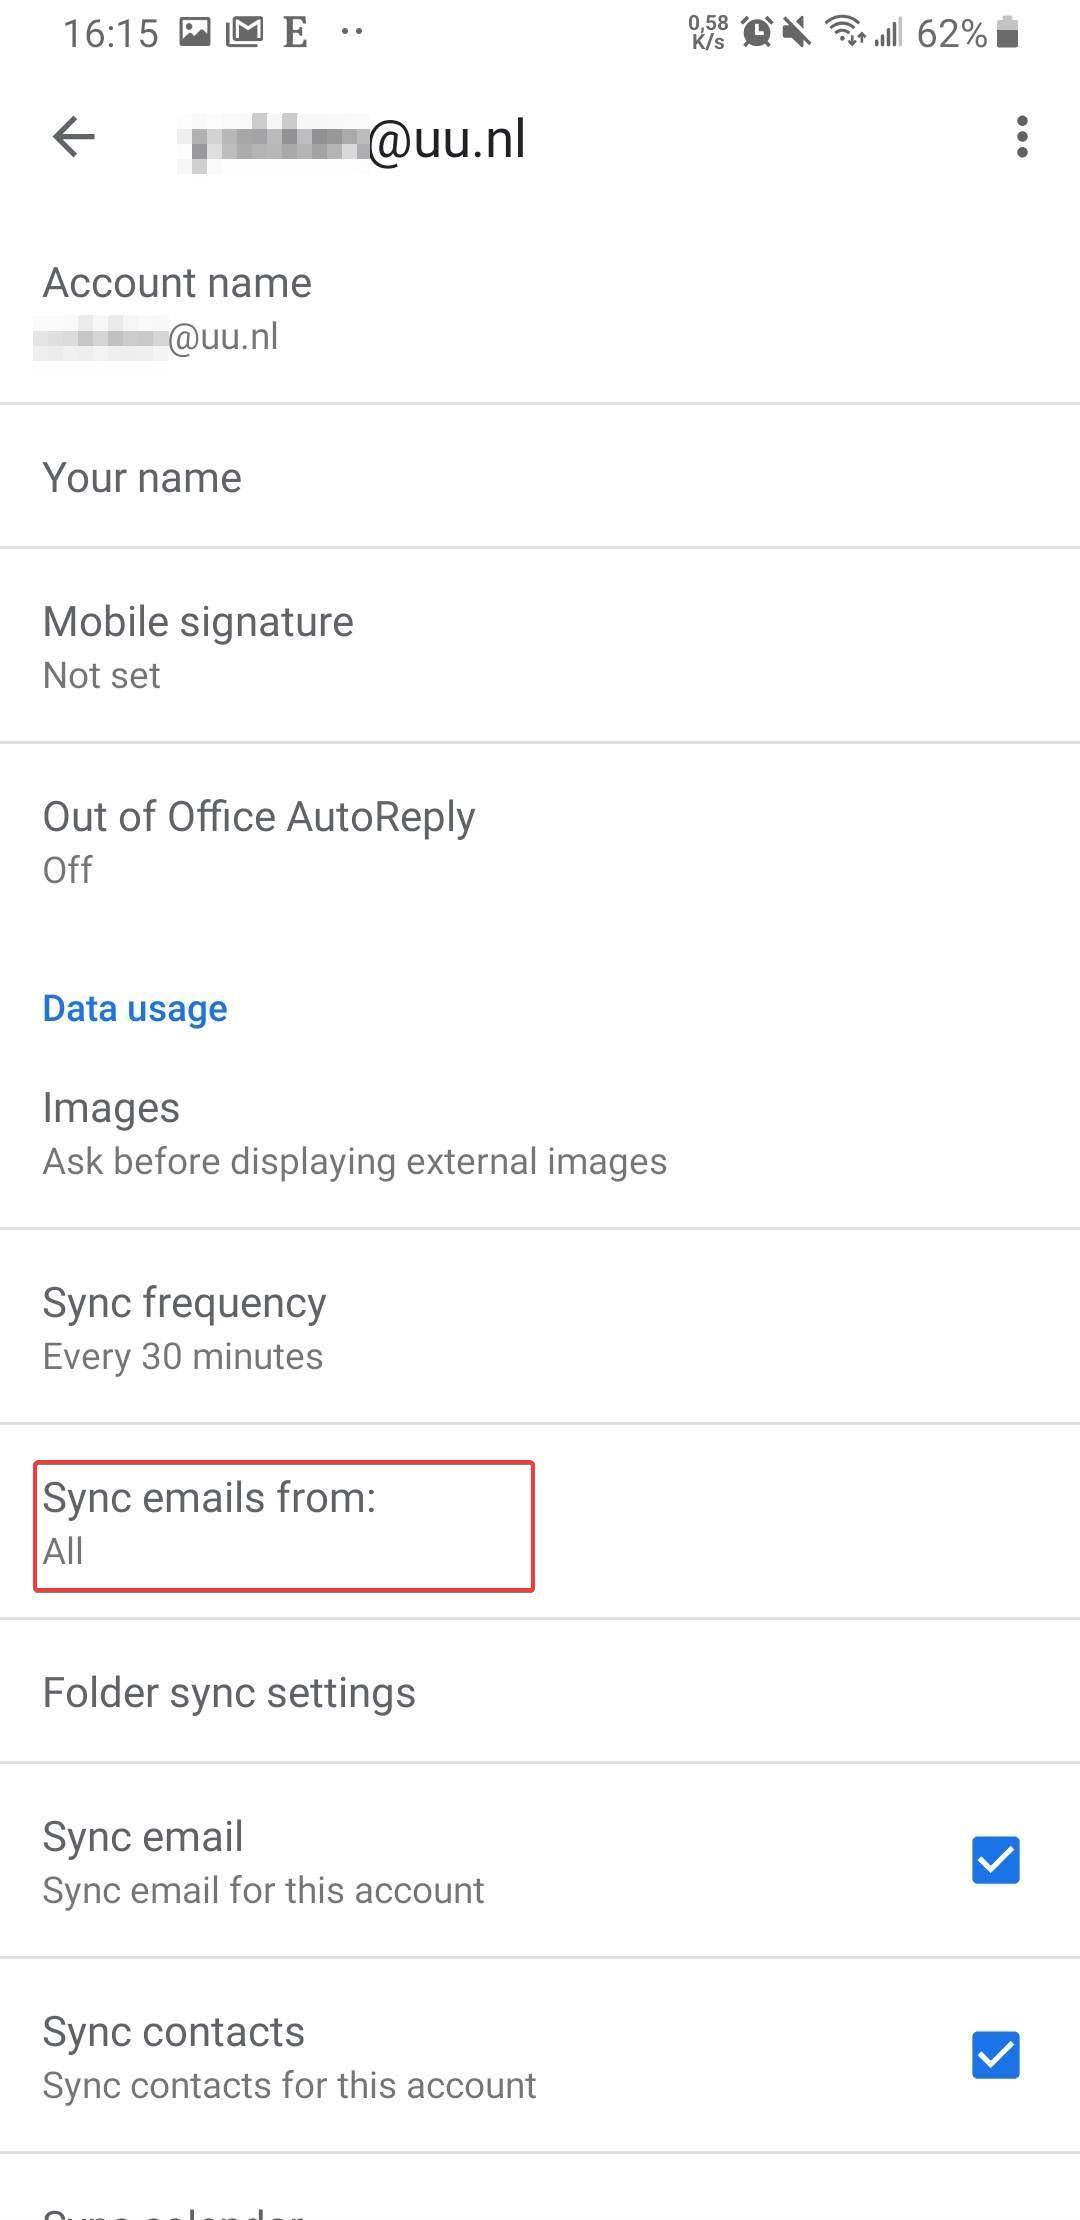
In this section you are able to change some default settings:
- The period of synchronization
- Your signature (at the bottom of every mail you send)
- Out of office settings
Last modified: 9/07/2020


