
Traintool
-
Step 1
1. Introduction Traintool (What Traintool has to offer)
- Traintool is an online tool in which students can practice communication skills through role play.
- Students can rehearse job interviews or coaching dialogues.
- Theory and examples will be shown to students.
- Students can try the role plays themselves, and their reactions will be filmed.
- Students can view their filmed reactions before handing them in.
- If satisfied, students can submit their reactions for feedback; if not, they can try again.
- This manual offers an introduction to using Traintool and can be used as a reference when using the tool.
-

Step 2
2. Login and Obtaining Rights
- Teachers and students from UU can log in with their Solis-ID at Traintool.
- Without rights, it is not possible to see anything yet.
- To obtain rights, fill in the information form for tools.
-
Step 3
3. Let’s Start!
-

Step 4
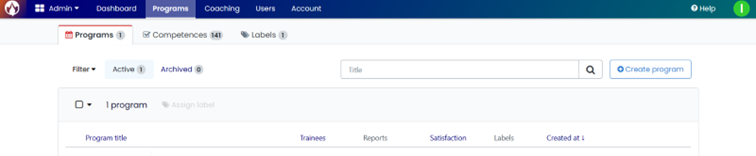
3.1 Creating Programs
- After logging in, you will enter the dashboard.
- As an admin, you can create a program:
- Click on ‘programs’ in the blue field above.
- In the right corner, click on the blue/white square with ‘create program’.
- Give the new program a title and select the right language.
-
Step 5
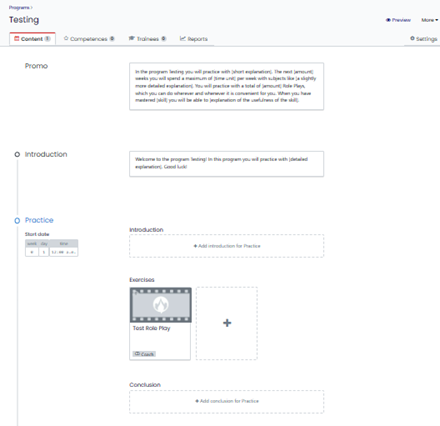
3.1.1 Adjusting Promo, Introduction, and Conclusion
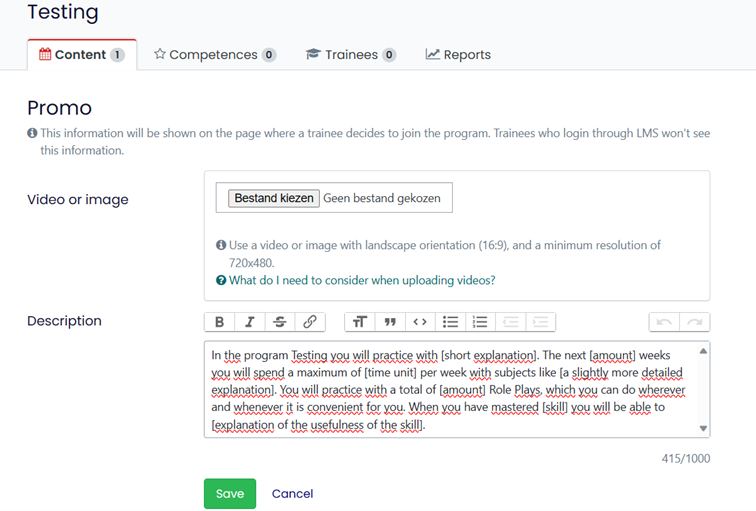
Promo: A promo is a short explanation. Adding a promo lets participants know what they’re getting into when they accept the program invitation. Introduction: The introduction provides an overview and context for the program. It sets the stage for what participants will learn and experience throughout the program.
Conclusion: The conclusion wraps up the program, summarizing the key points and learnings. It provides a sense of closure and often includes final thoughts or next steps for participants.
- Move your mouse to the text you want to alter.
- For example, to adjust the promo text, go to promo and write the new text.
- When editing a description text, you can also add videos and images.
-
Step 6
3.1.2 Creating Practices
- Traintool will set up a general program that you can adjust.
- Alter the number of practices by adding them using the plus sign above ‘Conclusion’.
- Adjust the introduction, exercises, and conclusion.
- Upload images, videos, and criteria.
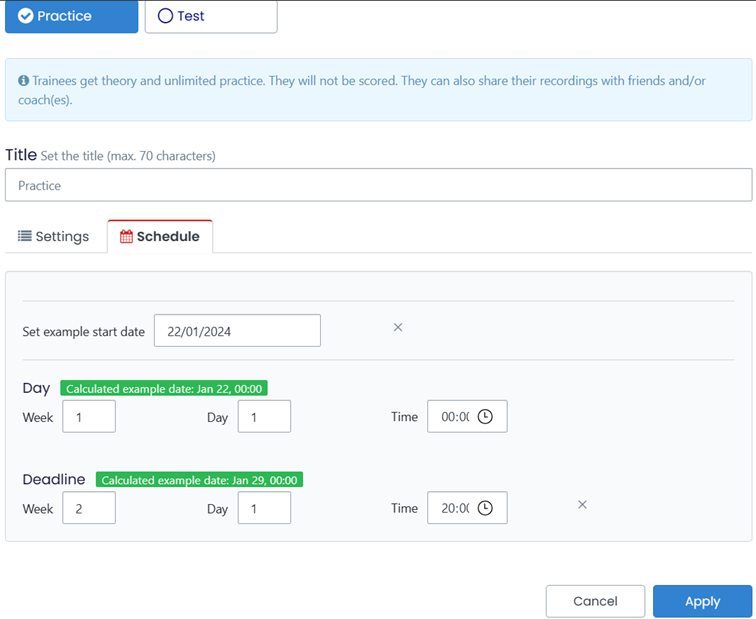
- Click on the blue ‘Practice’ heading to manage general data like the title, grading, and deadline.
- Click ‘preview’ in the upper right corner to see what students will see.
-

Set deadlines using the starting date of the whole exercise as the baseline. – Week 1 is the week of the starting date, week 2 the week after, and so on. – Specify the days, e.g., if the starting date is Monday, January 8th, a deadline on week 2, day 3 would be Wednesday, January 17th. – You will see these dates if you set the ‘Set example start date’ to the students’ starting date. A green section will show the start date and deadline.
-
Step 7
3.1.3 Different Purposes
- When creating a practice, you can select three different purposes:
- Practice: Trainees get theory and unlimited practice without scoring. They can share recordings with friends/coaches.
- Test: Determines the skill level of a trainee with limited attempts per Role Play. Trainees see a clear indication that the Role Play is part of a test.
- Live: Indicates live activities such as training days, workshops, or coach calls.
Selecting different purposes will give different setting options to choose from.
- When creating a practice, you can select three different purposes:
-
Step 8
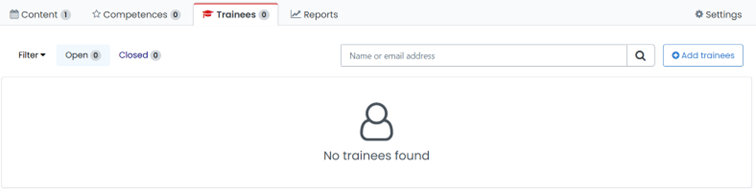
3.2 Adding Trainees
- Click on the ‘Trainees’ tab.
- Click on the ‘Add trainees’ button.
- Fill in the email addresses of the students, divided by commas.
- Alternatively, add trainees by a public link in ‘Settings’. Save it, and a link will appear which you can send to trainees.
-
Note: Trainees will be automatically put in group 1. Assign them to the right group and select the correct language.
-
Step 9
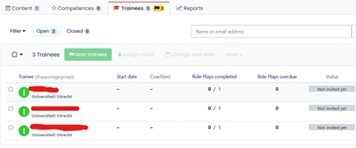
3.3 Sending Invites by Email
- Students will not be able to start immediately after being added.
- Start the trainees:
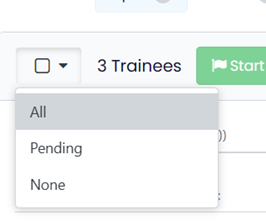
- Go to the ‘trainees’ tab.
- Check the boxes in front of their names (select all by clicking the top box).
- Click on the green ‘start trainees’ box.
- Indicate the date in the pop-up.
- A blue box will appear with ‘start trainees’; click it.
- Students will then receive an invitation.
-
Step 10
3.4 Assigning Coaches
- Once you add the participants, they can be found under ‘trainees’.
- Select the right participants (like when you started them).
- Click on ‘assign coach’.
- In the pop-up, type the coach’s name.
Click on the name and ‘assign coach’ (blue box below).
-
Step 11
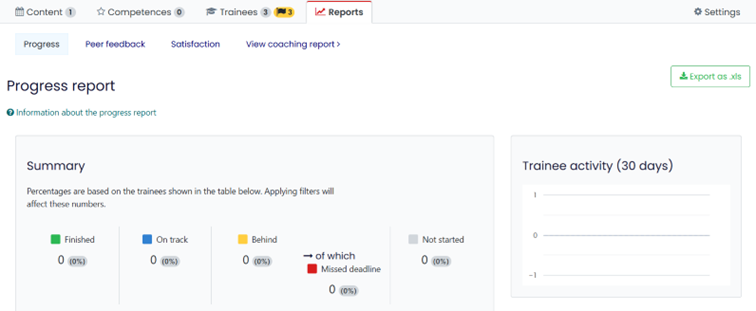
3.5 Following Progress
- Click ‘Reports’ to view the overview of trainee activity and status.
- Scroll down to see a list of all trainees with their progress.
- Click ‘Export as .xls’ to create an Excel file with all information.
-
Step 12
3.6 Archiving Program:
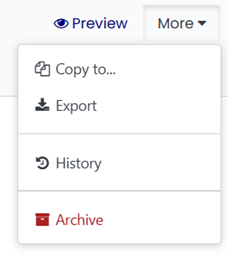
- Enter the program you want to archive.

- Click ‘More’
- Click ‘Archive’
- The program will become inactive and can be found within the ‘Archived’ tab.
-
- Enter the program you want to archive.
-
Step 13
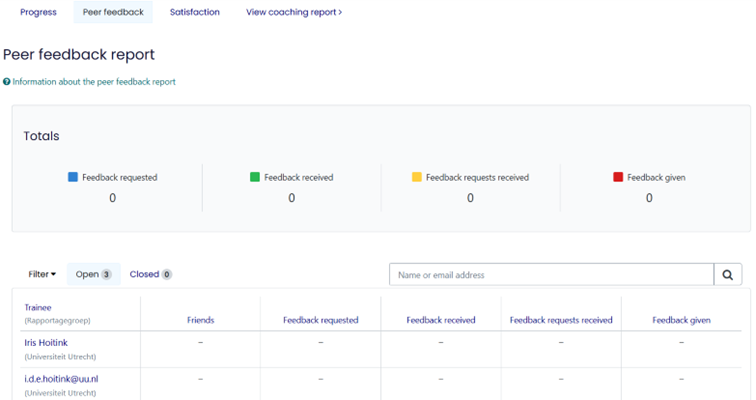
3.7 Feedback
- Trainees can give peer feedback during practice weeks.
- This option is on by default but can be changed in the ‘settings’ tab
How to…
- Set a minimum for peer feedback given and received.
- Set a limit for students to request feedback from a coach.
- In the ‘Peer feedback’ tab, find information such as the number of role plays for which trainees have requested or received feedback.
-
Contact
For questions or support with Traintool:
- Teaching support: Monday to Friday, 8.30 am – 5.00 pm
- Telephone: 030 253 2197
- Email: teachingsupport@uu.nl
- Website: Centre for Academic Teaching
Last modified: 24/07/2024