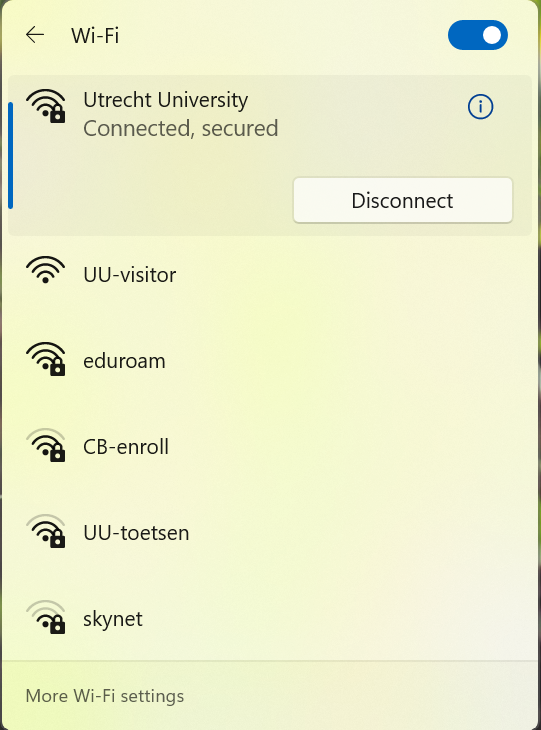
Utrecht University (Wifi) on Windows 11
This instruction guide describes how to connect your Windows laptop to the new wireless network Utrecht University for the first time.
-
This manual is also applicable for setting up a connection on Windows 10 laptops.
-
Step 1
Make sure you are in range of the wireless network Utrecht University. This is in most Utrecht University buildings.
-
Step 2
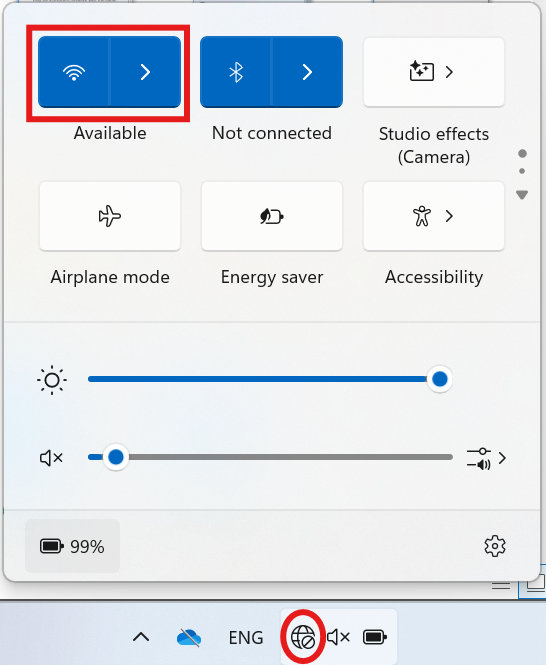
Click the mouse button on the network icon in the lower right corner of the taskbar. A pop-up with network settings appears. Near the wifi symbol icon, click the arrow.
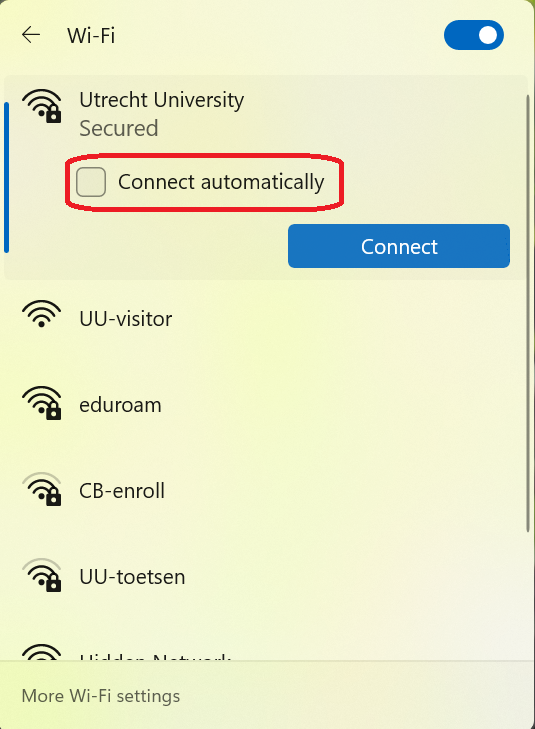
Click on “Utrecht University.”
-
Step 3
When you want your computer to automatically connect to Utrecht University the next time you are in range, check the box “Connect automatically”.
Click on “Connect”
-
Step 4
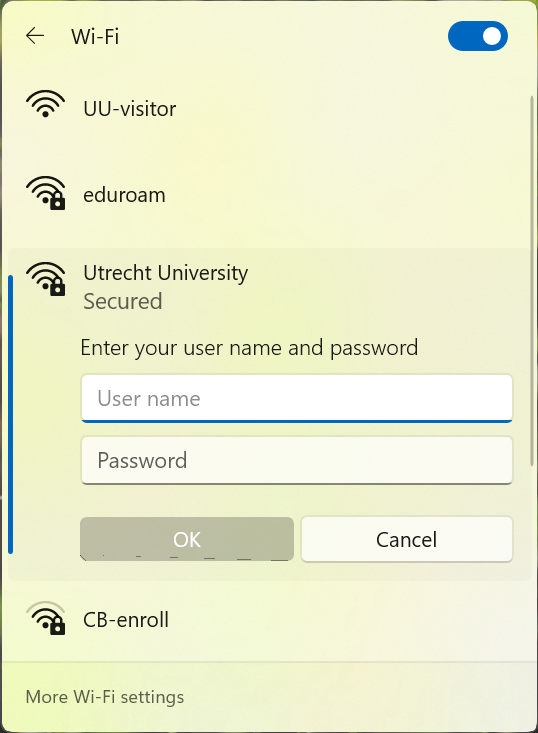
At Username, enter your University email address or your solis-id with @soliscom.uu.nl at the end.
Example: j.a.smith@students.uu.nl or j.a.smith@uu.nl / 43218765@soliscom.uu.nl or smith001@soliscom.uu.nl
Enter your Solis-password at “Password”.
After this, click on “OK”.
-
Step 5
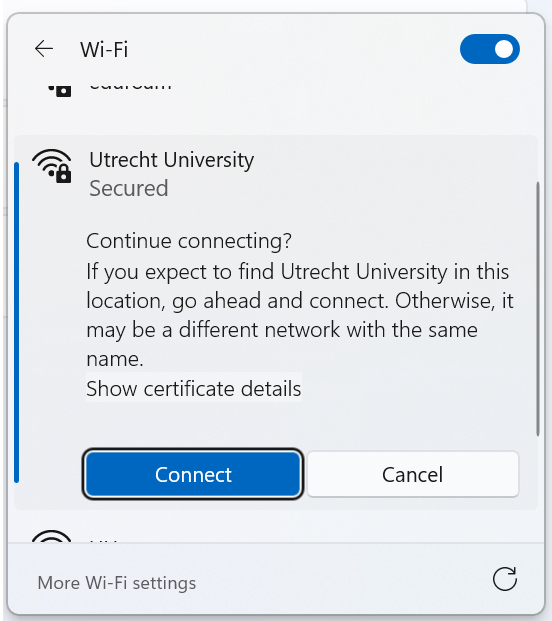
Click on “Connect” if you get this certificate notification.
-
Step 6
Wi-Fi (Utrecht University) is now configured on your device.
-
You will have to ‘forget’ the network before you can connect again with your new credentials. You can do this by following the steps below:
- Click on the Wi-Fi icon in the taskbar;
- Right-click on the ‘Utrecht University’ network;
- Click “Forget” (“Niet onthouden”);
- Reconnect with Utrecht University.
- When you reconnect with Utrecht University it will ask for your credentials. Enter your UU email address and new Solis-password.
Last modified: 30/01/2025


