
Printers: How to use the manual feed
This manual explains how to print a Word file on different kinds of paper on a Xerox Multifunctional using the manual feed (tray 5). For instance: labels, letterheads or colored paper.
For this instruction stationary (letterhead) will be used as an example.
-

How do I position paper in the tray?
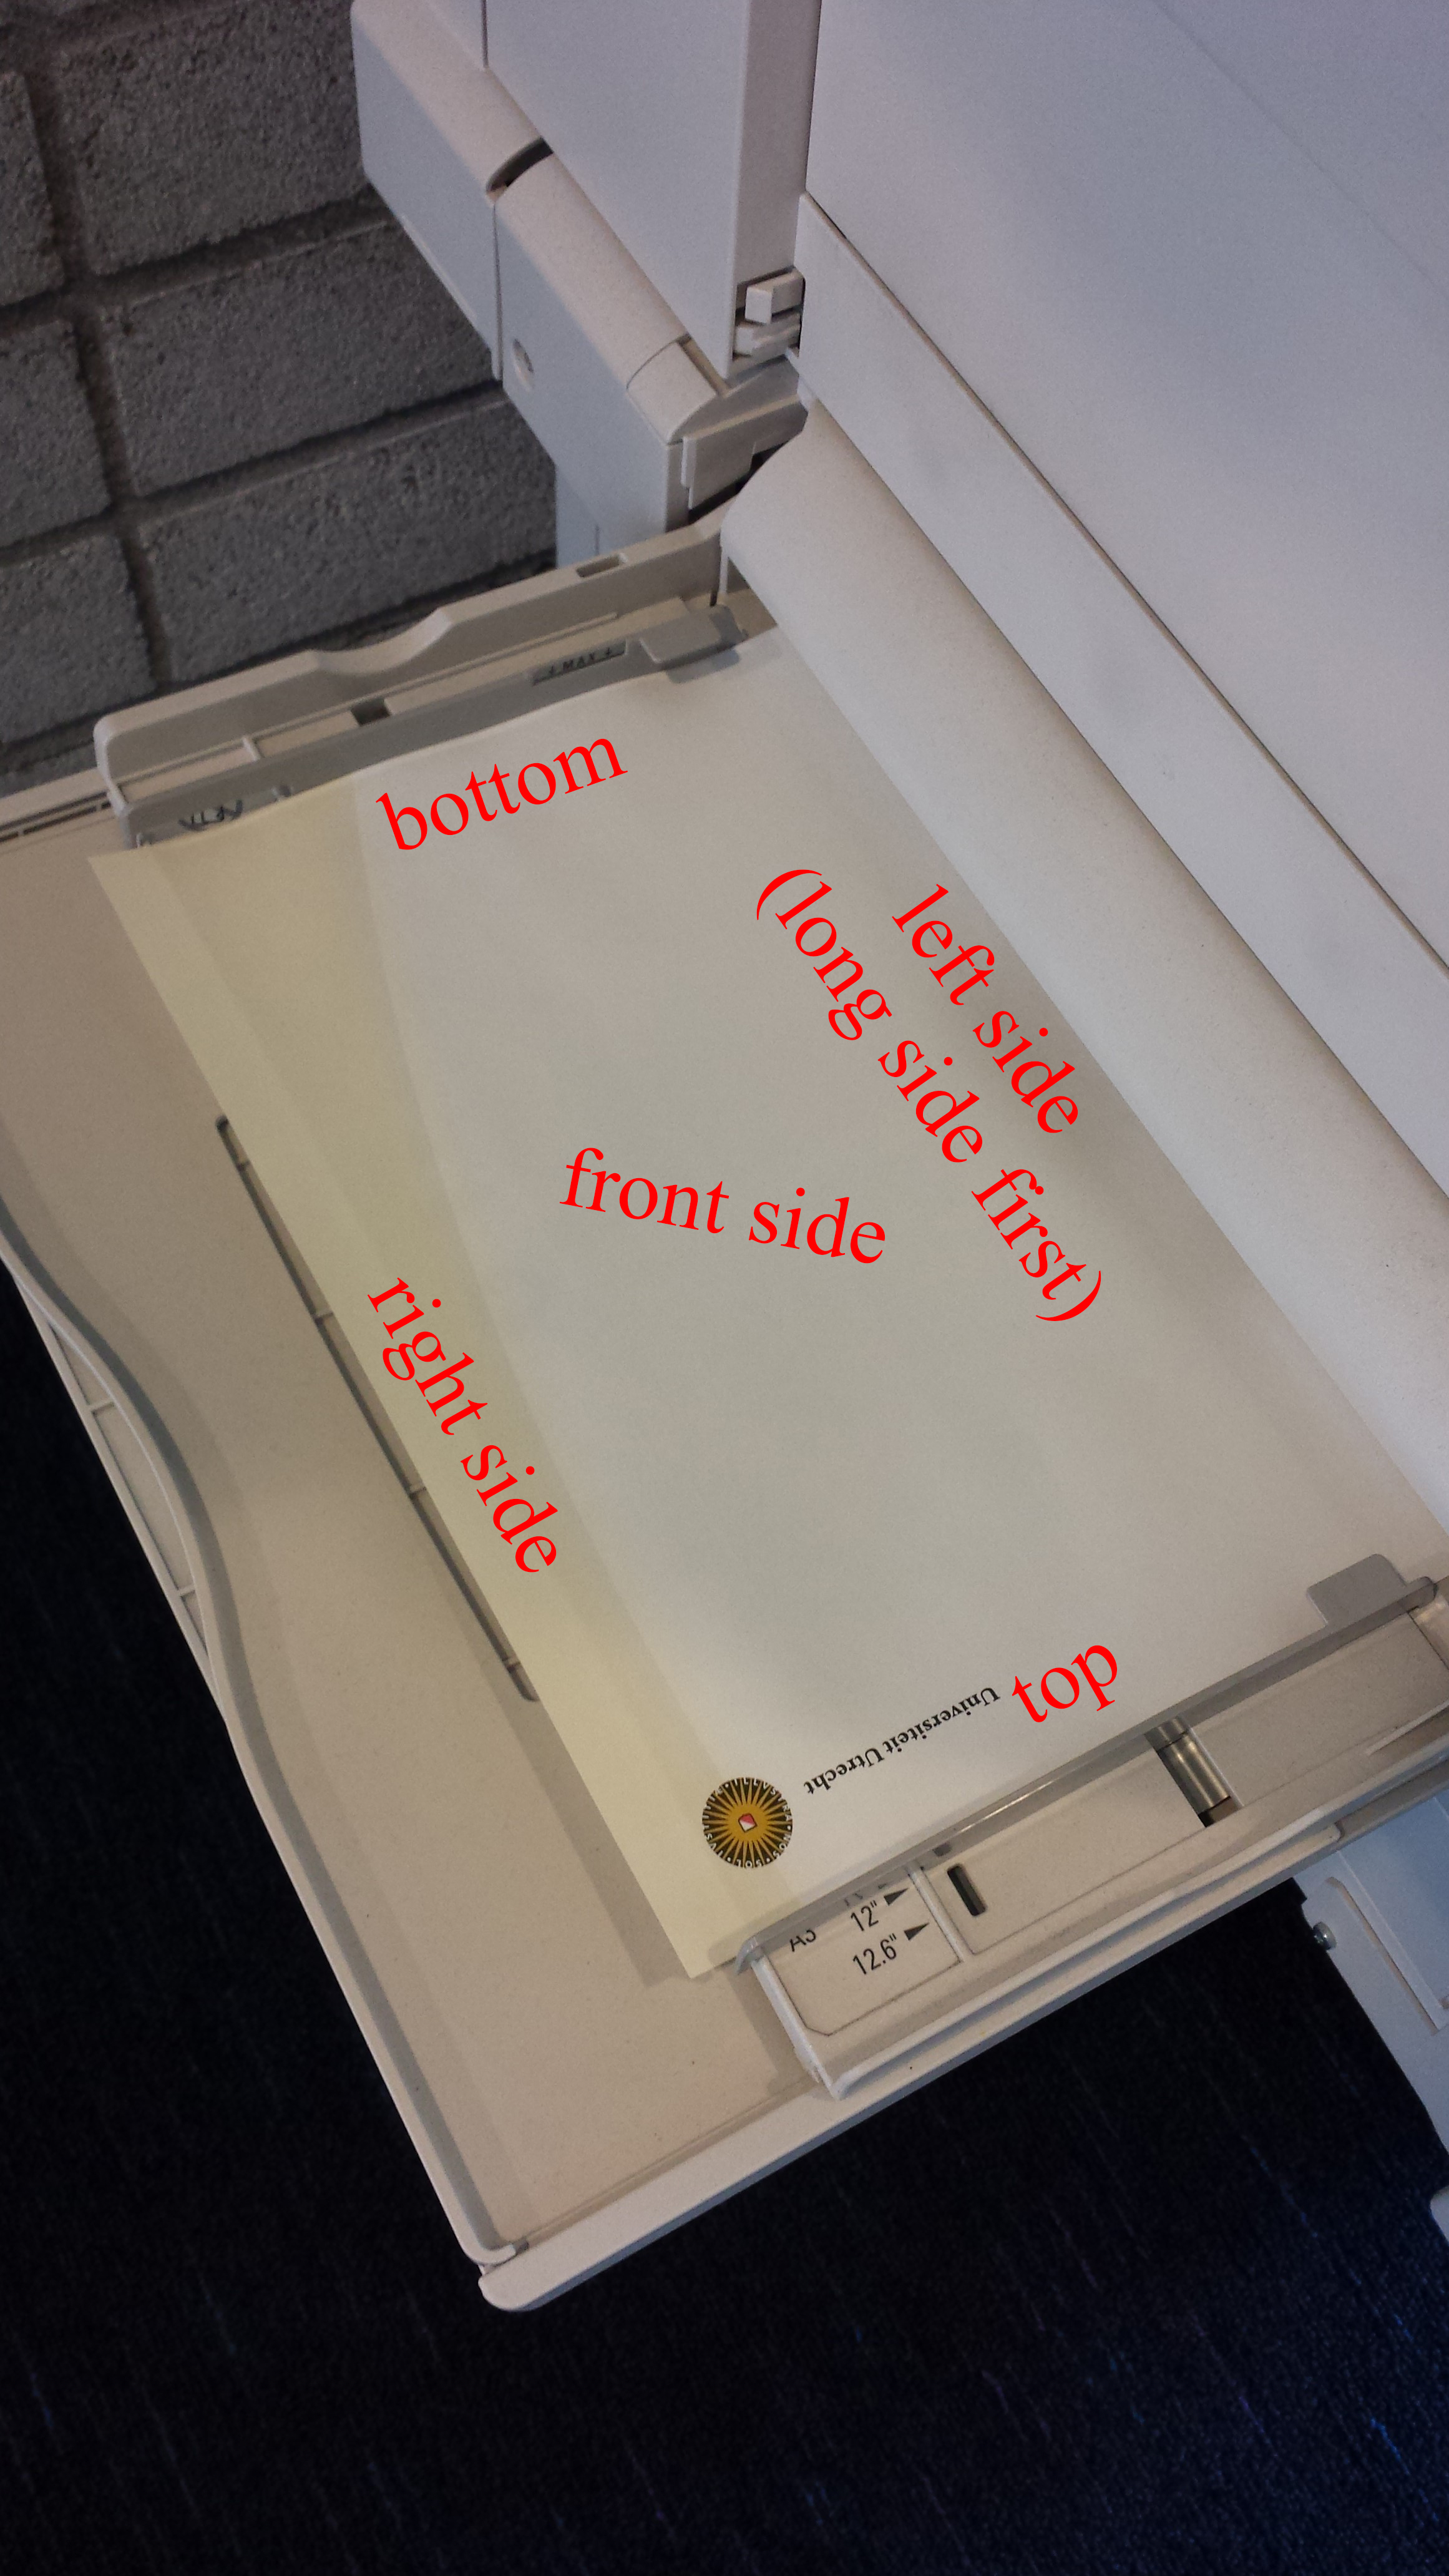
Most kinds of paper need to be positioned with the front facing down, but letterheads or other preprinted paper need to be placed facing up. This is to make sure that for preprinted documents with multiple pages you do not need to turn around the order.
-
Ensure that the settings on the printer and in Words are identical
Microsoft Word documents can be printed on several kinds of paper. It is important that the settings for size (incl. position), the kind, and the color of the paper are set identically in both Word and on the printer.
Setting the right kind of paper is important also because the printer prints different kinds in different manners. For example, labels are printed using a lower temperature to prevent them from coming loose during printing. Labels also make use of a shorter and straighter paper track, ending up in the middle tray (dark blue part underneath the control panel).
-
Step 1
- Open or create a document in Microsoft Word.
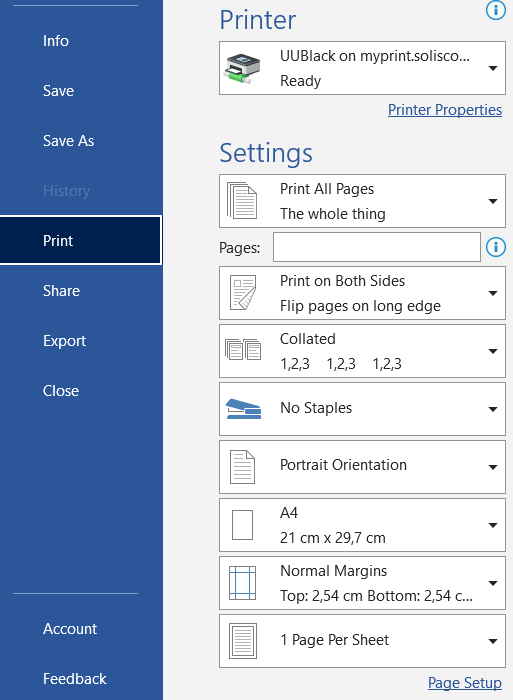
- Go to “File”, and click on “Print”.
- Check whether the desired printer is selected (UUBlack or UUColour).
- Click “Page Setup” (at the bottom of the page).
You can arrive at the same settings via “Printer Properties”, but in that case the properties will also apply to all other documents in the same Word session, which is not practical most of the time.
It is also possible to choose a tray right away, but that means you will also have to adjust the paper settings on the printer itself.
Furthermore, we advise against choosing a tray in this way, because not every printer has the same kind of paper in the same tray.
-
Step 2
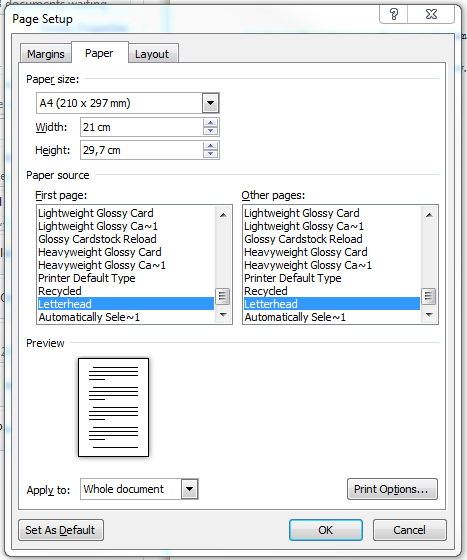
On the tab “Paper”, under “Paper Source” and “First page”, choose “Letterhead” (or the desired paper).
If you want to print the whole document on stationary, also click “Letterhead” under “Other pages”.
If you want to print the rest of the document on plain paper, then choose “Default tray (automatically select)” or “Plain”. Please note that if you have selected print on both sides page 2 will be printed on the next sheet. If you want to print page 2 on the back side of page 1, then you do have to choose “Letterhead” under “Other pages”, and print the rest of the document via a different print job using “Default tray”.
Click “OK”.
Then click “Print” (see step 1).
-
Step 3
Go to the printer. Take the special paper with you.
-
Step 4
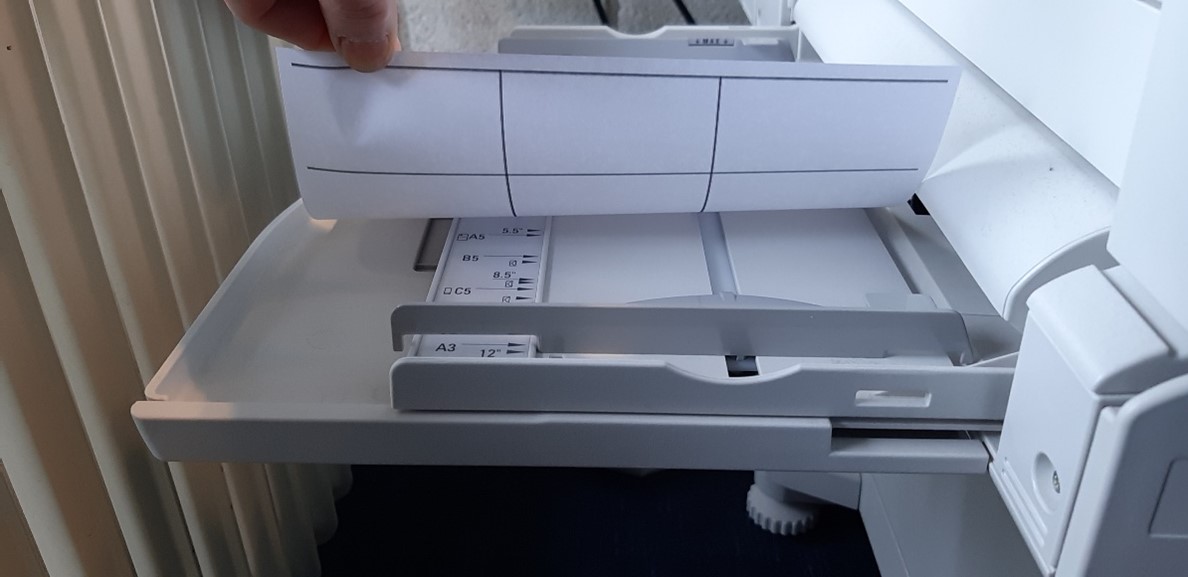
- Before you logon to the printer, place your special paper on tray 5.
- You will find this tray on the left underside of the machine (you might have to fold it out).
- Position the paper as demonstrated on the left.
- Make sure that the paper guides are neatly closed.
Tray 5 is capable of containing 100 sheets of 80 gsm (gr/m2), which is a stack of about 1 cm.
-
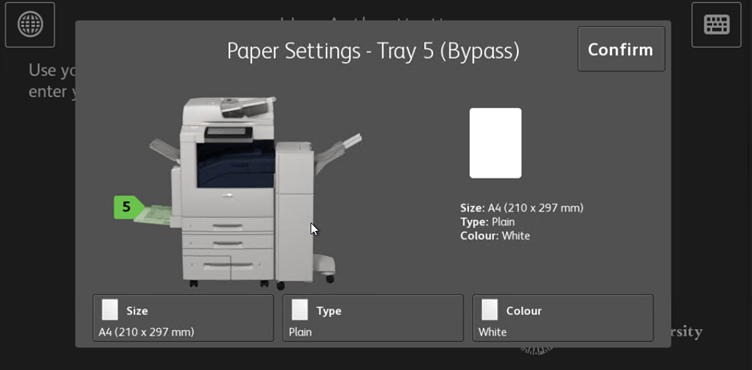
Step 5
The menu to configure your paper will be displayed automatically. You can then select and confirm the Size, Type and Colour exactly as you configured in your Word document.
-
Does the abovementioned menu not appear on the printer? In that case, move the paper in tray 5 a little. The paper sensor will trigger, and activate the menu.
-
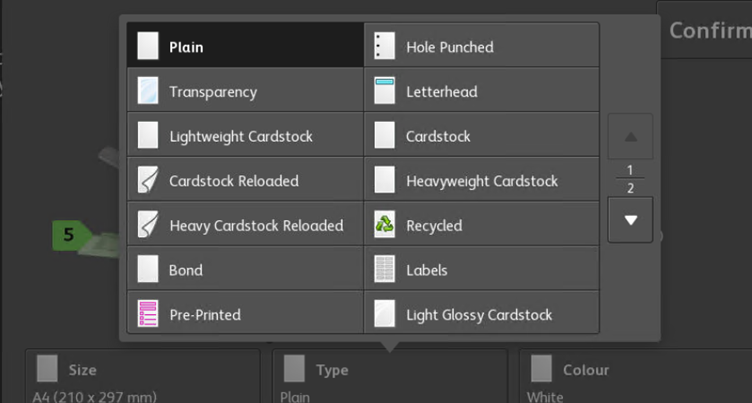
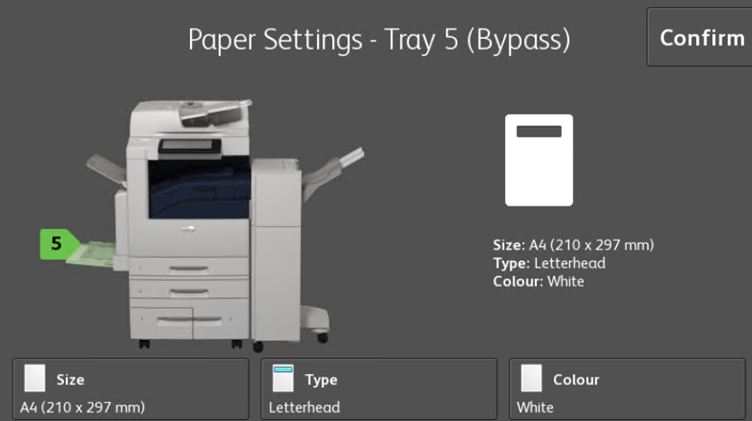
Step 6
In this example, you change the type “Plain” to “Letterhead” like you configured in Word.
Press “Confirm”.
-
Step 7
After pressing “Confirm”, the “Paper Settings” menu disappears.
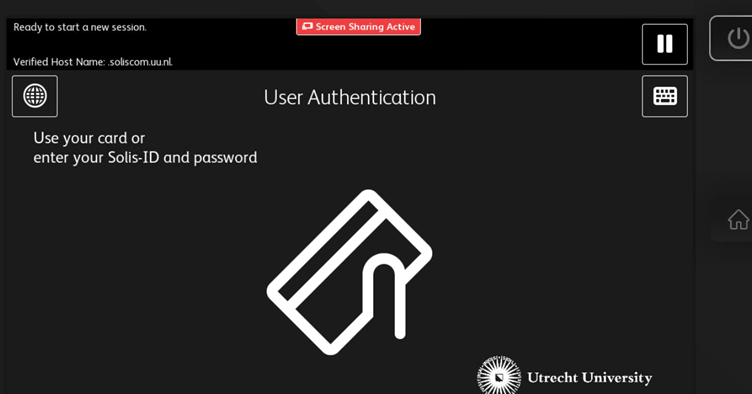
Now you can logon to the printer and select “Print”.
Release your print job. The special paper from Tray 5 will be automatically used for your job.
If you get an error about “Resources Required”, check the settings again. For example, the orientation of your document (Size) may be incorrect.
-

- At the UU, Staples label sheets are in use with 3 columns and 8 rows and without margins all around at the edges of the sheet. That edge is the part where the printer cannot print. You can set those margins with the Page Layout to 0.5 cm, but then the layout of the labels gets confused.
- However, if you set the page margins to 0 cm, Word will give an error message when giving a print command that the margins are not correct, with the option to fix the margins or to ignore the error. Then choose the 2nd option (Ignore), then it will work out fine; if you choose the 1st option (Fix), the layout will still get confused. If you have chosen the 2nd option by mistake, make sure that you do not save the document, otherwise you will have to set the label format again.
Points to check:
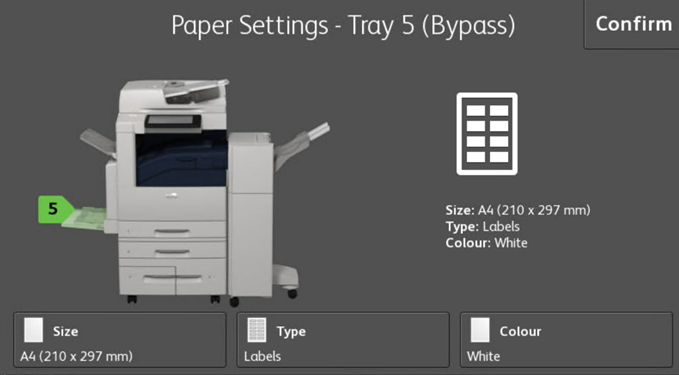
- In Word, choose A4 portrait and paper type Labels.
- On the printer, confirm these choices.
- Sending a document directly to Tray 5 does not work (always). The reason is that the settings of tray 5 can be adjusted by anyone. If the tray is set differently than your document, the printer will not print your document (immediately).
- To test the settings, first place a plain sheet of paper and make a test print.
- The label should be placed face down, with the longest side against the printer.

Last modified: 21/05/2024