
Teams: organize a webinar using a live event (large groups)
In Teams employees are capable to organize live events for a maximum of 10.000 attendees. This can be used for example if you want to organize a webinar.
This manual explains how to setup a live event and can be used by the organizing people. We strongly recommend testing the set up of the event beforehand. If something doesn’t work as it should the Servicedesk or the Microsoft 365 teams can offer support.
Setting up a live event and modifying it afterward should always be done by using the Teams desktop application (not online or Outlook). If you have not installed the desktop application yet you can find more information in this manual: Teams: chat and work together
More extensive help resources for live events can be found through our Microsoft 365 support site. Click on Office training | Teams >> Meeting & calls >> Live events.
-

Step 1
Open the Teams desktop application. In the menu on the left side click on ‘Calendar’.
-
Step 2
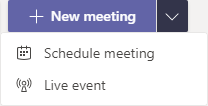
In the top right corner click on the purple down facing arrow, next to the purple button for ‘New meeting’, and click on ‘Live event’.
-
Step 3
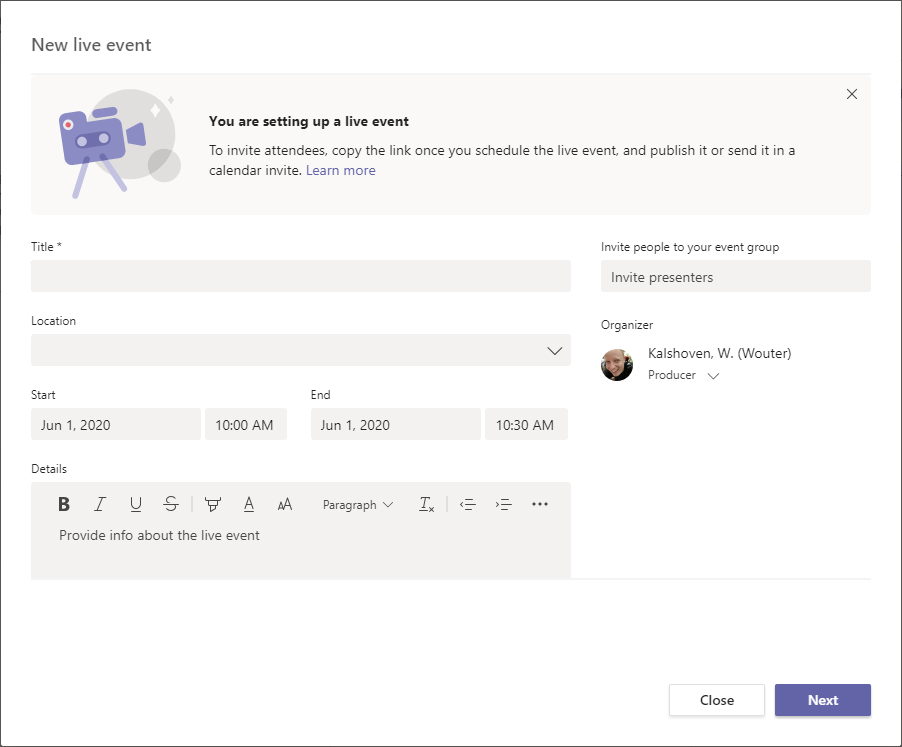
In the window for a new live event you add the name, date and time of the live event.
On the right side you can add the people who will organize the live event. Think about the people behind the scenes (producers) and the people “on stage” (presenters). After adding a person you can click on this person and assign the correct role.
The people you’re adding can be UU people, but also external people. If you want to add an external person it’s required that this person was already added to a team in Teams.
Beware! Don’t invite people here who are only going to attend the live event. Attendees will be invited later on and will receive an invitation link.
- Click on ‘Next’.
-

-
Step 4
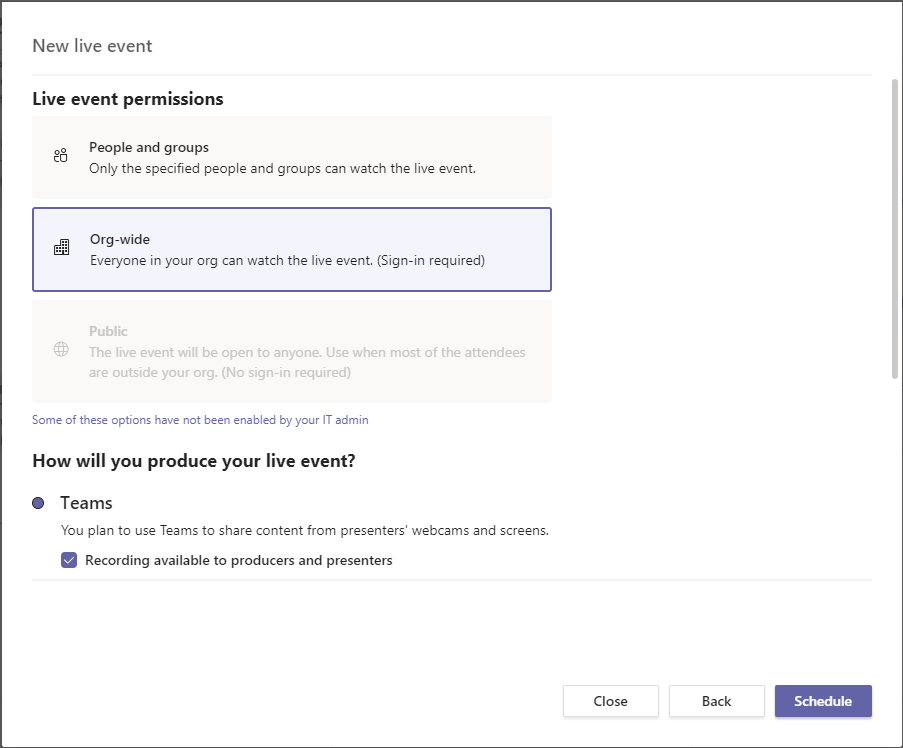
Below ‘Live event permissions’ you choose who is authorized to attend the live event. Choose from:
- People and groups – Choose this one if you want to invite individual people or groups of people, based on their membership of a team or based on Active Directory groups.
- Org-wide – Choose this one if everyone at UU should be able to attend the live event.
In both cases the attendee must logon with his/her Microsoft 365 account.
In both cases users who were invited to teams as guests are also able to attend the live event.
Beware! After making your choice only the permissions are set, nobody has been invited yet. Attendees will be invited later on and will receive an invitation link.
- Scroll down in the popup.
-
Step 5
Below ‘How will you produce your live event?’ Teams is selected by default and can be left untouched.
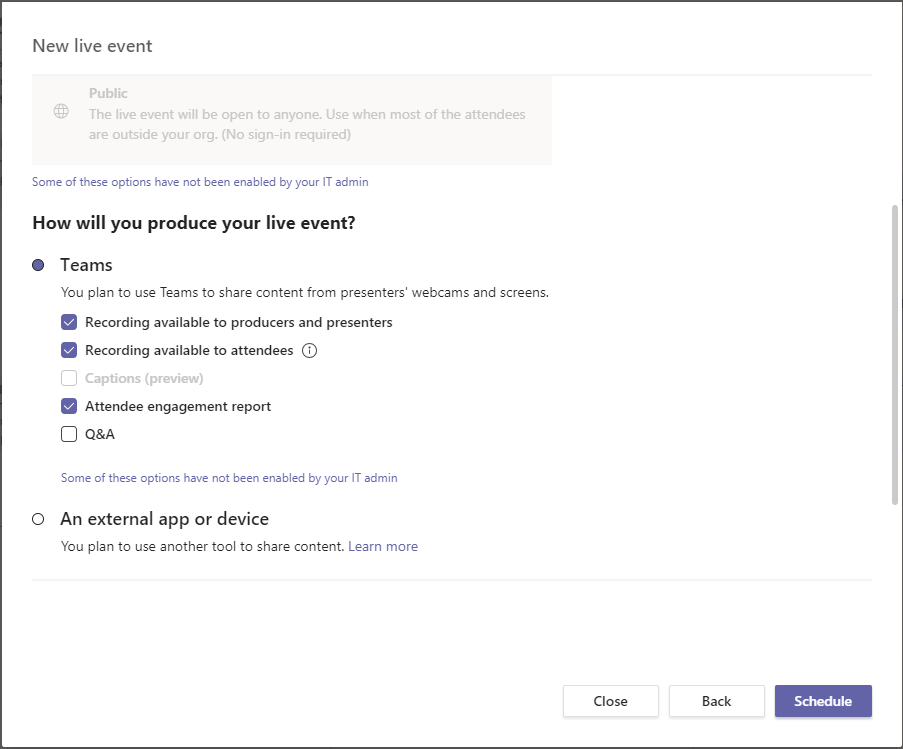
Below you can enable/disable several live event settings. Usually the default settings are just fine, but enabling Q&A can be very interesting.
If Q&A is enabled attendees are capable to ask question using a separate chat section. These questions are delivered to the producers and presenters. Behind the scenes one of these persons has to moderate these questions. If a question is relevant and is going to be answered then this question can be published by the moderator. Then this question is visible to everyone.
If Q&A is desired then you should activate it at this point. Enabling it afterwards is not working really smoothly.
- Click on Schedule to finish creating and scheduling the live event.
Beware! Only the people added in step 3 as producers and presenters will receive an invitation in their Outlook calendar.
-
Step 6
After scheduling the live event, attendees can be invited. To do this:
- Open the calendar in the Teams desktop application
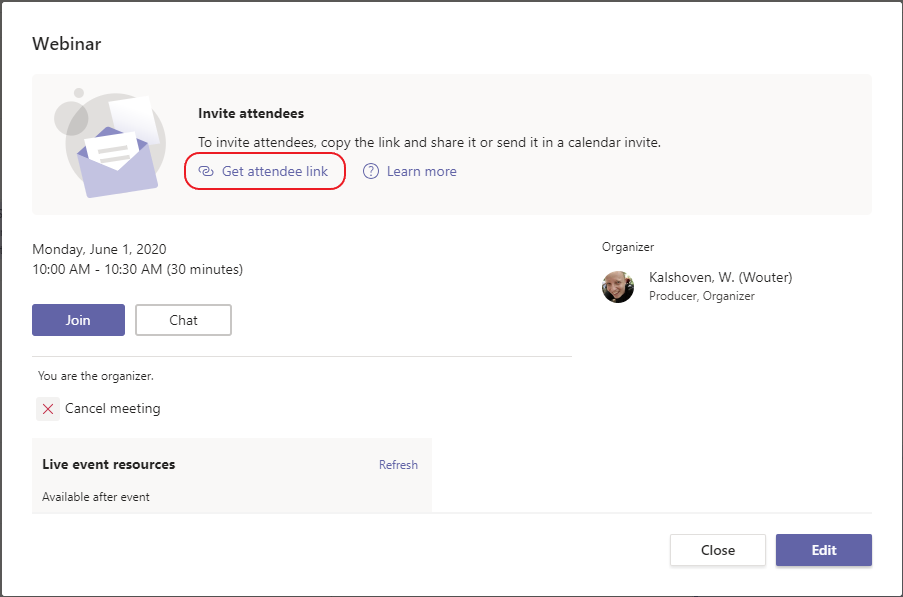
- Then click on the live event and click on ‘Get attendee link’.
When you click on the link it will be copied to the clipboard.
-
Step 7
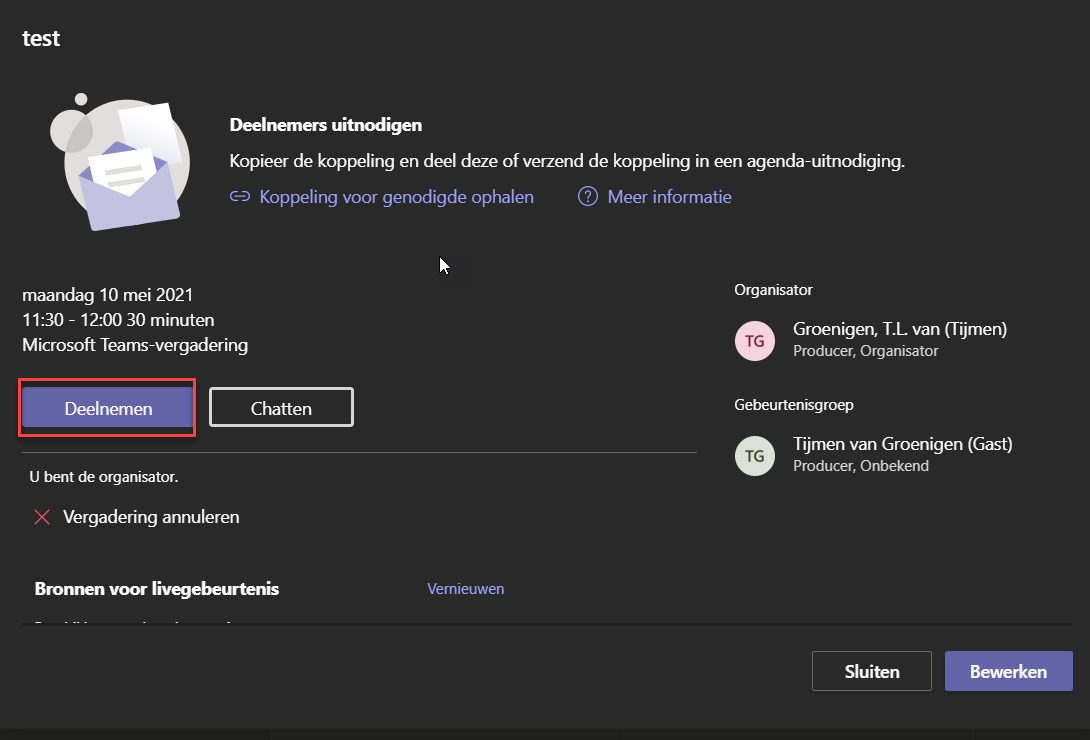
Now the link can be distributed. You can do this for example by using mail or Teams. Another possibility is creating a meeting in Outlook where you paste the link in the meeting details. Send the invitation to the people you want like it’s a normal meeting. Benefit of this is that the live event will show up in the calendar of the invitees. You can join the life event from the calendar by double clicking on the event and choosing ‘Join’ (see image).
If the attendees have the link they can click on it to attend the live event. This can be done in the Teams desktop application, but also in the browser or using a smartphone or tablet.
In this popup you also see “Live event resources”. After the live event here you can find the recording and for example the attendee engagement report if configured in step 5.
-
Step 8
Producing the live event
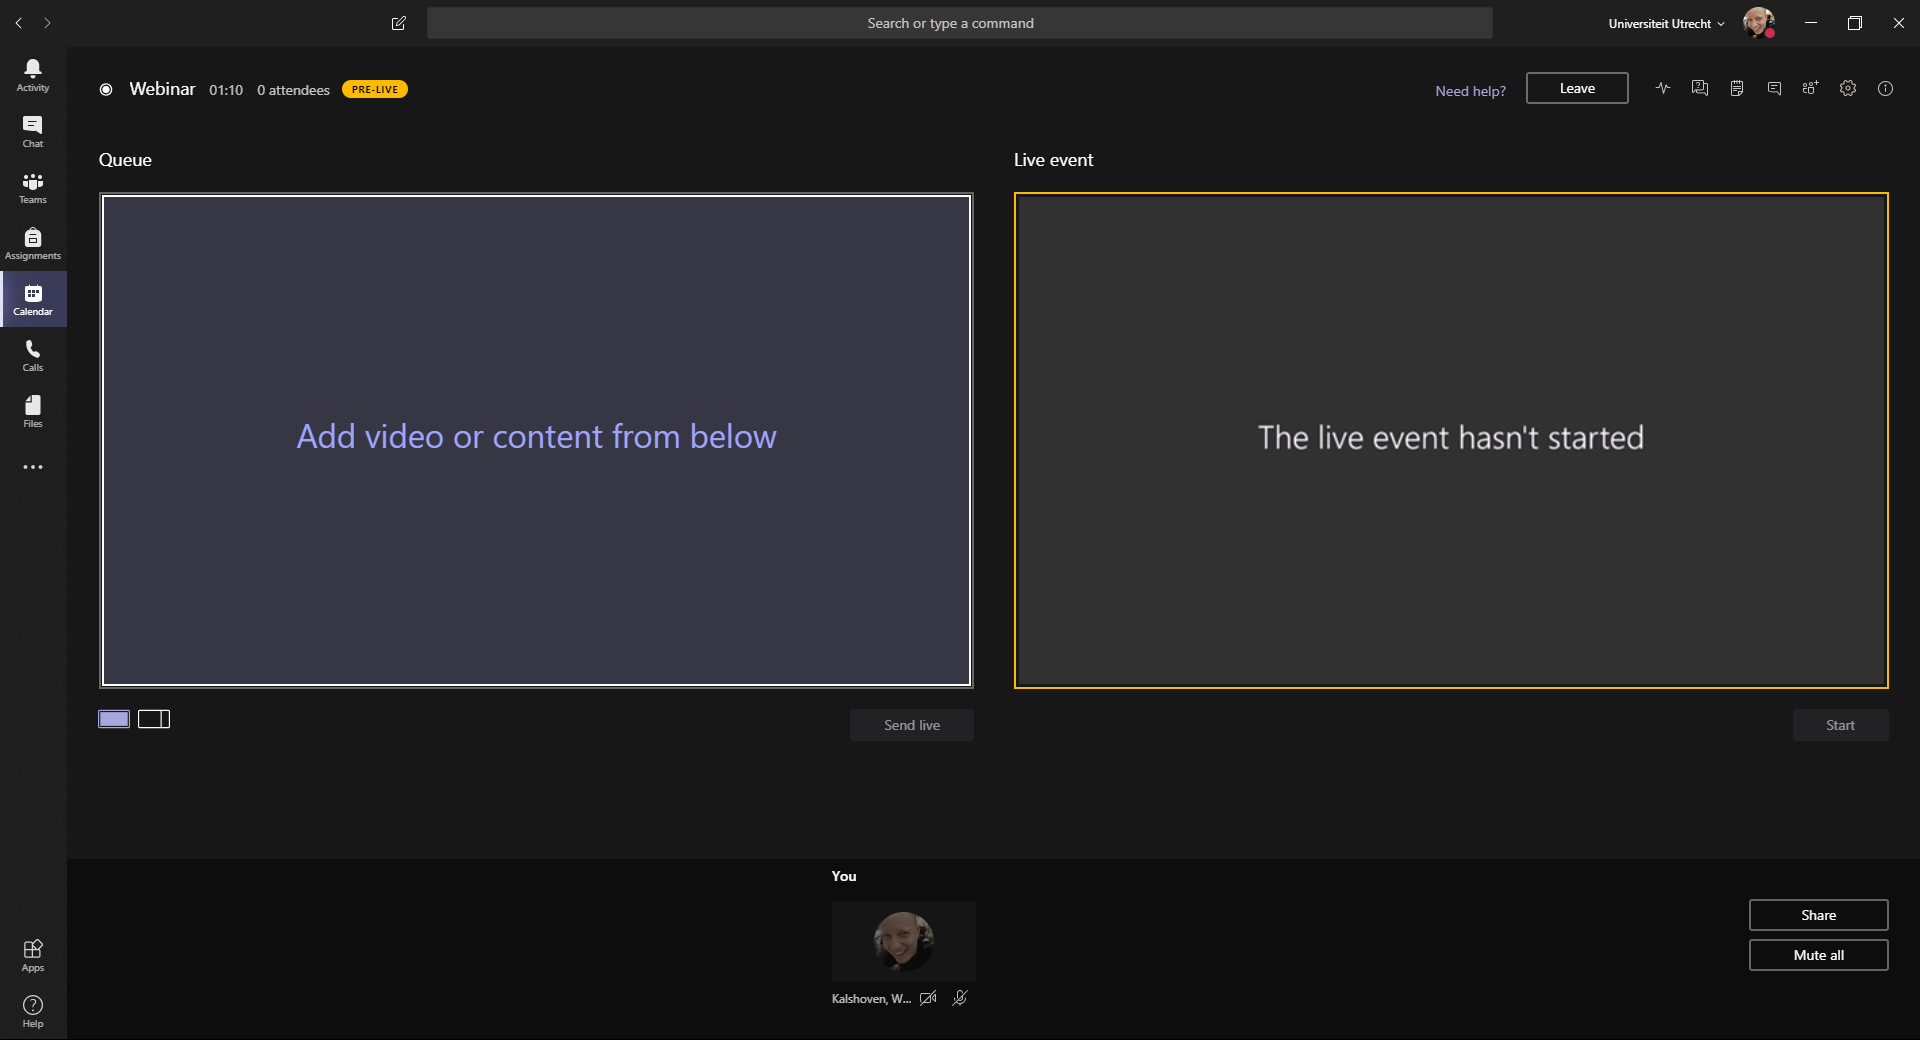
To start the live event open the live event in your Teams or Outlook calendar and click on the link or button to join the live event. This works the same as if you’re joining a regular meeting. After deciding you already want to enable your camera and microphone you click on ‘Join now’. Then you see a window like in the image on the left.
The window consist of three components:
- The big section on the left side is the queue. Content in this section is only visible to you. In this section you prepare the things you want to send live. If you click on ‘Send live’ then the content will appear on the devices of the attendees.
- The big section on the right side is the actual live event. Starting the live event can be done by clicking on the ‘Start’ button. If the live event is started then here you’ll exactly see the same as the attendees. Do keep in mind a lag of 15 to 60 seconds before the attendees really see the content.
- The screen wide bar at the bottom of the window displays the organizer, producers and presenters as soon as they joined the live event. Also content shared by other producers and presenters is displayed over here. Think of windows and presentations. This content can be used to send to the live event.
Below the left big section on the left side you see two screen layouts. By default “Single source” is selected (left). The other option is “Content left”. If you choose this one the content is displayed on the left side (for example a presentation) and on the right side you can display a video (for example a presenter).
As a producer you can now start preparing the content for broadcasting live.
-
Step 9
Sharing of your own content can be done with the following steps.
- A. If the screen layout “Content left” is selected, click left in the big section.
B. If the screen layout “Single source” is selected, move on to step 2. - At the bottom on the right side click on Share.
- Choose the desktop or window you want to share.
- The window jumps to what you clicked on. At the bottom on the right side in the tiny window click on “Call is in progress. Click here to go back to the call screen.”.
- The window jumps back to the live event in Teams. At the bottom of the window, in the screen wide bar, below “Content”, click on what you want to share.
- The content appears in the big section on the left side
Sharing a video can be done with the following steps.
- A. If the screen layout “Content left” is selected, click in the right small section.
B. If the screen layout “Single source” is selected, move on to step 2. - Click on the video of the person you want to share (camera already has to be enabled).
- The video appears in the big section on the left side.
If the queue section contains the correct content you can click on ‘Send live’ any moment.
Beware! Attendees can always hear all producers and presenters, also if they are not on the screen. Take care that your microphone is muted if you’re not speaking.
- A. If the screen layout “Content left” is selected, click left in the big section.
-

Step 10
In the top right corner you’ll find several supporting functionalities for producing a live event.
Health and performance:
Metric live event data. Think about network, webcam or policy information.
Q&A (if enabled in stap 5):
The section where attendees can ask their questions. All question are delivered on the “New” tab. A producer or presenter can publish a question if it’s going to be answered during the live event. After publishing, the question is visible to everyone.
Meeting notes:
Here you can make notes about the live event. These notes will be available after the live event.
Conversation:
This panel can be used for chat based communication between organizer, producers and presenters. After the live event this conversation will be available and can also be continued.
Participants:
Here you see the participating organizer, producers and presenters.
Settings pane:
Here you find device settings regarding audio and video. You can select if you want to use your headset or for example your laptop speakers and microphone.
Call info:
Here you find some general information about the live event like start date and time and end date and time.
-
Step 11
The roles Presenter and Attendee
Presenter
As a presenter you have to use the Teams desktop application. After joining the live event you have the same capabilities as in a regular Teams meeting.
If ‘Q&A’ was enabled in step 5 then you’ll see an extra button for this. In the Q&A section you’ll have the same capabilities as a producer.
Attendee
As an attendee you’ll receive an invitation link. Click on the link to attend the live event. This can be done in the Teams desktop application, but also in the browser or using a smartphone or tablet.
If ‘Q&A’ was enabled in step 5 you can ask questions in the Q&A panel on the right side.
If ‘Recording available to attendees’ was enabled in step 5 then after the live event an attendee can (re)watch the live event using the original invitation link.
Last modified: 14/07/2023