

Microsoft Teams: Organize a Town Hall / Meeting for Large Scale Events
A Town Hall is a large‑scale, one‑way oriented Teams meeting for up to 10,000 participants (or 100,000 with Teams Premium) and is intended for organization‑wide communication. Participants mainly watch; presenters and producers determine what is visible.
A Town Hall is useful when:
- You are hosting a large scale event
- You want to share and stream content in high quality
- You want to use a professional layout and production controls
During a Town Hall, the focus remains on the speakers while participants watch. Cameras and microphones of participants are disabled by default. Participants can, however, join interactive elements such as a Q&A session.
You can find more information about Microsoft Teams here: Teams: chat and work together
-

Step 1
To create a Town Hall, open the Teams desktop app and click Calendar in the left menu.
-

Step 2
Click New in the top right, then select Town hall.
-

Step 3
In the new meeting window, enter the meeting name and set the start and end time. You can also add a description.
-
Step 4
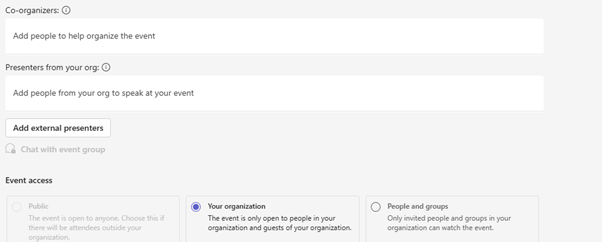
Fill in the following fields (if applicable):
- Organizer – manages settings and access
- Co‑organizer – supports the organizer
- Presenter – speaks and shares content
- External presenter – presenters from outside the organization
You can also add participants in the field below. Everyone added to these fields automatically receives an invitation.
-
Step 5
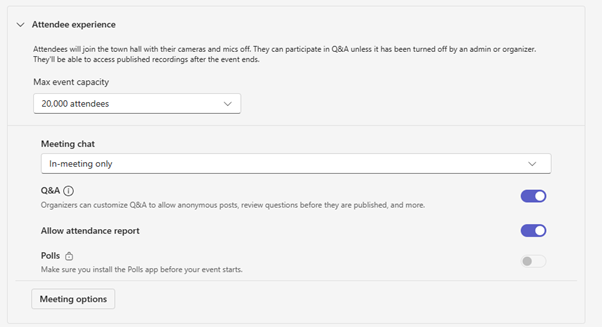
Scroll down to adjust meeting settings. If you want to use Q&A, make sure it is enabled. You can also enable or disable meeting chat.
-

Step 6
At the bottom, click Meeting options. Here you will find additional settings. Under Recording and transcription, you can choose whether a recording and transcript should be created automatically. Under Meeting access, you can set who is allowed to admit others from the lobby.
-
Step 7
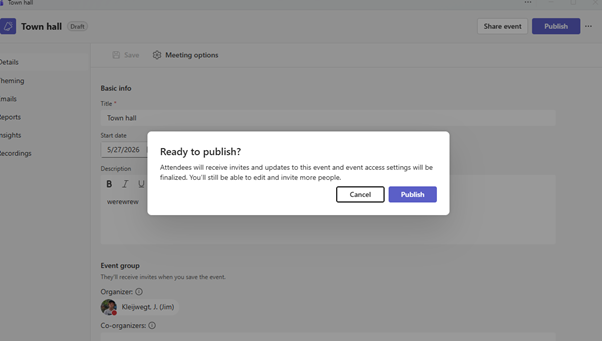
When everything is configured, click Save in the top left. Then publish the event by clicking Publish in the top right.
-
Step 8
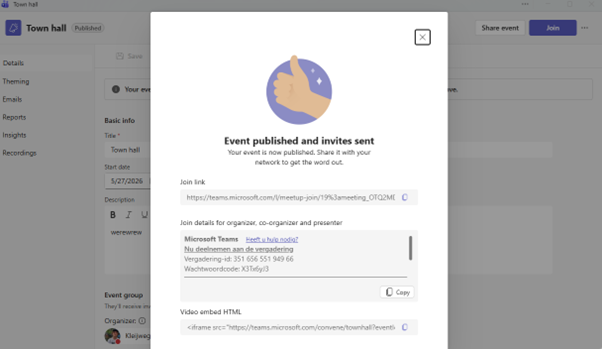
Shareable links will now appear. These can be manually shared with participants, organizers, or co‑organizers if needed. Participants join by clicking the link — via the Teams desktop app, browser, smartphone, or tablet.
-
Step 9
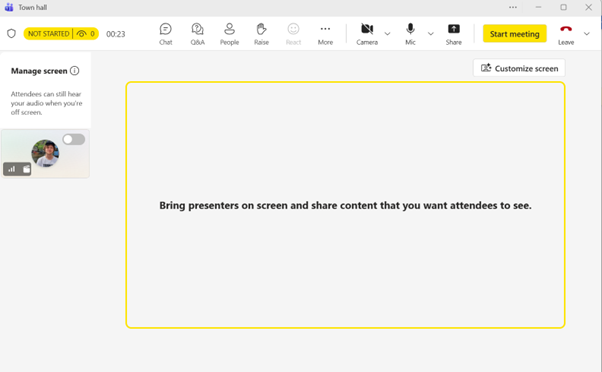
When you open the event in your calendar and click Join, you first enter the preparation screen. This works the same as a regular meeting: choose whether your camera and microphone are on and check your device settings.
You will not see the live broadcast yet. At the top, you will see that the event has not started. You can already see the controls you will use during the broadcast — Chat, Q&A, People, and Share — but they are not yet active for participants.
Only when you click Start meeting does the broadcast begin, and everything you show becomes visible to participants. Until then, you can prepare without anyone seeing you.
-
Step 10
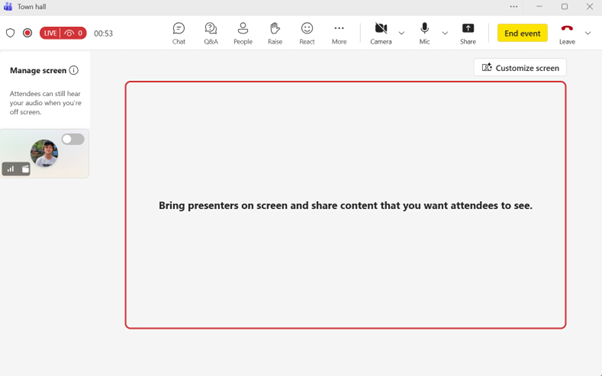
The large block in the center shows the live preview — what is currently being broadcast. Start the broadcast using the Start button at the top. Once live, you will see the same as participants, with a slight delay.
At the top are the controls you use during the broadcast. Via Share, you can make a screen, window, or presentation available. Under … (More) you’ll find options such as starting a recording and device settings.
On the right is the Q&A panel, where you approve, answer, or hide questions. This panel is only visible to organizers and presenters.
On the left is the bar showing organizers, presenters, and shared content. When someone joins the Town Hall, they appear here. Shared screens or presentations also appear here, ready to be made live.
Presenter management happens via the People list at the top, where you can adjust roles.
When the broadcast is finished, click End event to close it for all participants.
-
Step 11
Sharing content in a Town Hall is simpler than in the old Live Events.
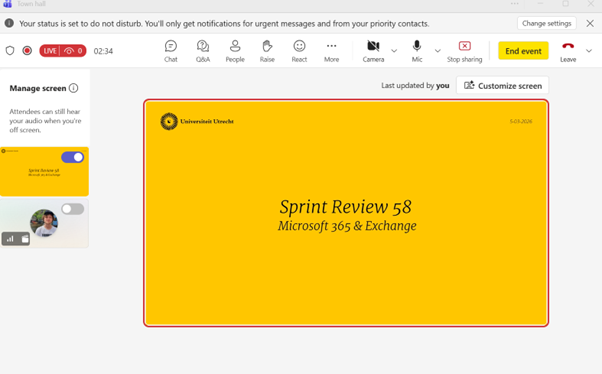
Click Share in the top right and choose the screen or window you want to show. The selected content appears as a preview on the left. Only when you toggle the switch in the preview does the content move to the main screen and become visible to participants once the broadcast is live.
To bring a presenter on screen, click their video preview in the left bar. Use the same switch to place the presenter in the main screen.
Note: Participants hear all organizers and presenters, even when they are not on screen. Turn off your microphone when you are not speaking.
-
Step 12
The Town Hall uses a moderated Q&A. All questions appear in the Q&A panel, visible only to organizers and presenters. You decide which questions become visible to participants. Once you publish a question, it appears for everyone. Hidden or unpublished questions remain visible only to the organizing team. Answers are only shown once you publish them.
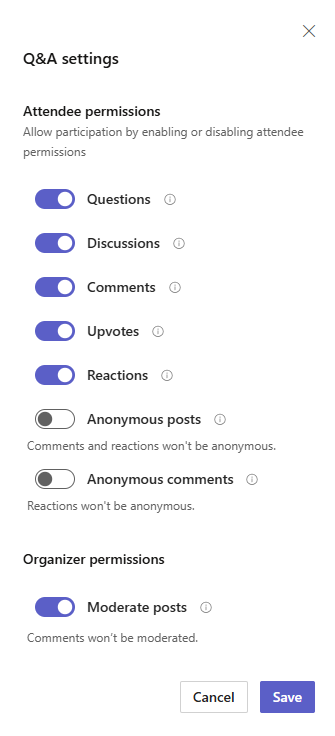
To manage Q&A settings, click Q&A at the top, then the gear icon. Here you can configure what attendees can contribute.
When moderation is enabled, all audience questions must be approved before they become visible. When moderation is disabled, all questions and responses appear automatically.
-
Step 13
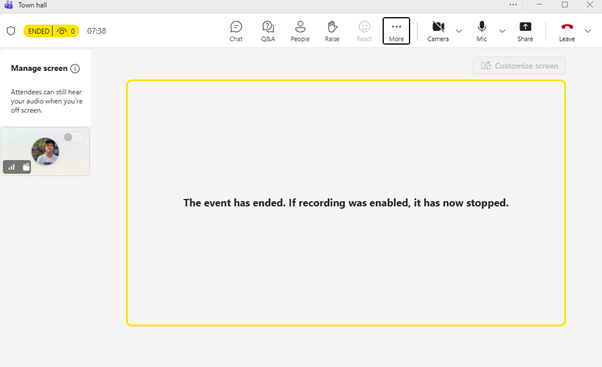
When the Town Hall has ended, you as the organizer return to the event overview. In this screen, you can find the recording as soon as Teams has finished processing it. The transcript of the session is available under the Recordings and Transcripts tab.
The Town Hall itself remains accessible to organizers. You can reopen the event at any time to review settings, manage the recording, or add or share additional materials.
-
Step 14
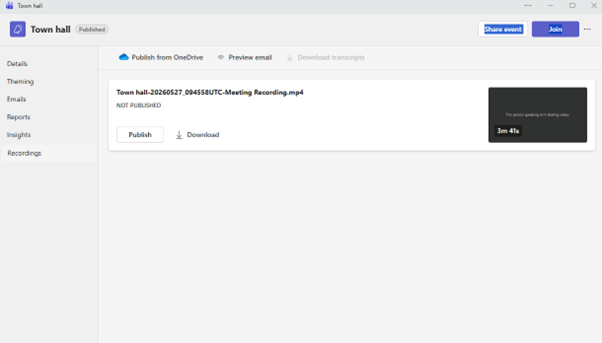
When you open the Town Hall in your calendar afterward and go to the Details tab, you will see the Manage event button. Here you can find all available recordings and transcripts.
In this screen you can:
- View recordings — once processed, they appear in the list
- Download recordings — save the video locally
- Publish recordings — make them visible to all participants
At the top, you can download the transcript. You can then share it via email, a Teams channel, or a shared organizational folder.
Last modified: 28/05/2026