
Teams: give a workshop
If you have not used Microsoft before, read this manual to see how to download and use the application. You will need a Microsoft account.
Microsoft Teams offers a easy, interactive experience that works best with the Teams app. We recommend that you download the desktop app if you don’t already have it installed, because not all browsers support the web version. When you participate in this event, your name, email address and/or phone number will be visible in the session participation list. By participating in this event, you agree to this.
-
Step 1
Sound and camera
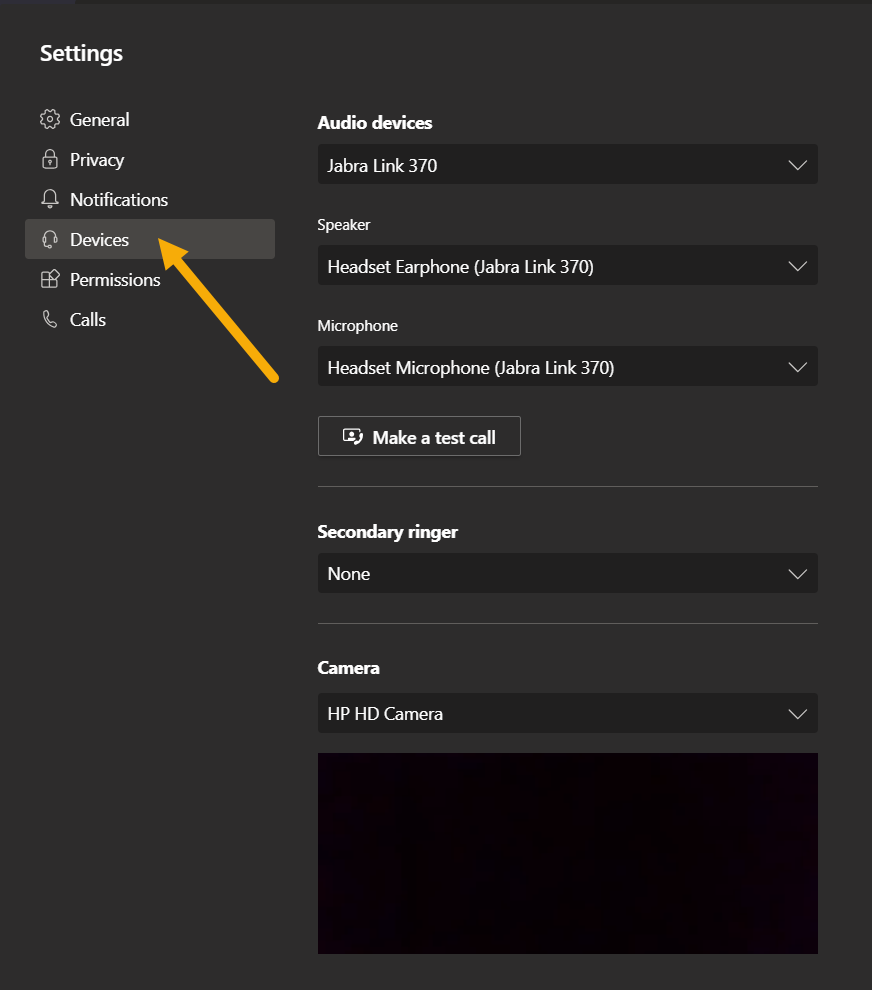
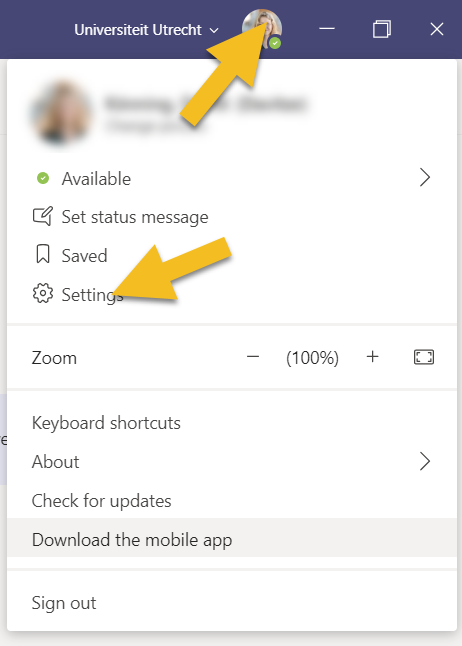
Click on your own profile picture in the top right corner and then choose ‘settings’. Then click on ‘Devices’ to change the webcam and/or microphone settings if necessary.
When using Teams during an event it works best if everyone uses a webcam and a ‘headset’. A headset is a headphone with a microphone or earbuds, and using them will prevent echos in the sounds when someone else in the meering is speaking.
-
Step 2
Switch on ‘New meeting experience’
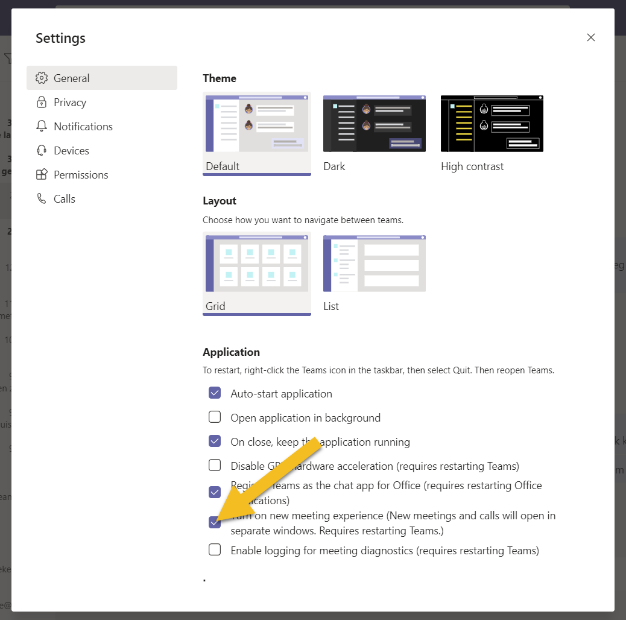
To ensure you can see all the participants in the meeting at the same time, we recommend you switch on the ‘New meeting experience’ setting.
You can do this by clicking on your own profile picture in the top right corner and then choose ‘settings’.
-
Step 3
In ‘Settings’ you then select ‘Turn on new meeting experience’. In order to make sure the settings take effect properly you will need to close the application and start it up again. You can close the app by right clicking the Teams icon in the taskbar and then clicking ‘Quit’.
Then click the icon again or open Teams via the start menu, the new meeting experience will be active. You will now be able to see everyone in a meeting at once by clicking the three dots in the top right corner and selecting ‘Large gallery’.
-
Step 4
Your workshop ‘space’
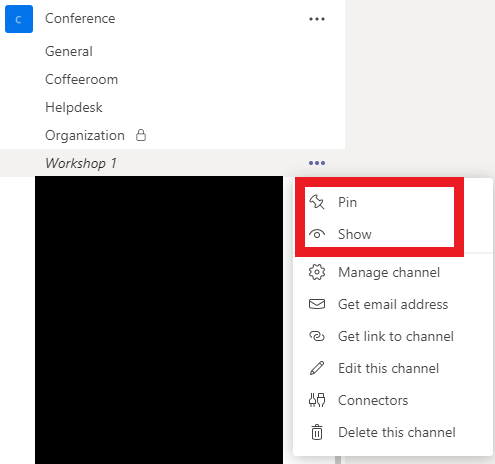
For every workshop a channel has been set up in the Teams environment. Click the arrow to ‘hidden channels’ if you do not see it straight away and find the title of your workshop.
Click the title of your channel to open it. Then go to the three dots ‘…’ next to the title and then click on ‘Pin’ and ‘Show’. This will ensure the channel will be always visible to you when you are in the Teams environment.
-
Step 5
If you want you can set up the workshop space further before it starts. You can share files for example at the tab ‘Files’ and place a welcome message by starting a new conversation.
-

Step 6
Depending on the organisation of the conference/workshop you will see a meeting planned here for the time of the workshop. If not, you can do this yourself by clicking on ‘Meet’ in the top right corner and then choosing ‘Schedule a meeting’.
-

Do you want to use break-out rooms during your workshop to divide the group of participants in smaller groups? Read more about how to set this up here: Breakout rooms work-around Teams EN.
-
Step 7
The Workshop
The participant will receive a link to the channel of their workshop before it starts. In this channel they can then click ‘Join’ to start the meeting.
-
Step 8
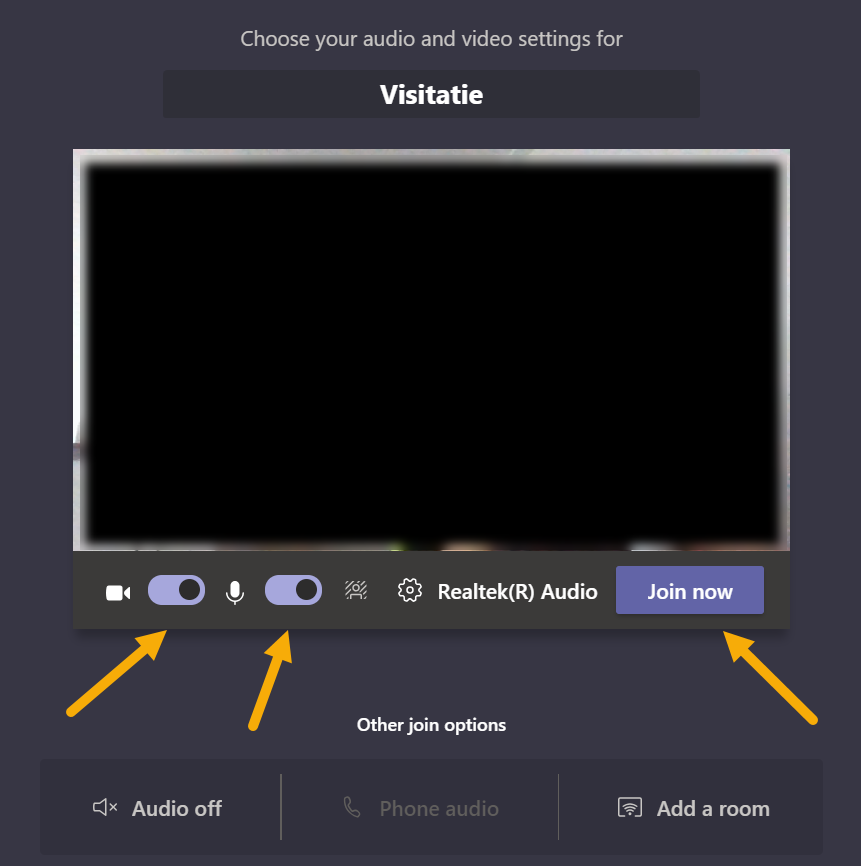
During the meeting you have various options as workshop host. First click ‘Join’:
- A window will open (see image). If necessary you can change the device settings here. Make sure that your camera and microphone are on by checking the sliders next to the respective icons.
- Click ‘Join now’to start the meeting.
-

Step 9
Once you’ve clicked ‘Join now’, you will these buttons in the top right of the window (see image).
From left to right on the image you see:
- The participants of the event
- Here you can send messages to people in the meeting
- This hand icon can be used to virtually raise your hand and indicate you want to say something. You will see a border around the video to indicate who wants to speak.
- The ‘…’ offers more option. These are some of the more relevant:
– ‘Large gallery’. By selecting this you can see everyone at once.
– ‘Apply background effects’. You can change your background settings here, blur your background for example.
-‘Start recording’. You can record the meeting if you prefer.
- This will turn your camera on and off. If there is a line through the icon the camera is turned off.
- This will turn your microphone on or off. If there is a line through it, the microphone is off.
- Here you can share your screen, more information about this option can be found in the next step.
- With this button you will leave the meeting.
-
Step 10
There are four ways to share your screen with the participants:
1. You can share your full screen via the ‘Desktop’ option. Here you show everything that happens on your screen to the participants. This is useful if you want to share information from different applications. It is recommended to close all windows you don’t want to show before you start your workshop.
2. You can share a specific open application or page via the ‘Window’ option. You choose the window you want to share. Only that window will be visible to the participants. If you do something somewhere else on your computer, the participants will not see it.
3. You can share a powerpoint file using the ‘Powerpoint’ option. You can drag in a document here or search for it via ‘Browse’. Via ‘Browse’ any other documents can also be shared. Note: Participants can take over the presentation. If a button ‘Take control’ appears, a participant can control the presentation.
4. You can share a whiteboard via the ‘Whiteboard’ option, for example to draw or write. In addition, you can also use the Whiteboard to brainstorm with other participants. In this manual you will find more information about Whiteboard: Whiteboard: installation and FAQ
-

Step 11
Share files
In the Teams channel you will find a tab ‘Posts’, here you can exchange messages with the other participants.
You will also find a tab ‘Files’, here you can find the files that are shared in the channel or prepared by the person organizing the workshop.
-

Step 12
You can also collaborate in documents. When working in documents that are public this is visible to everyone. Multiple people can work together in one document. There is a chat function in Word so that it is easy to consult during editing.
It is possible to work in the desktop app (Word) when it is installed on the computer. It can be opened from Teams by clicking on the three dots in the top right corner. Changes made in the desktop app will also appear in Teams.
-
Step 13
General tips
- Use the ‘…’ to select ‘Large gallery’. By selecting this you can see all participants at the same time.
- Turn off your microphone when you are not speaking to avoid unnecessary background noise.
- If you want you can change the size of the view of the speaker. Go to the participants list (left most button at the top of your screen) and click on the ‘…’ next to the participant you want to view in particular and select ‘Spotlight’. Every participant will now see this person larger than the other participants.
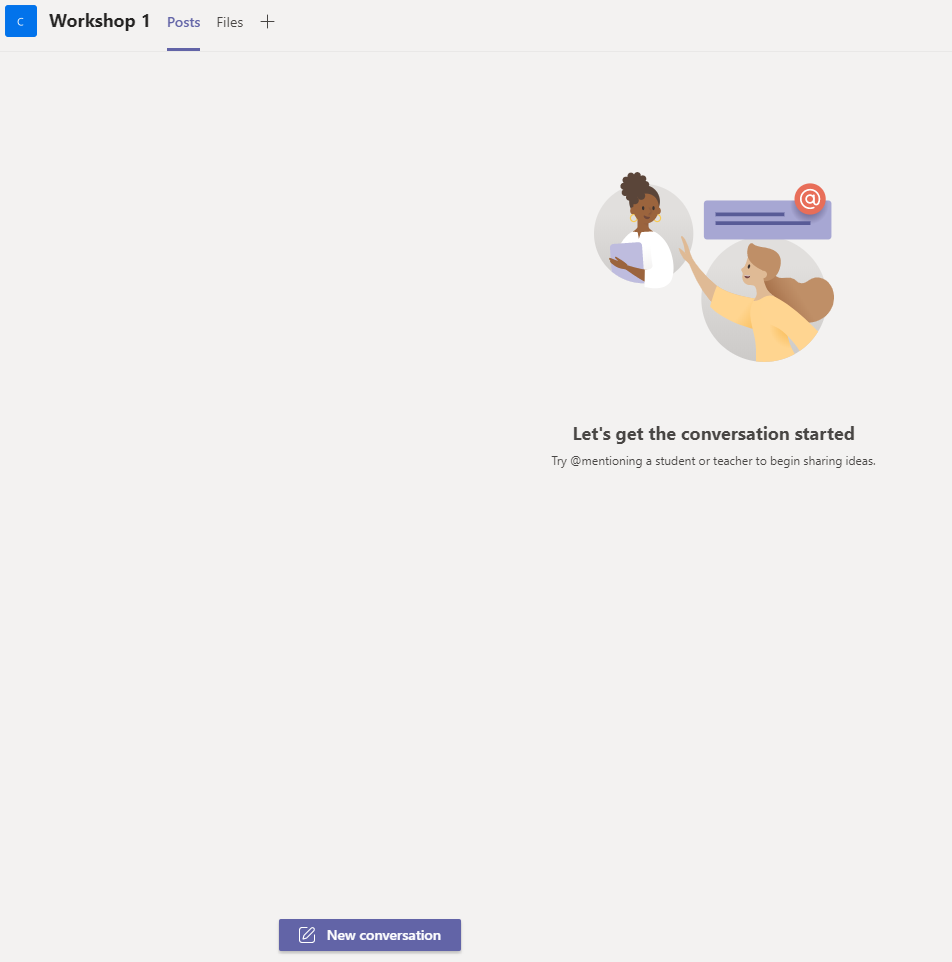
- You can also use the chat option to have a chat with each other (see image).
Last modified: 24/01/2023