
Laptop UU: Standard setup
The standard setup of a UU Windows laptop (Solis-laptop) is:
- Windows 11 as operating system
- Microsoft 365 (Office) with all associated applications
- The Software Center that contains a large selection of software
- Cisco Secure Client to connect to VPN
- A number of security settings
New UU laptops will be setup this way by default.
It is also important to know that all your Office files will be saved in this folder by default: “C:\Users\[Solis-id]\Documents”. [Solis-id] here will be your own Solis-id.
You are free to choose another location to save your files, locally or in the Cloud. We recommend the use of OneDrive to store and synchronize your files.
The default setup and first use
Before you can use your laptop at home, you need to log in once on your laptop while it is connected to the UU network via a network cable on campus, or the Utrecht University WiFi network (eduroam will not work).
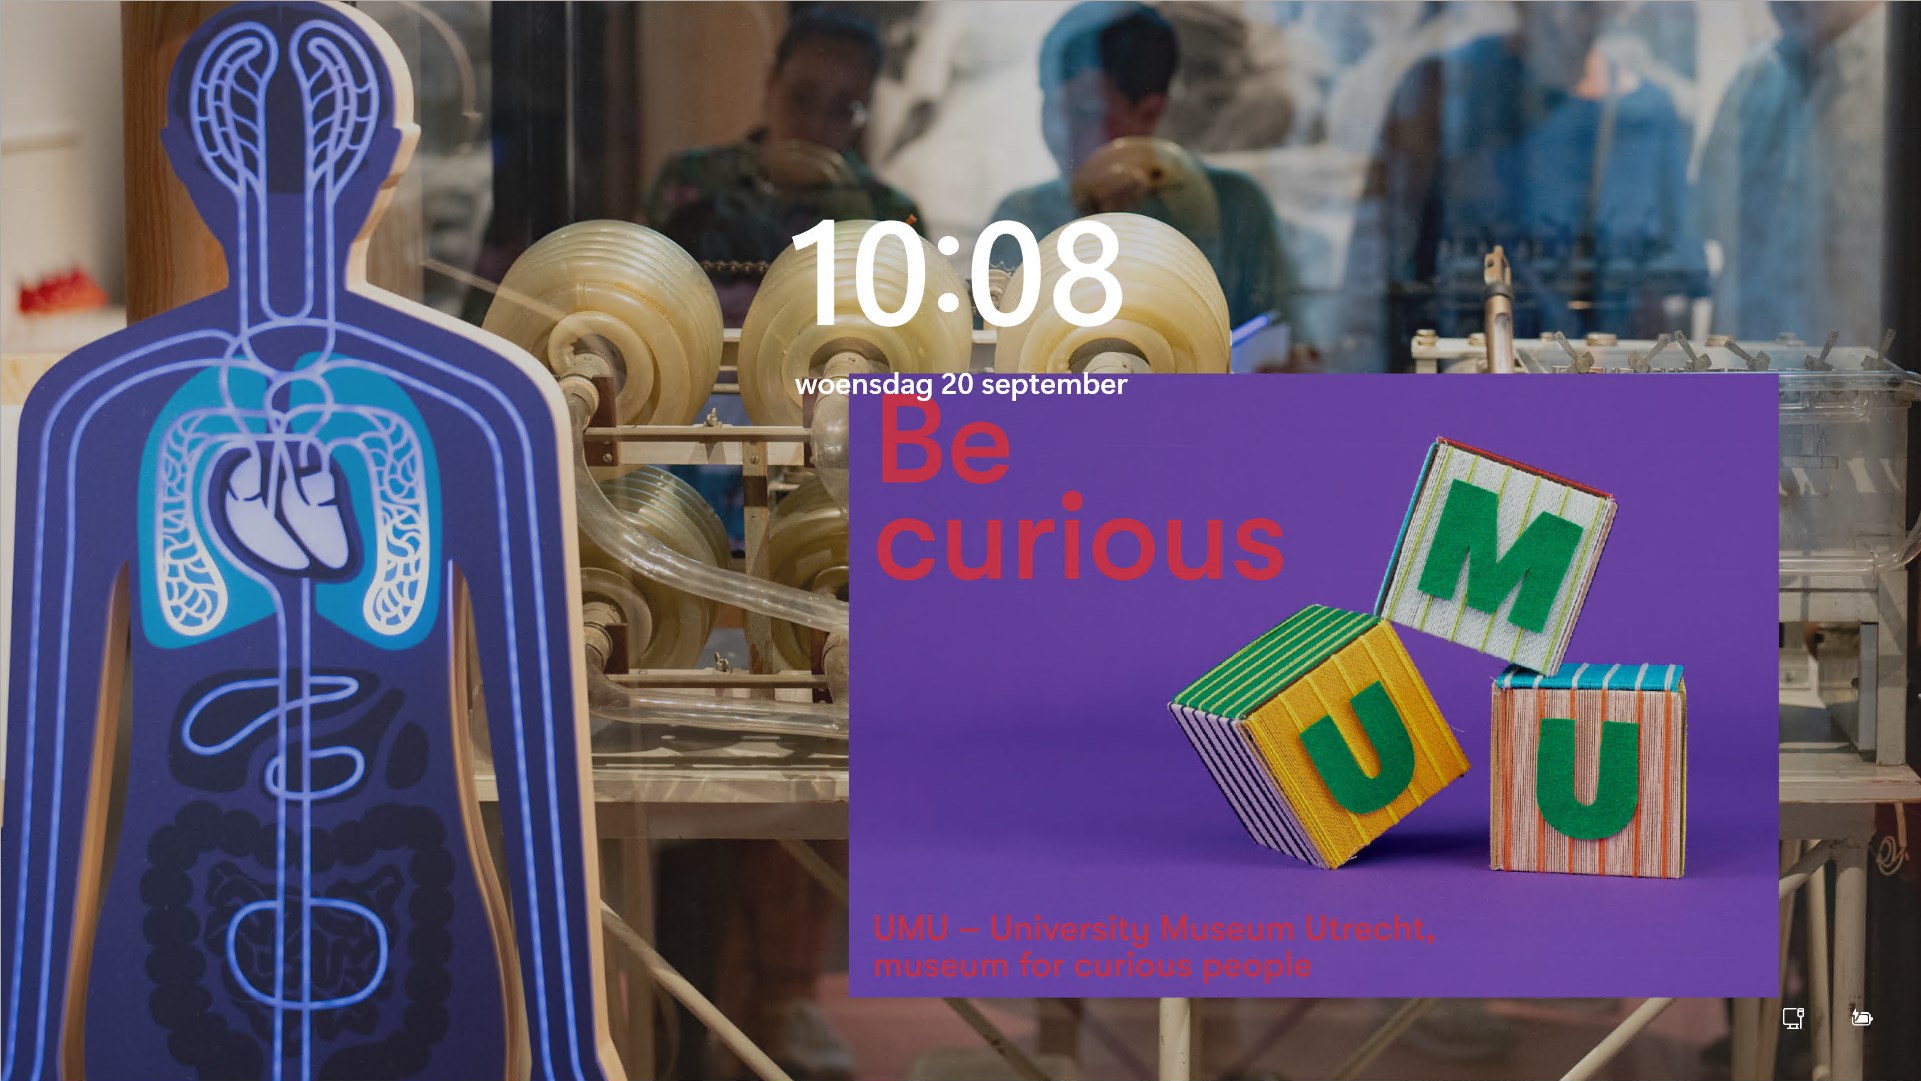
When you start the laptop for the first time, you will see the screen below. The background image may vary (incidentally, you can change this yourself once you have logged in).
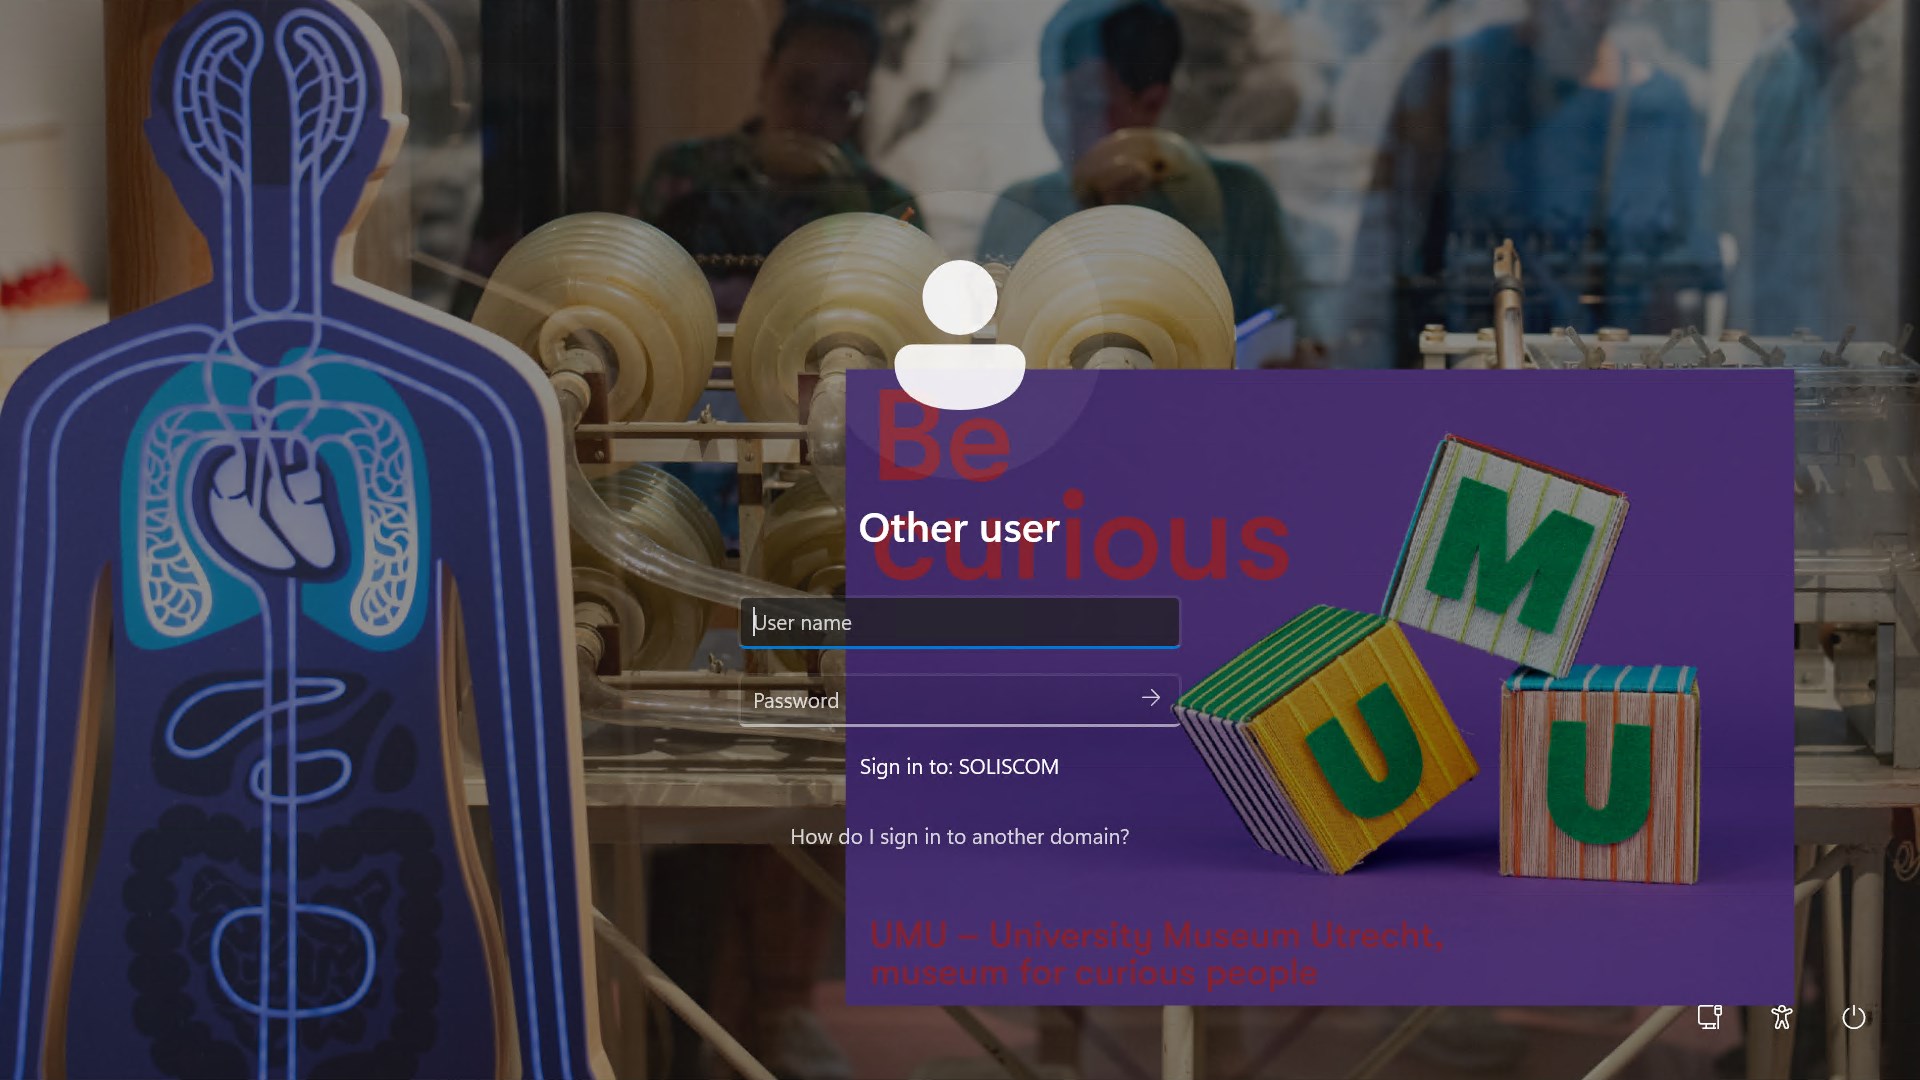
Press a key on the keyboard, or click anywhere on the screen. You will see the login screen below. Here you can log in with your Solis ID and corresponding password (set at uu.co.uk/password). When you first log in with your account on this laptop, you must be connected to the UU network.
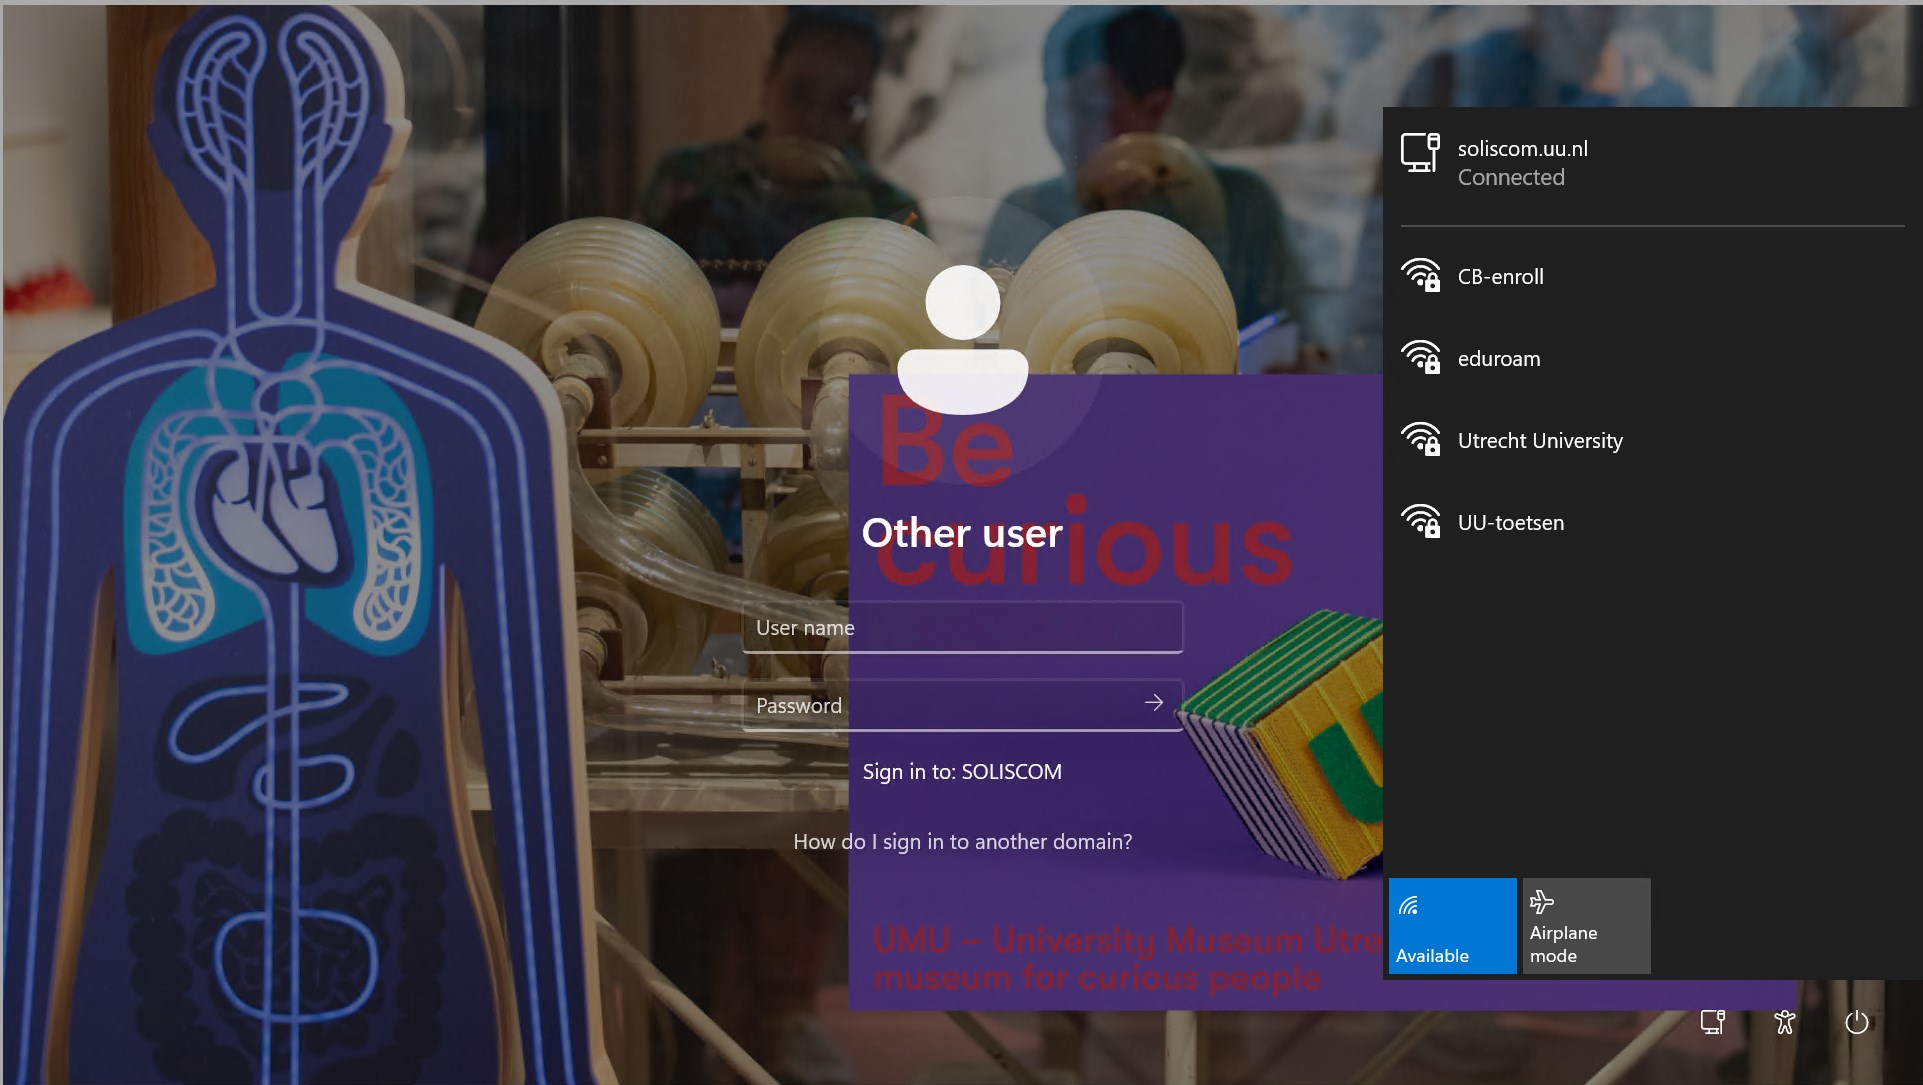
Connecting to the UU network is via a network cable on campus (This can be done directly or via a docking station connected to a network cable) or with the Utrecht University WiFi network.
If no network cable can be used, you can also log in the first time by connecting to the Utrecht University WiFi network. Connecting to the Utrecht University WiFi network can already be done in the lock screen. You’ll see the WiFi icon in the bottom right corner (looks like a planet). Click on it and choose ‘Utrecht University’. Connect with your UU e-mail address and your Solis password.
When you are connected to Utrecht University, you can log in to the laptop with your Solis-ID and Solis-password.
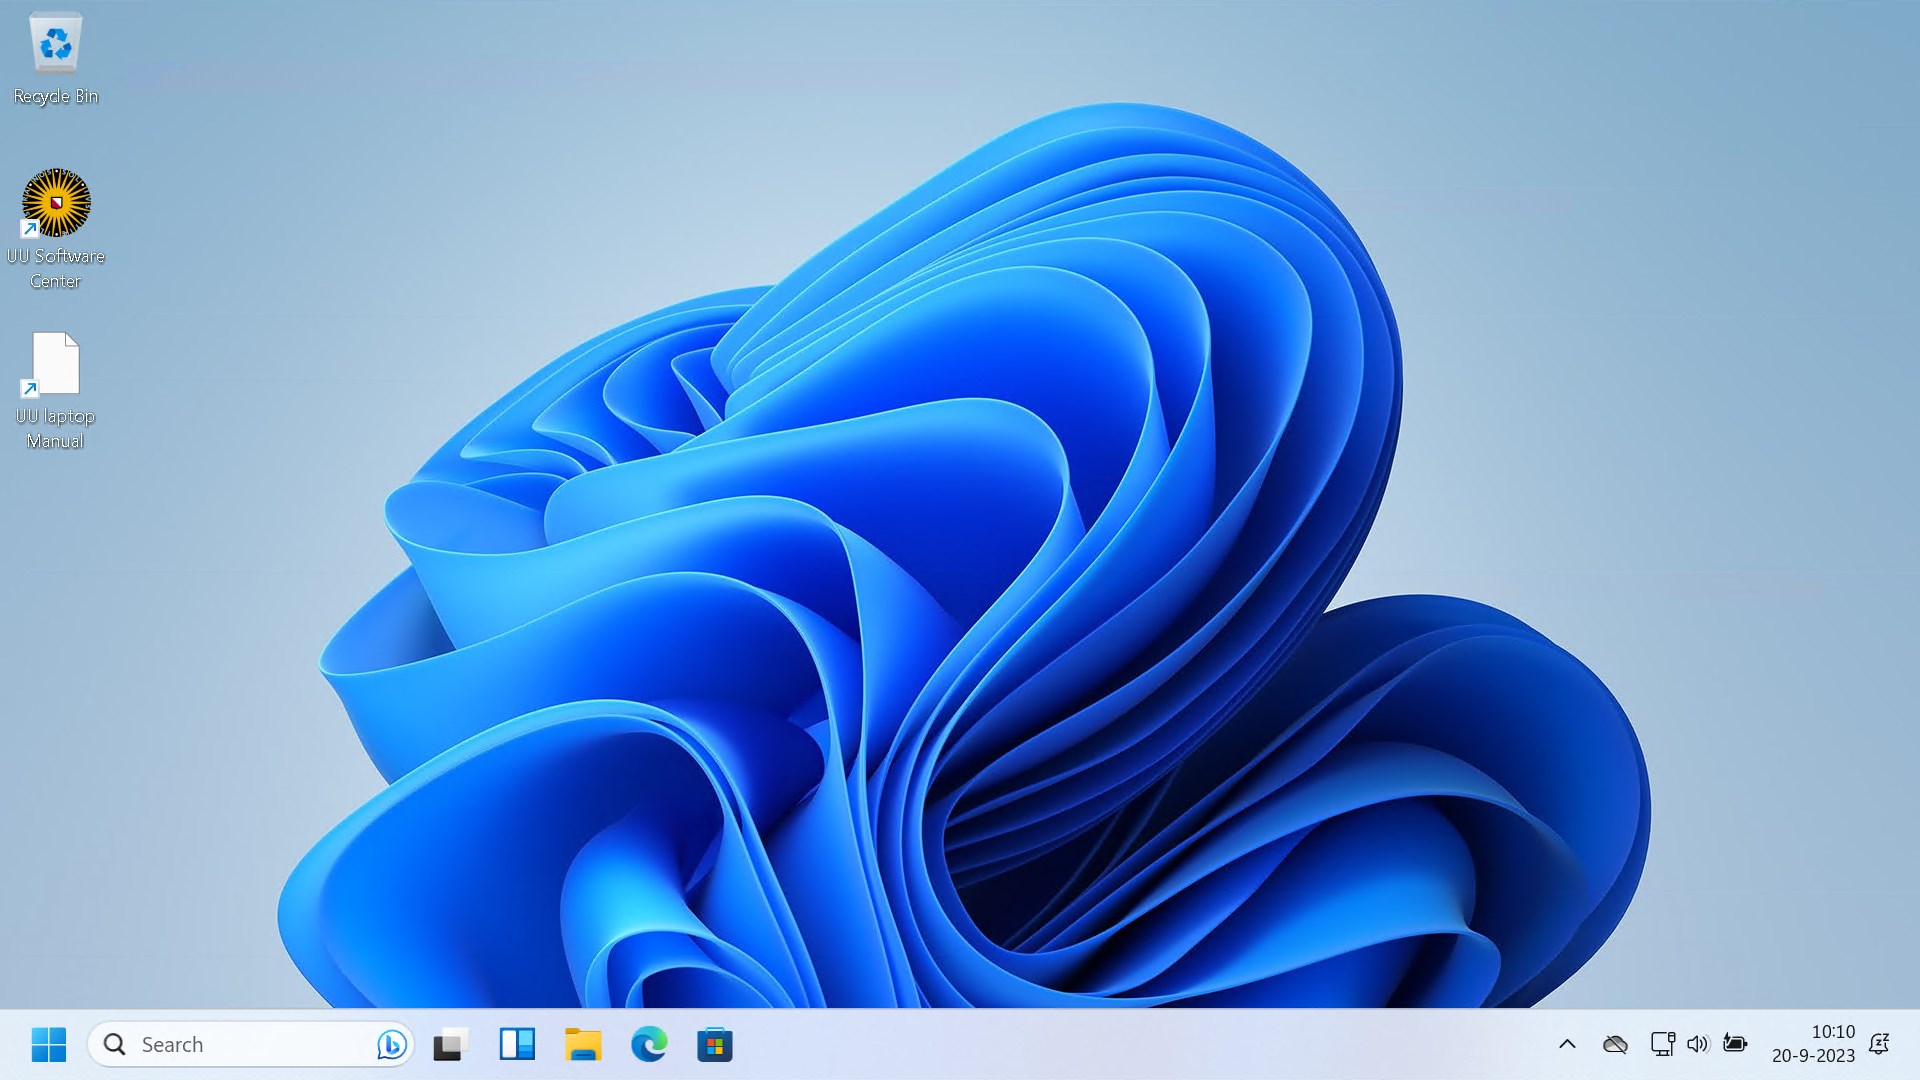
When you log in to your laptop for the first time, links to the Software Center application and this guide are on the desktop.
At the UU a lot of applications and websites are protected with two-factor-authentication (2FA) to ensure everyone can work safely with UU data. There are several methods you can use for 2FA, the recommended one is the app NetIQ.
You can find more general information about 2FA on the intranet: https://intranet.uu.nl/2fa. You can set up your 2FA via this website https://mysolisid.uu.nl and for the most asked question and help you can visit Two-factor authentication: FAQ.
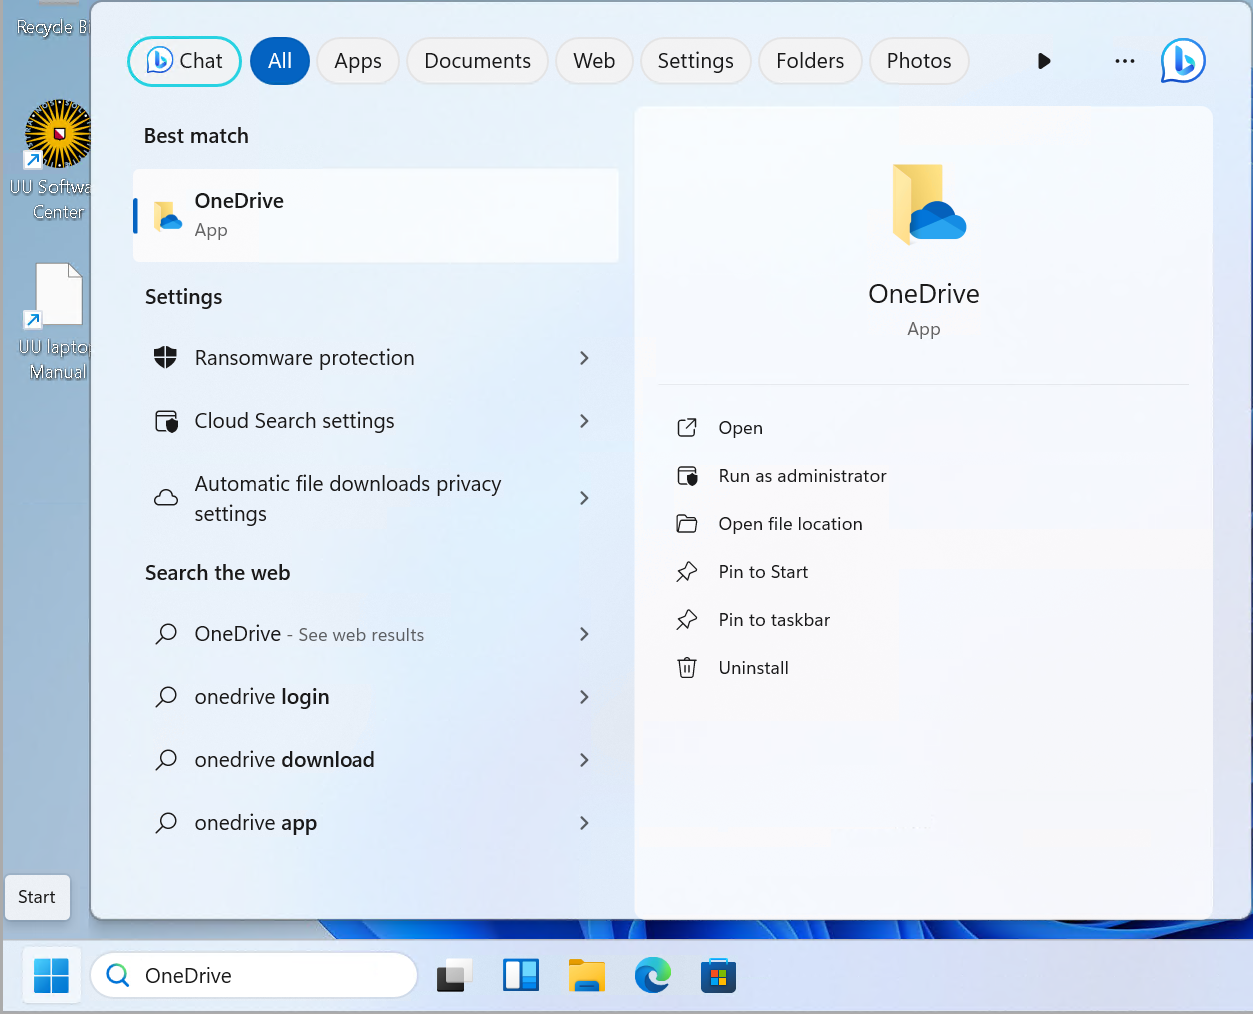
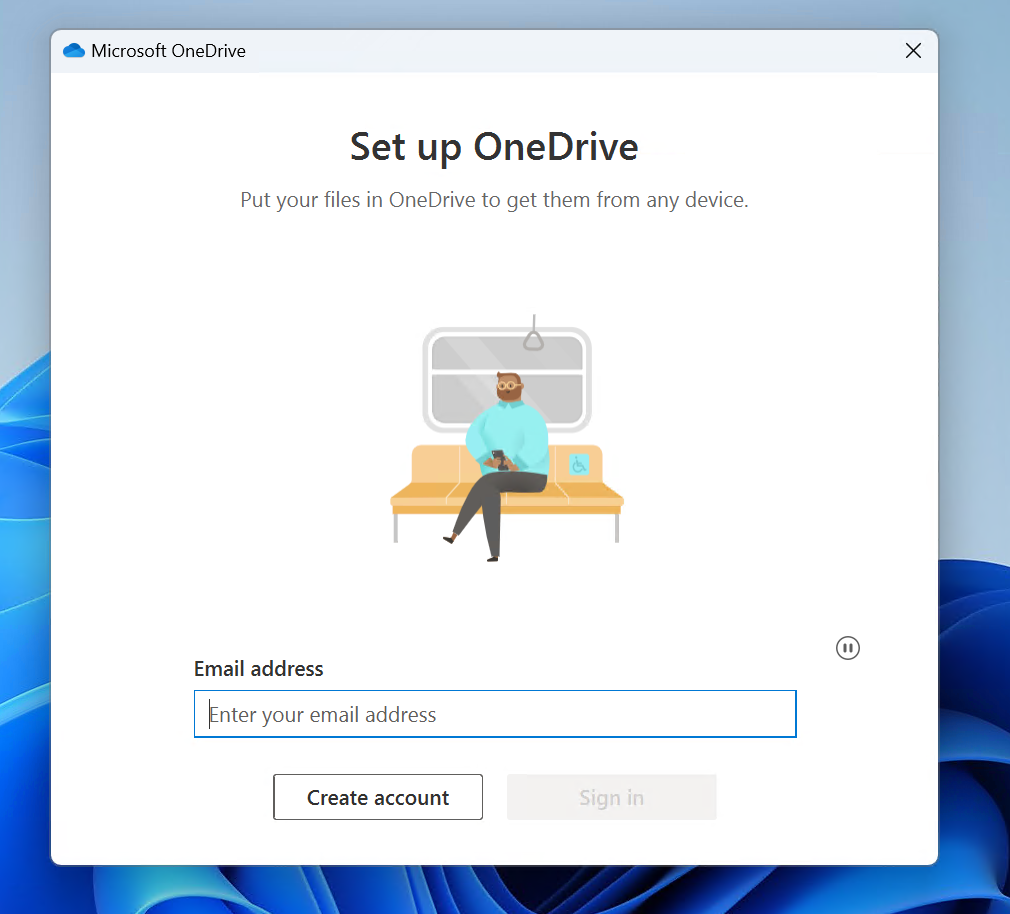
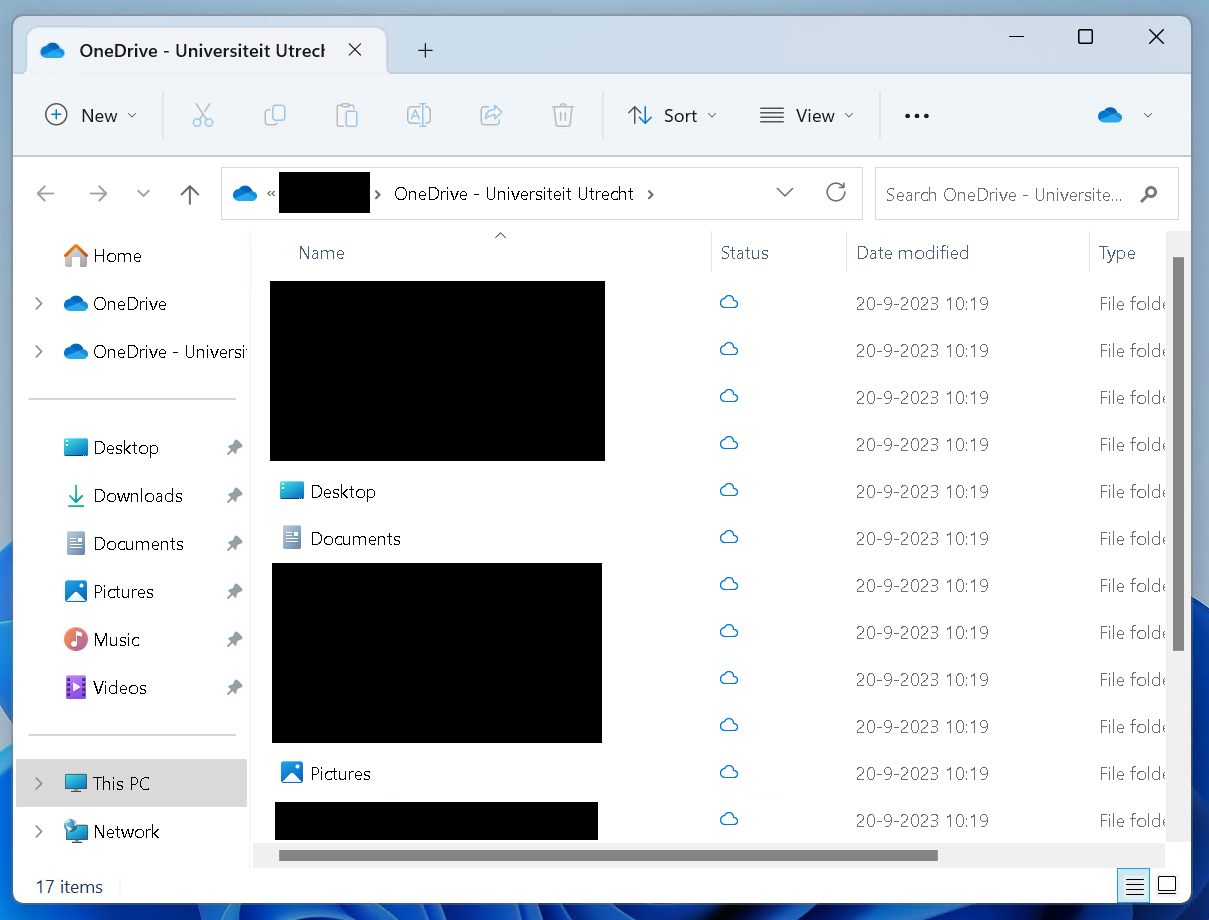
When you first log in to the laptop, it is advised to set up OneDrive right away. This can be done by following these steps:
- Find ‘OneDrive’ in the start menu (the search bar in the bottom left) and open it;
- You’ll get the OneDrive login screen. Log in using your university email address;
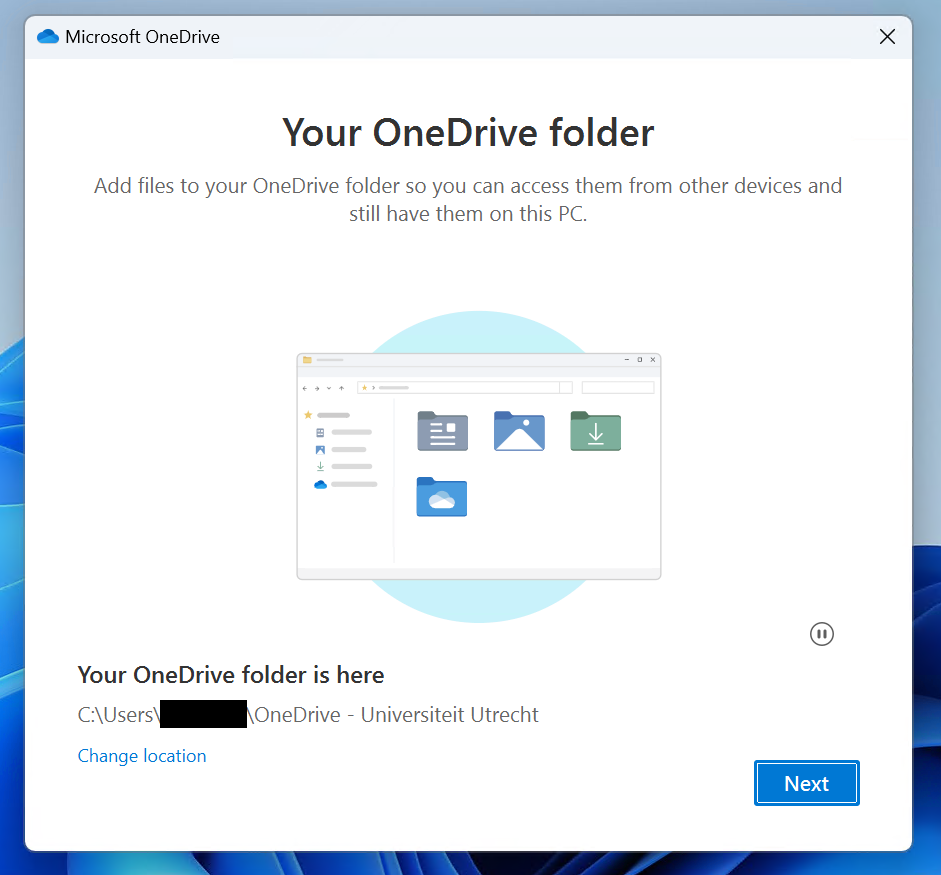
- Press Next several times, then Later, and then Open OneDrive folder. You will now see your OneDrive folder.
See also: this manual.
When you work or study at the University, you get a personal e-mail address from the UU. This is called your Solis-mail. The steps needed to set up your Solis-mail can be found here.
A number of Microsoft 365 (Office) applications are installed on your UU laptop by default, for example Outlook and Word. You need to log in with your UU credentials the first time you open these. In addition, you can use all kinds of other Microsoft 365 applications in a browser or install them yourself on your laptop. You can read how to do this here.
You can also install all kinds of other free applications via the Software Center on your laptop. To install applications on your UU laptop, follow the steps here. If a desired application is not (yet) in available from the Software Center, you can request it from this intranet page.
FAQ
Have you only been connected to the UU https://manuals.uu.nl/wp-admin/post.php?post=15220&action=editnetwork via a network cable and do you want to use Utrecht University WiFi? Then make sure there is no network cable in your laptop and then follow the steps in this manual.
- From the start menu, search for “Language” (“Taal”), and open the system setting that pops up;
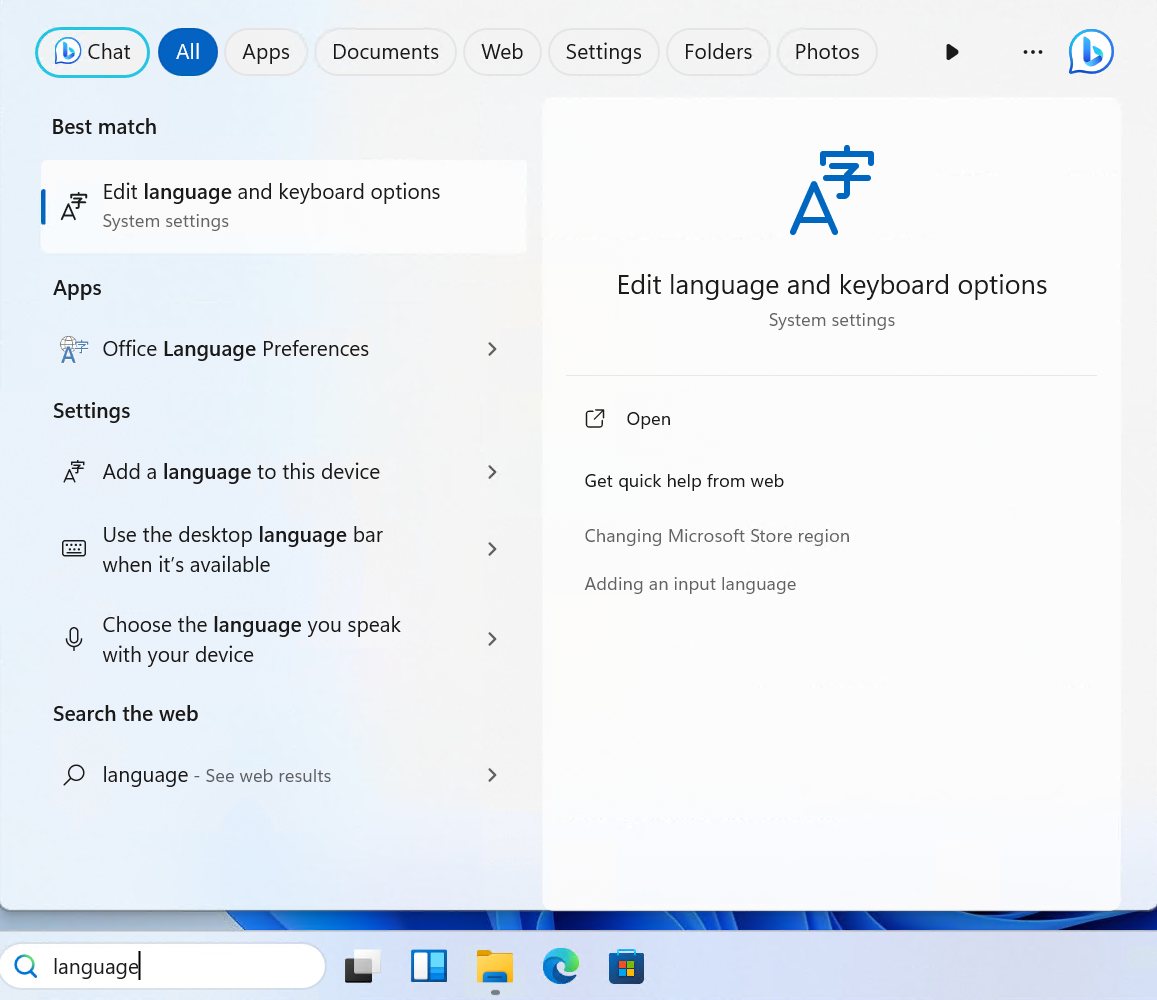
- You will see the language settings. Click on “Add a language” (“Een taal toevoegen”).;
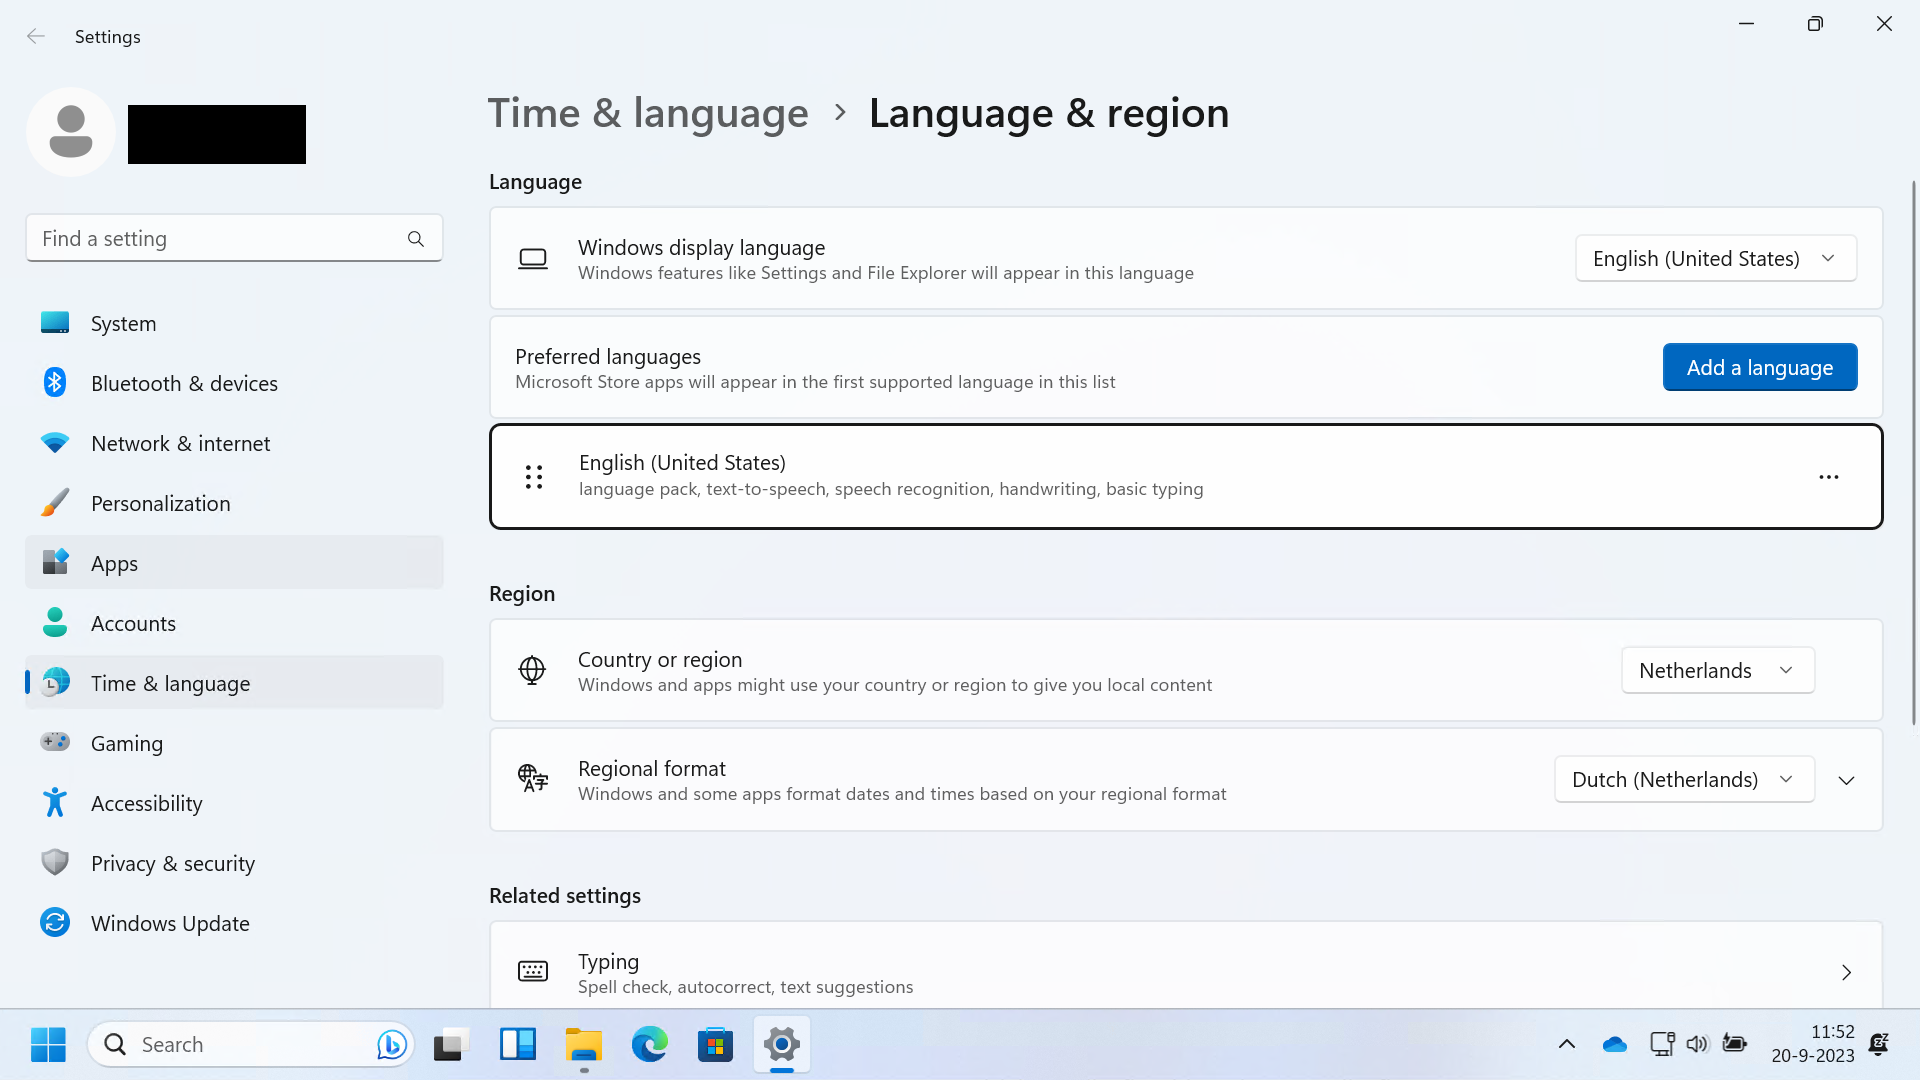
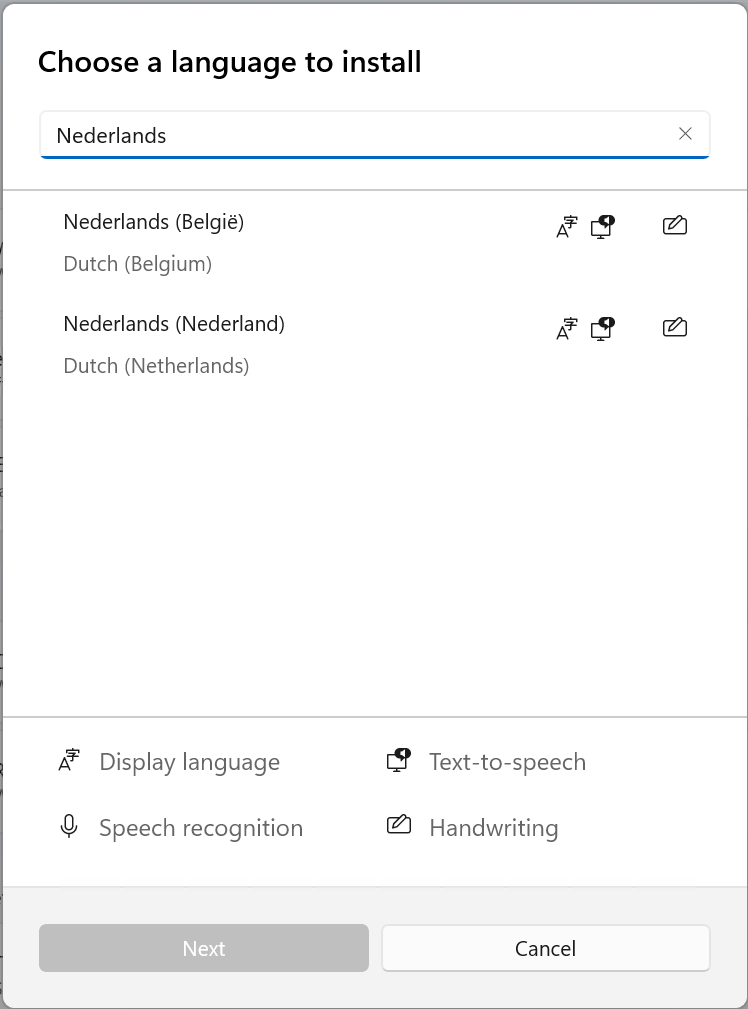
- Then find the language you want to add, select it, and click Next;
- If you want this language to become the default display language for your laptop, check “Set as my Windows display language” (“Als mijn Windows-weergavetaal instellen”), and press Install.
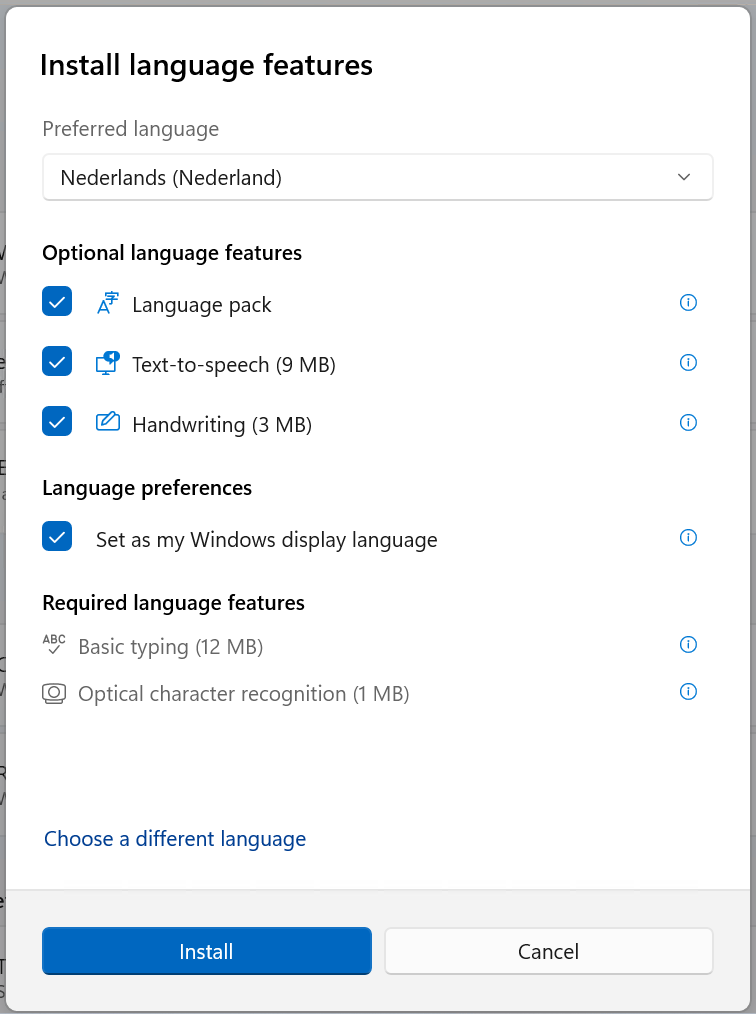
- Wait until the language is fully installed;

- Log out. The next time you log in, the display language will have changed.
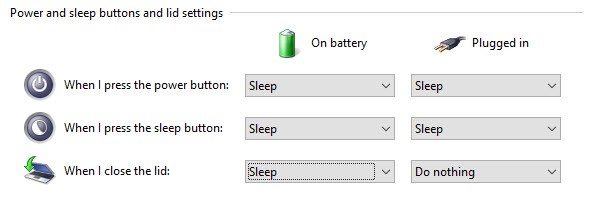
- From the start menu, search for “Lid”, and open “Change the action when closing the lid”;
- Change the “action when I close the lid” option to “do nothing”. Note that this needs to be set separately for when the laptop is connected to mains power and when it is on battery power.
- Press Save changes.
You’ll see this screen:
If you want to use multiple displays with your laptop or want the text to be displayed a bit larger (or smaller), it is often necessary to change some additional settings.
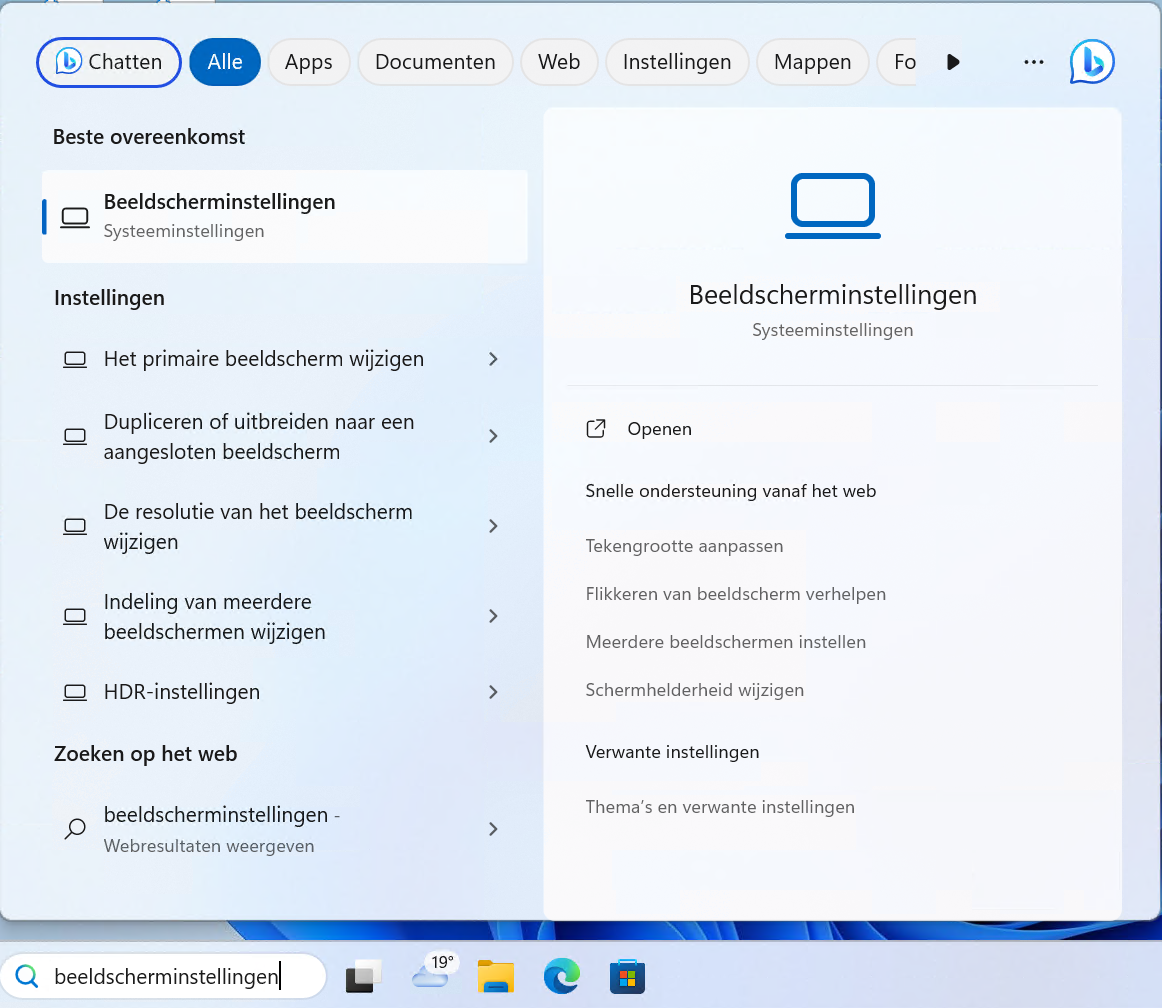
- Find “Display settings” in the search bar at the bottom left, and open it;
- You will see the following screen;
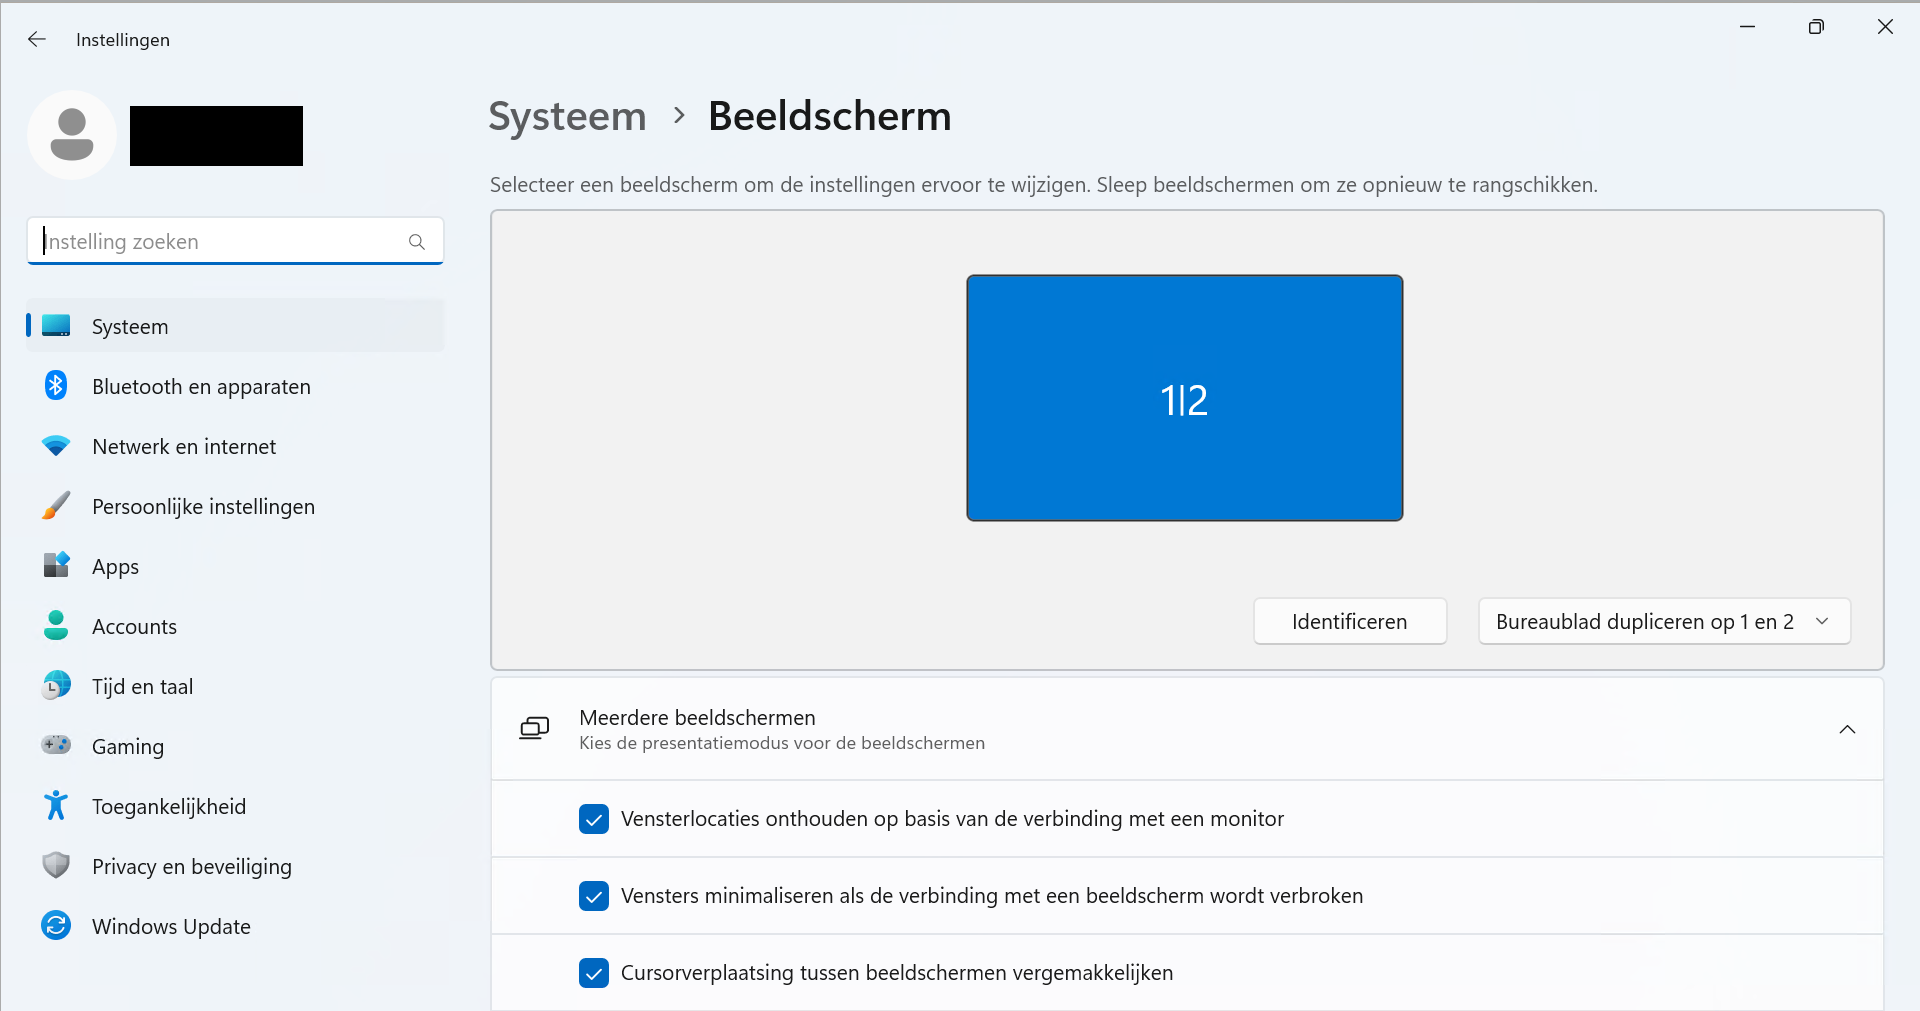
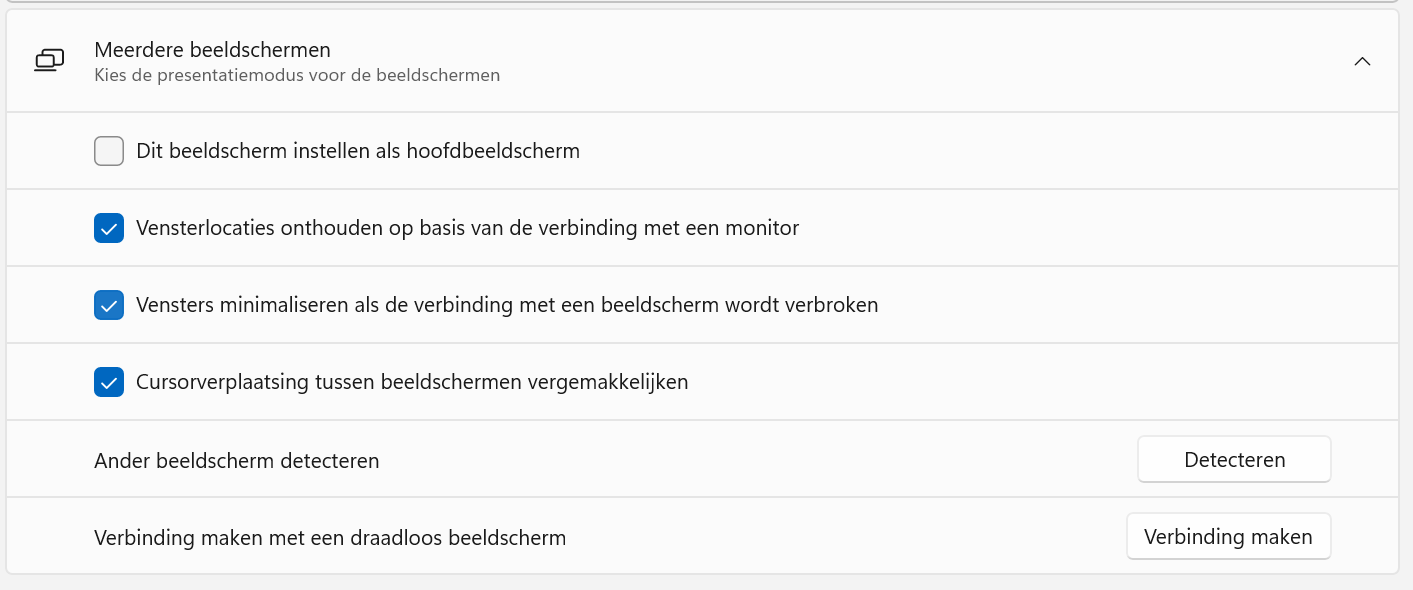
- There are two buttons in this window. The button on the right determines how the screens are set up. It is often recommended to choose to ‘expand’ the desktop. You can then use several applications at once on different screens.
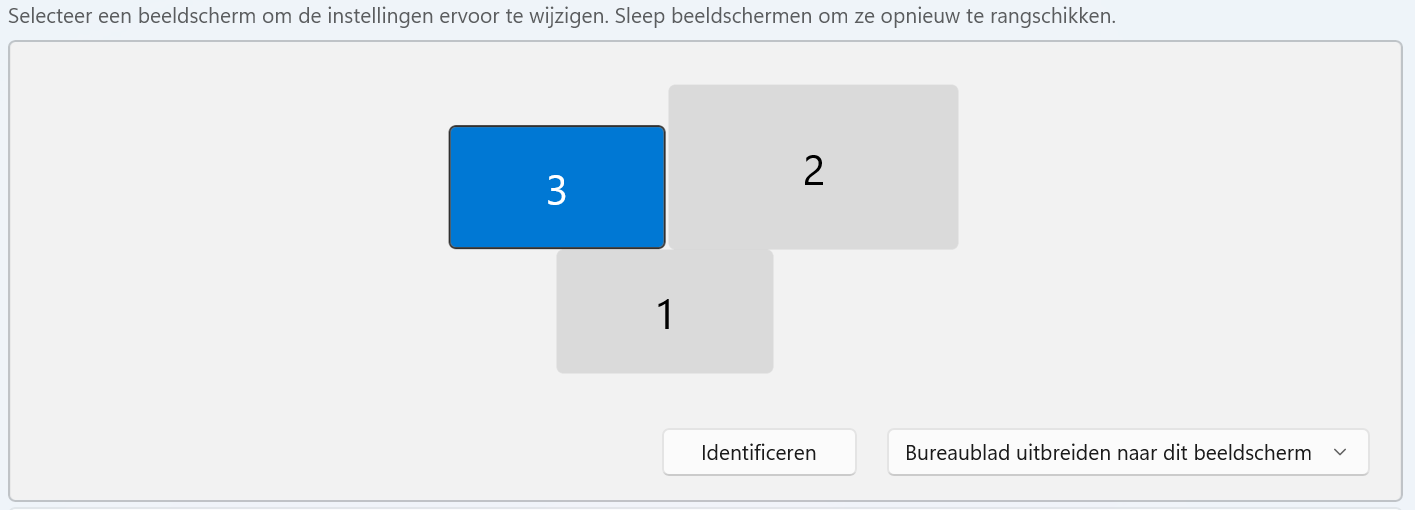
- Clicking Identify will show you a number on all screens. This allows you to identify which screen is where.
- The screens can be moved by dragging them in this window. It is recommended to set them up roughly the same as they are in real life. That way you can easily move the mouse between multiple screens.
- Under the heading Multiple monitors, you can find some additional settings for working with multiple monitors. For example, you can set which screen is seen as the main display by selecting the relevant screen at the top and then checking the box for “Set this screen as the main display”.
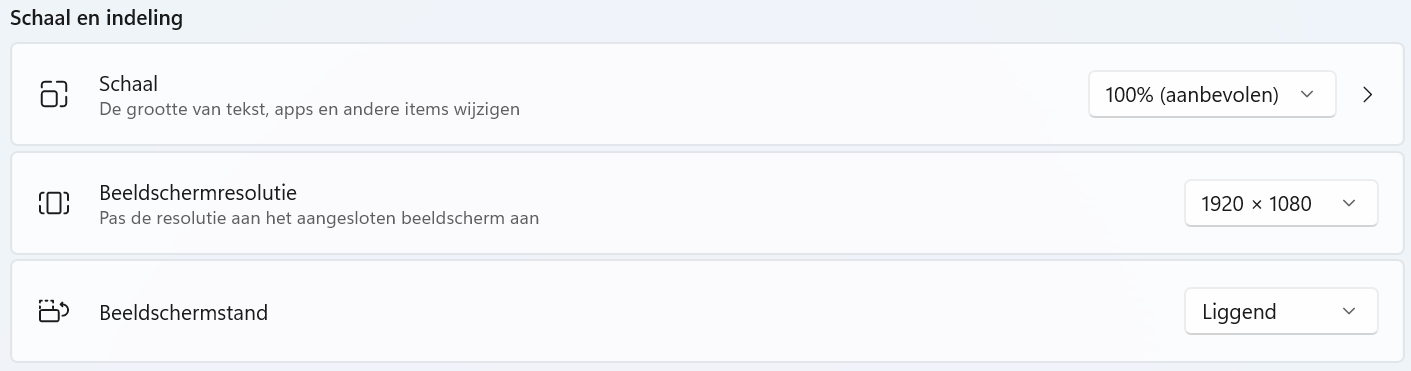
- At the bottom there is also a heading Scale and layout. It is always recommended to keep the screen resolution set to the recommended resolution, but the Scale can be adjusted to make text and icons a bit larger on the screen.
See the manual: Setting Up Multiple Displays (Windows) for a detailed step-by-step guide on setting up multiple displays on a workplace.
Last modified: 27/10/2025